Manage purchase orders
A purchase order (PO) is the document you send a supplier to order goods or materials. In Jobyo it holds the supplier, header details (currency, terms, expected date, ship-to), and a set of ordered lines — then moves through a lifecycle from draft to received, tracking how much of each line has been received and invoiced along the way.
Who uses this
Purchase orders are a back-office procurement surface for operations and admin roles. The list, detail, and create/edit forms sit under Purchase Orders in the app.
The feature is available on the Business plan and up. If purchase orders aren't on your plan, you'll see a locked panel instead of the list — upgrade under Subscriptions & plans.
What you'll need
- Permission to list and view purchase orders to browse them, and create or modify to raise or change them.
- A supplier to order from — required on every PO.
- For buying from a plan: permission to view projects as well, since the planned-requests queue reads project and task data.
- For recording receipts: the create goods receipts permission — a separate permission from purchase orders.
Prices and totals on a PO are actual committed spend, so they're only shown to users who have cost visibility (the actual costs: view permission). A project manager can see a PO's structure — lines, quantities, suppliers — with every amount blanked out. The currency code and all quantities are always shown.
Browse and search
Open the purchase order list
Select Purchase Orders from the main menu. Each row shows the PO number (or a dash if not yet issued), the supplier, a status badge, the total, and the expected delivery date.
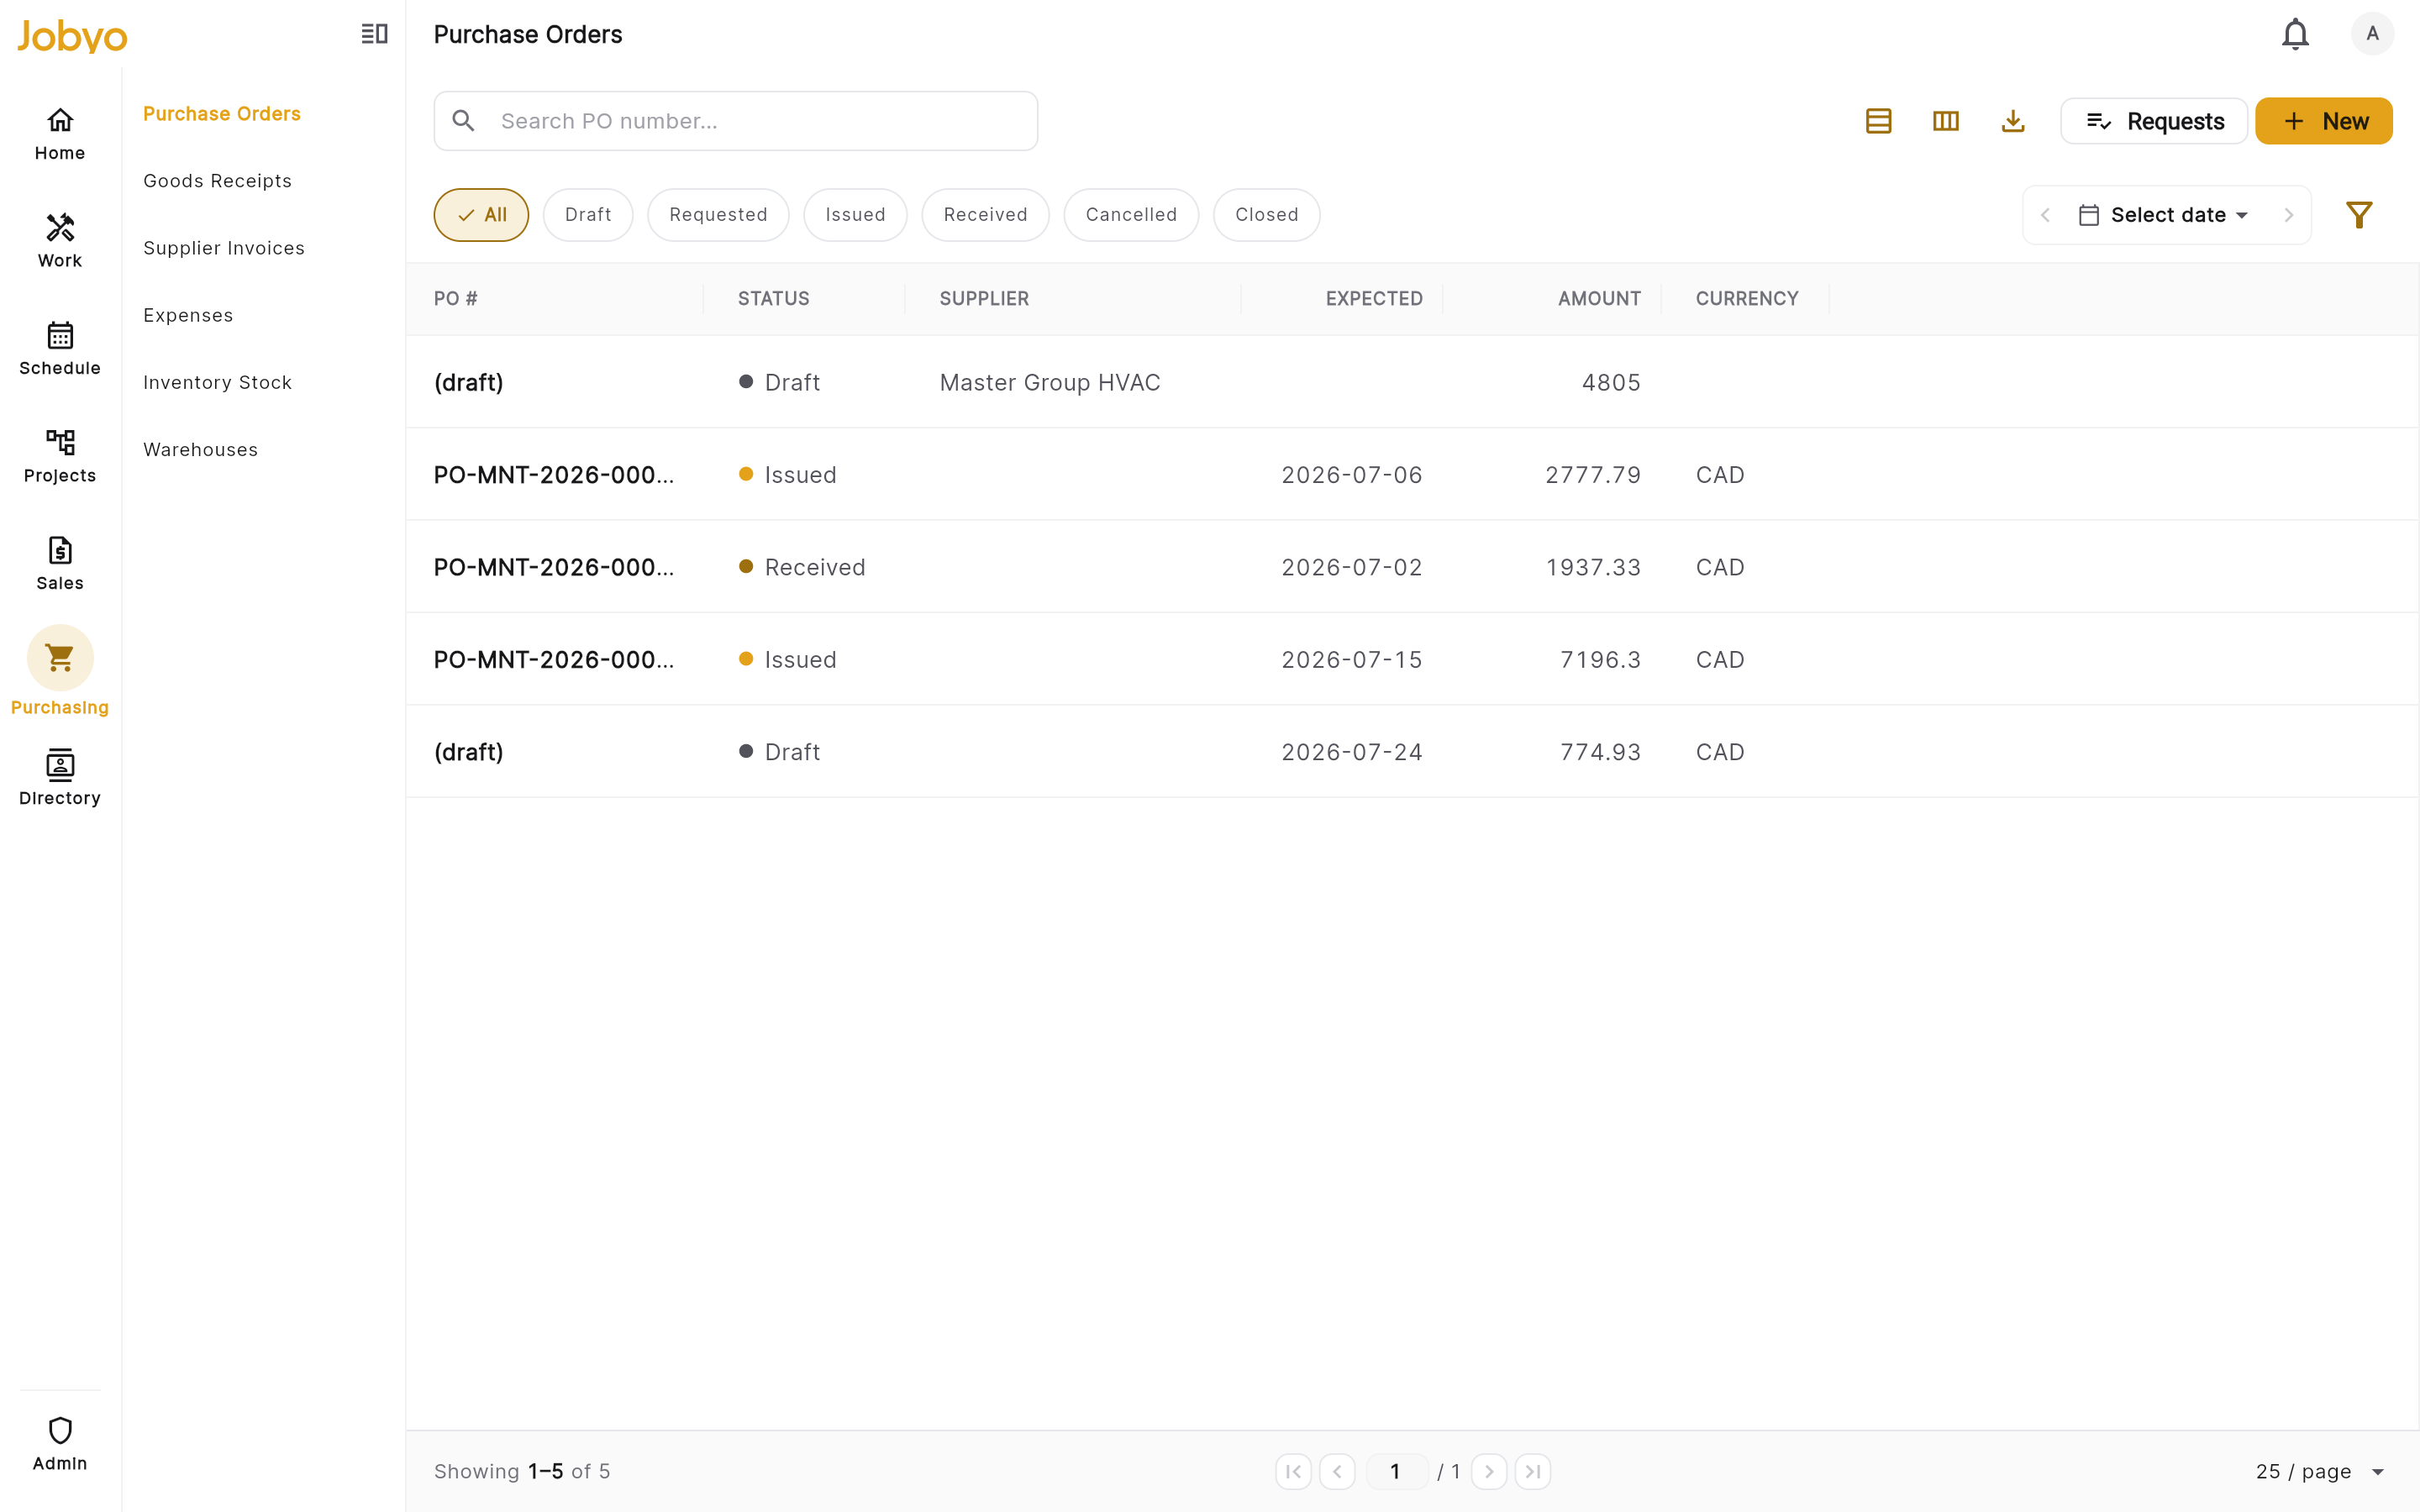
Purchase order list — status badges, supplier, totals, filters Filter to find a PO
Narrow the list by status (Draft · Requested · Issued · Received · Cancelled), supplier, linked project or work order, an expected-date range, or by typing part of a PO number. Results are paginated — page or scroll to load more.
Open a record
Click any row to open the PO detail in read-only View mode — supplier snapshot, header, line items, per-line fulfillment progress, totals, and who created, approved, and sent it. The action bar at the bottom shows the actions available for the PO's current status.
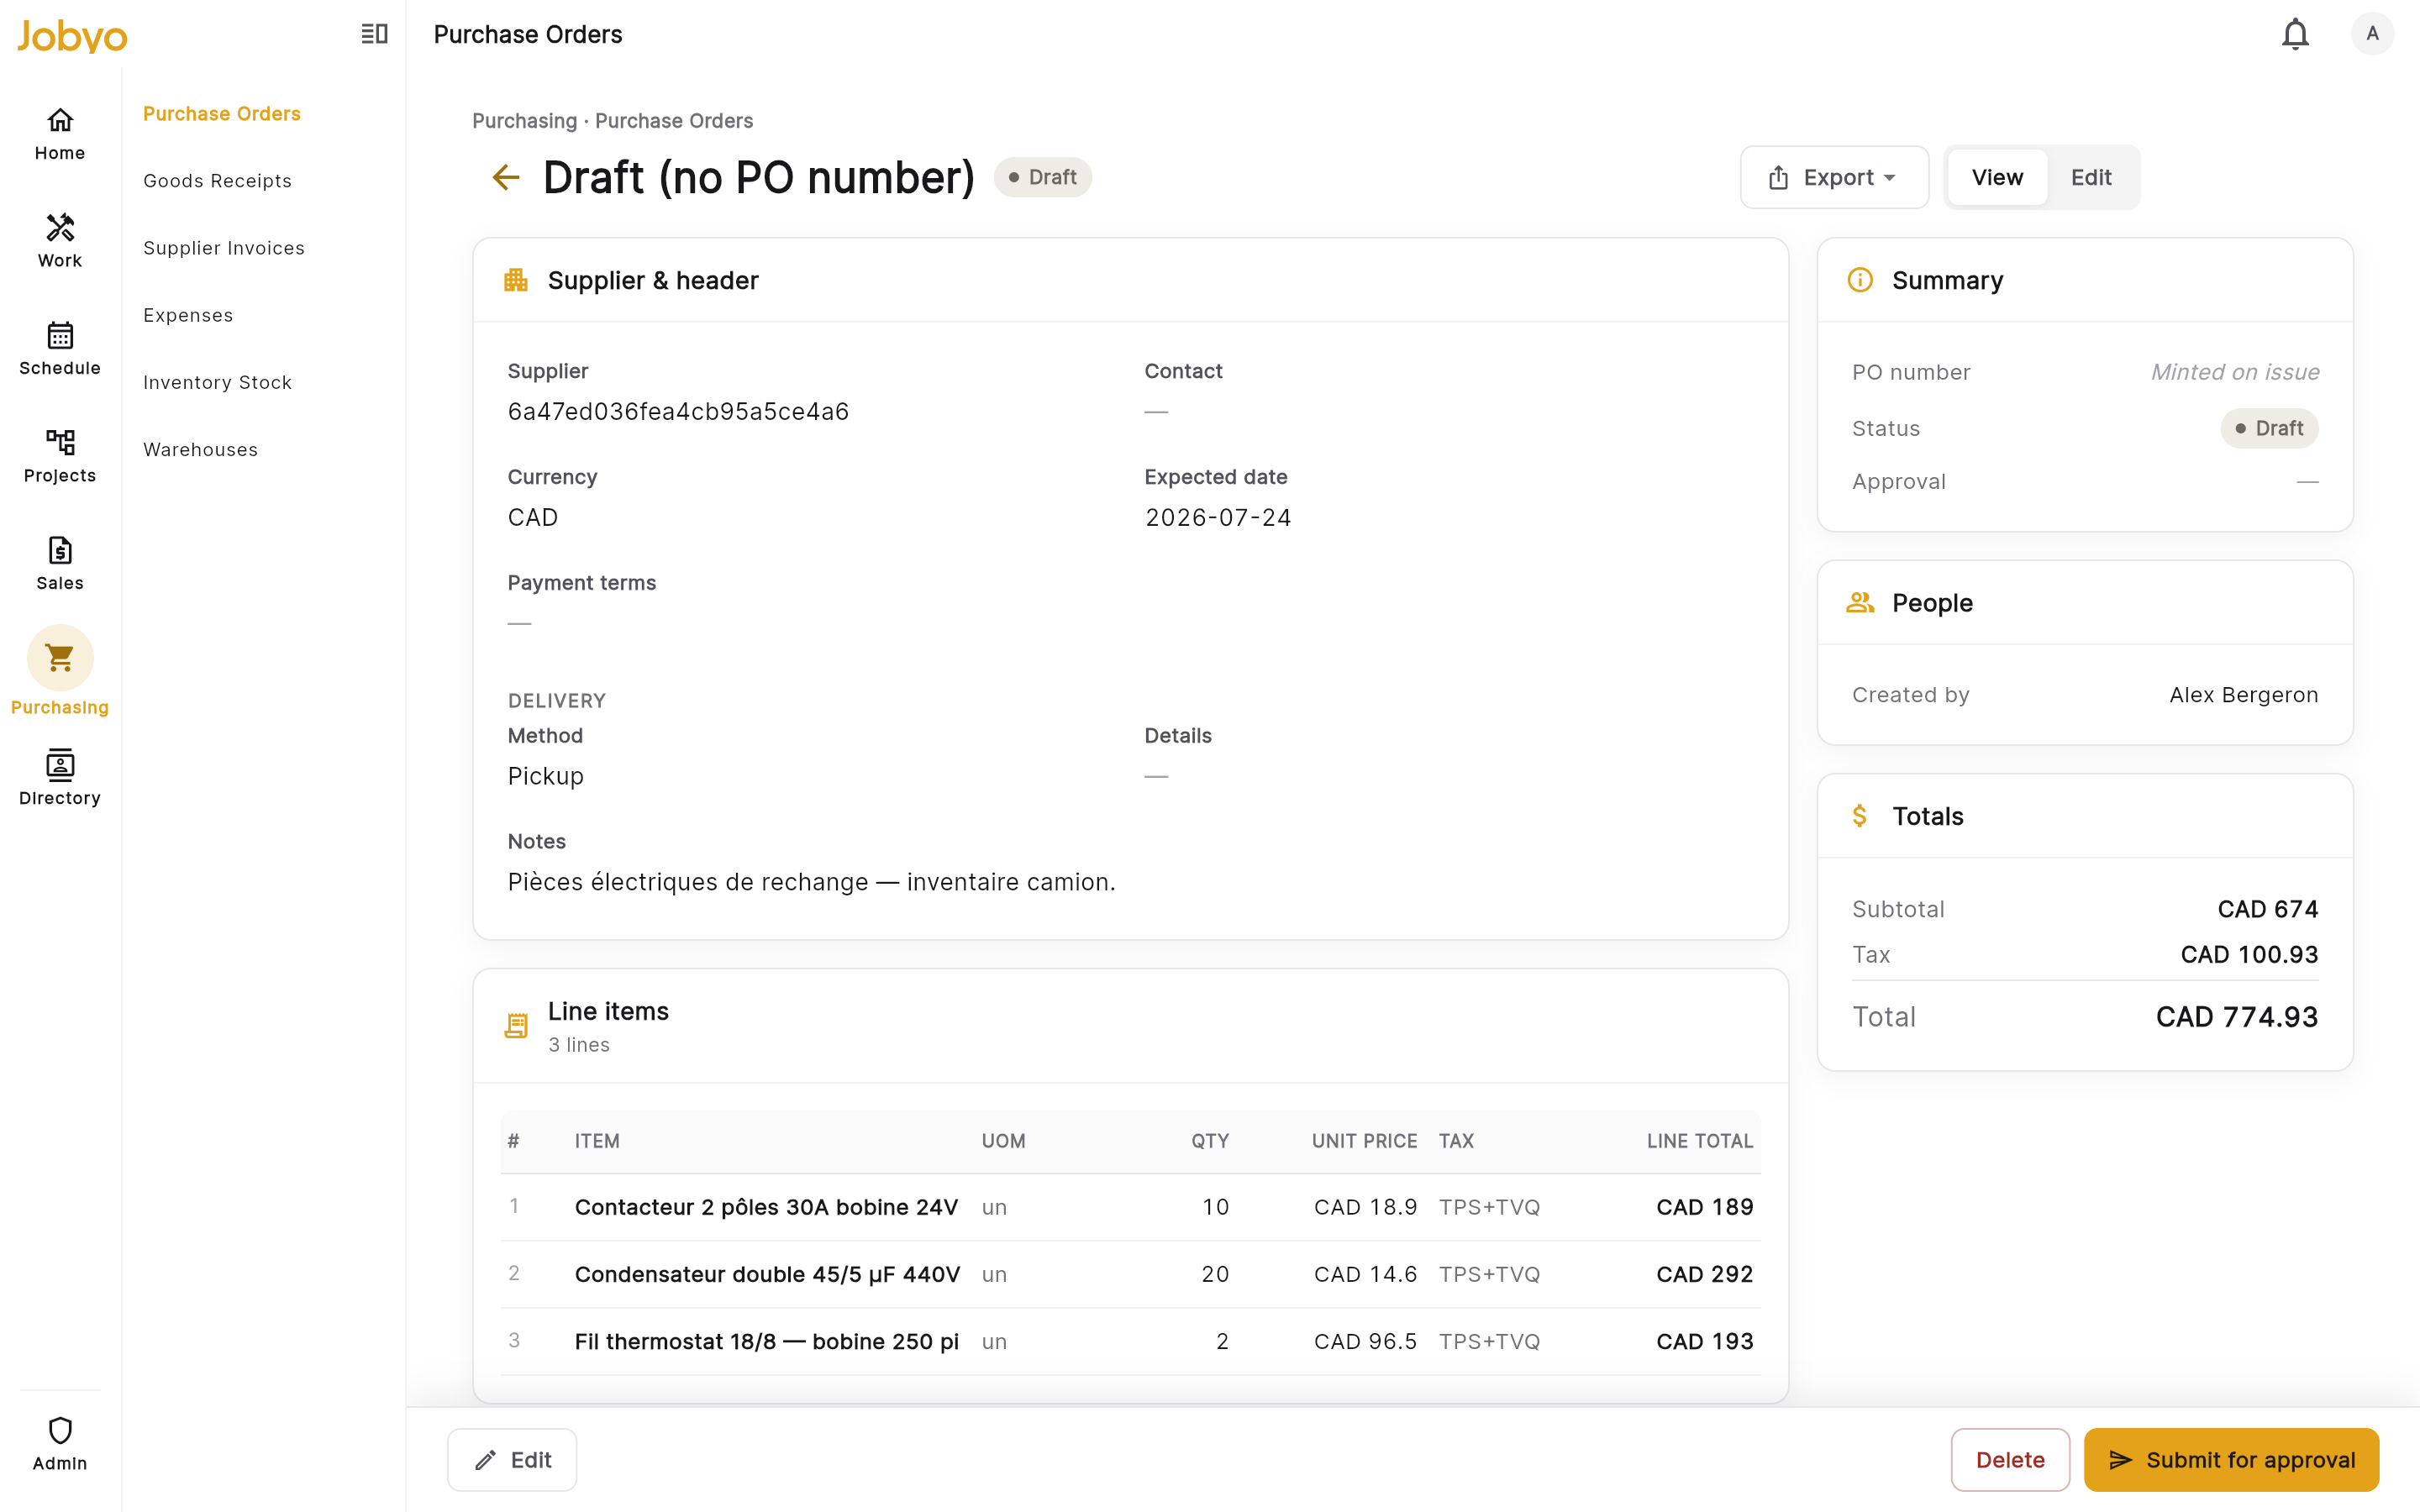
PO detail — header, lines, fulfillment progress, status action bar
Create a purchase order
Open the New PO form
From the list, select New PO. If you don't see the button, your role doesn't include create — ask an administrator.
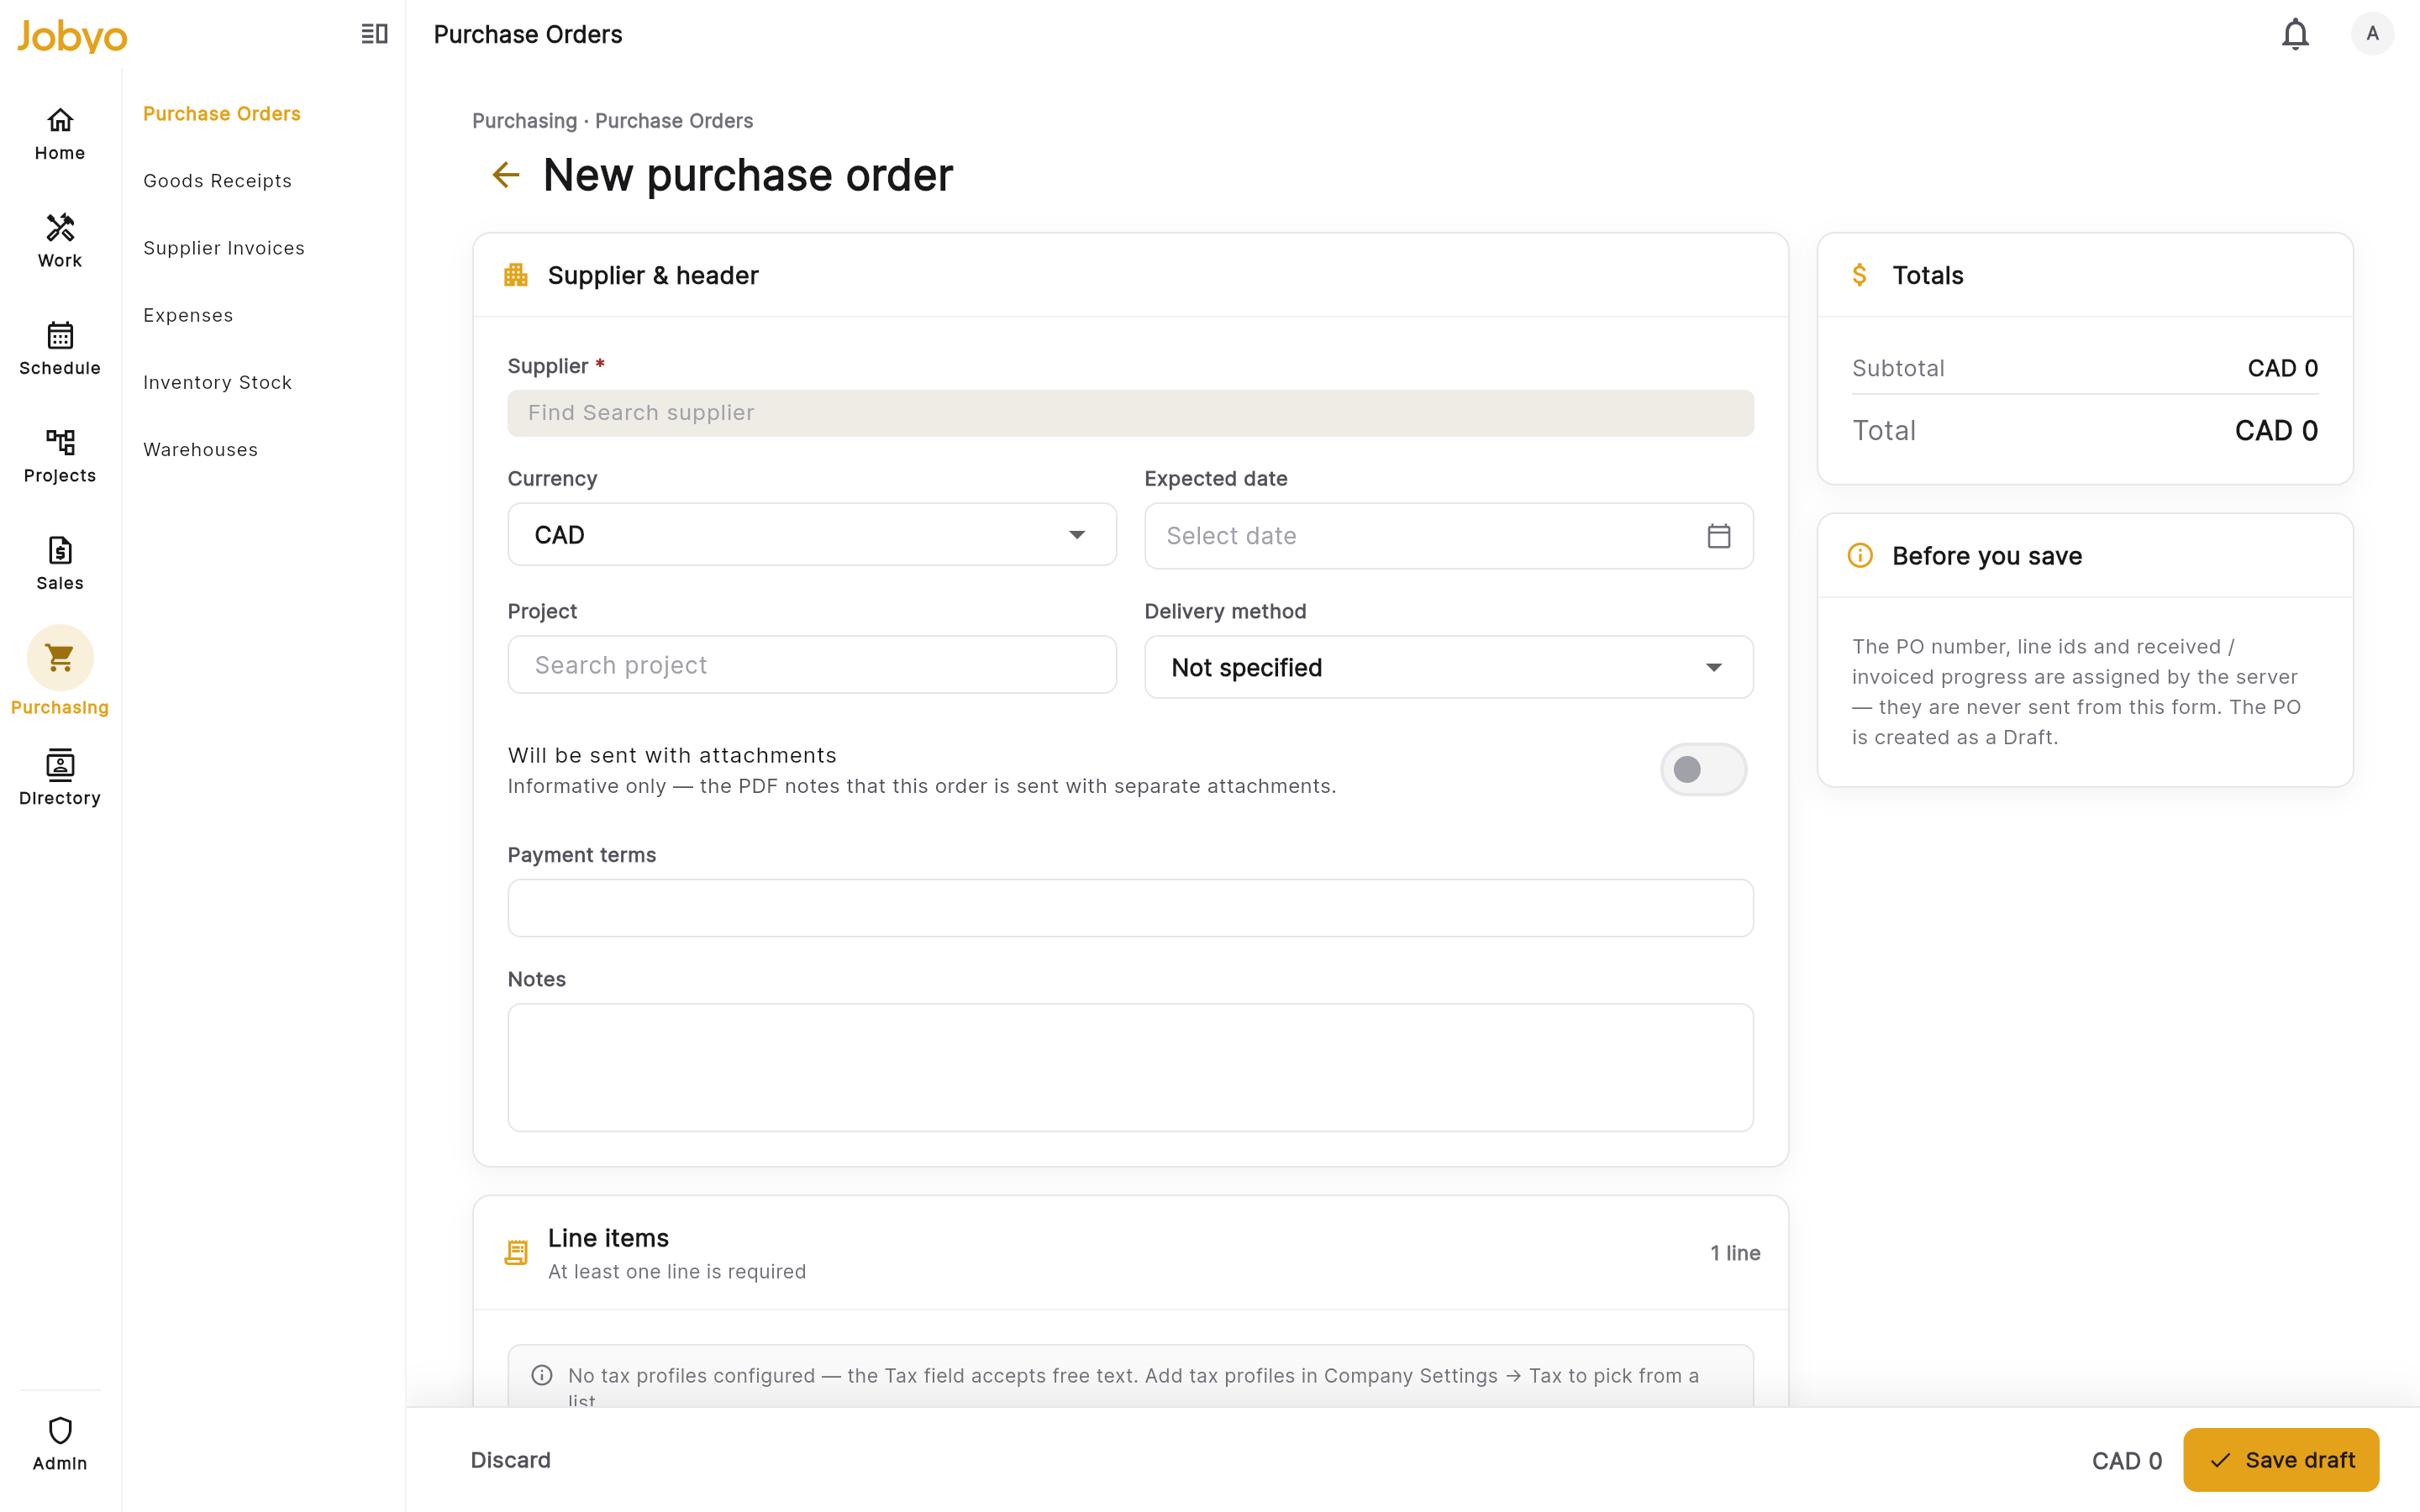
Create form — supplier picker and first line row Choose the supplier
Pick the supplier (required). Jobyo captures a snapshot of the supplier's name, contact, and address at save time — this snapshot stays on the PO and does not update automatically if the supplier record changes later.
Fill in the header (all optional)
Add any of: currency, payment terms, expected delivery date, notes, a ship-to (name, address, and optionally a worksite), and a delivery method (Delivery · Pickup · Courier · Other — pair Other with a delivery note). You can also link the PO to a project and/or work order for reporting and filtering.
Task links go on lines, not the headerDon't try to link a task at the header level — task links belong on individual lines. Sending a task on the PO header is rejected.
Add at least one line
Add one or more line items. For each line, either pick a material from the catalog (which fills the material name) or type a free-text description — one of the two is required per line. Enter the quantity (required, must be greater than zero). Optionally set unit of measure, unit price, and tax code, and link the line to a project, work order, task, or project phase for job-cost tracking. Line subtotal, tax, and total are calculated for you and shown read-only.
Set a destination warehouse (optional)
A line can carry a destination warehouse — the warehouse the goods will be received into. Setting it here pre-fills the warehouse on the goods receipt so the receiving team doesn't have to pick it. Leave it blank and stock defaults to your company's Main Warehouse at receipt time.
Non-project number categoryFor a PO that isn't linked to a project, you may pick a category code (for example SRV or MNT) that forms part of the PO number. A project-linked PO doesn't use a category — the project supplies that part of the number instead. The category can only be changed while the PO is Draft or Requested.
Save the draft
Select Save draft. The PO is created with status Draft. No PO number is assigned yet — the number is minted only when the PO is issued. The totals are calculated by the system.
- "Supplier is required"Choose a supplier before saving — it can't be left blank.
- "Lines must not be empty"Add at least one line item.
- "Quantity must be a positive number"Enter a quantity greater than zero on every line.
- "Description is required"A line has no material selected. Either pick a material from the catalog or type a description.
Buy materials planned on jobs
When materials are planned on projects and tasks, they collect in a buyer planned-requests queue — a single, cross-scope backlog of everything that still needs ordering, netted against what's already on order.
Open the planned-requests queue
Open the planned-requests queue (or the buy-plan on a specific project). It gathers pending planned materials from all projects and standalone (repair / maintenance) tasks, and:
- groups the items by supplier,
- shows the project, task, and phase each material belongs to,
- shows a suggested price, and
- shows how much is already on order versus how much is still remaining.
Filter the queue to a single project, to standalone work only, or to a specific task or phase. An empty queue means nothing is waiting to be bought right now.
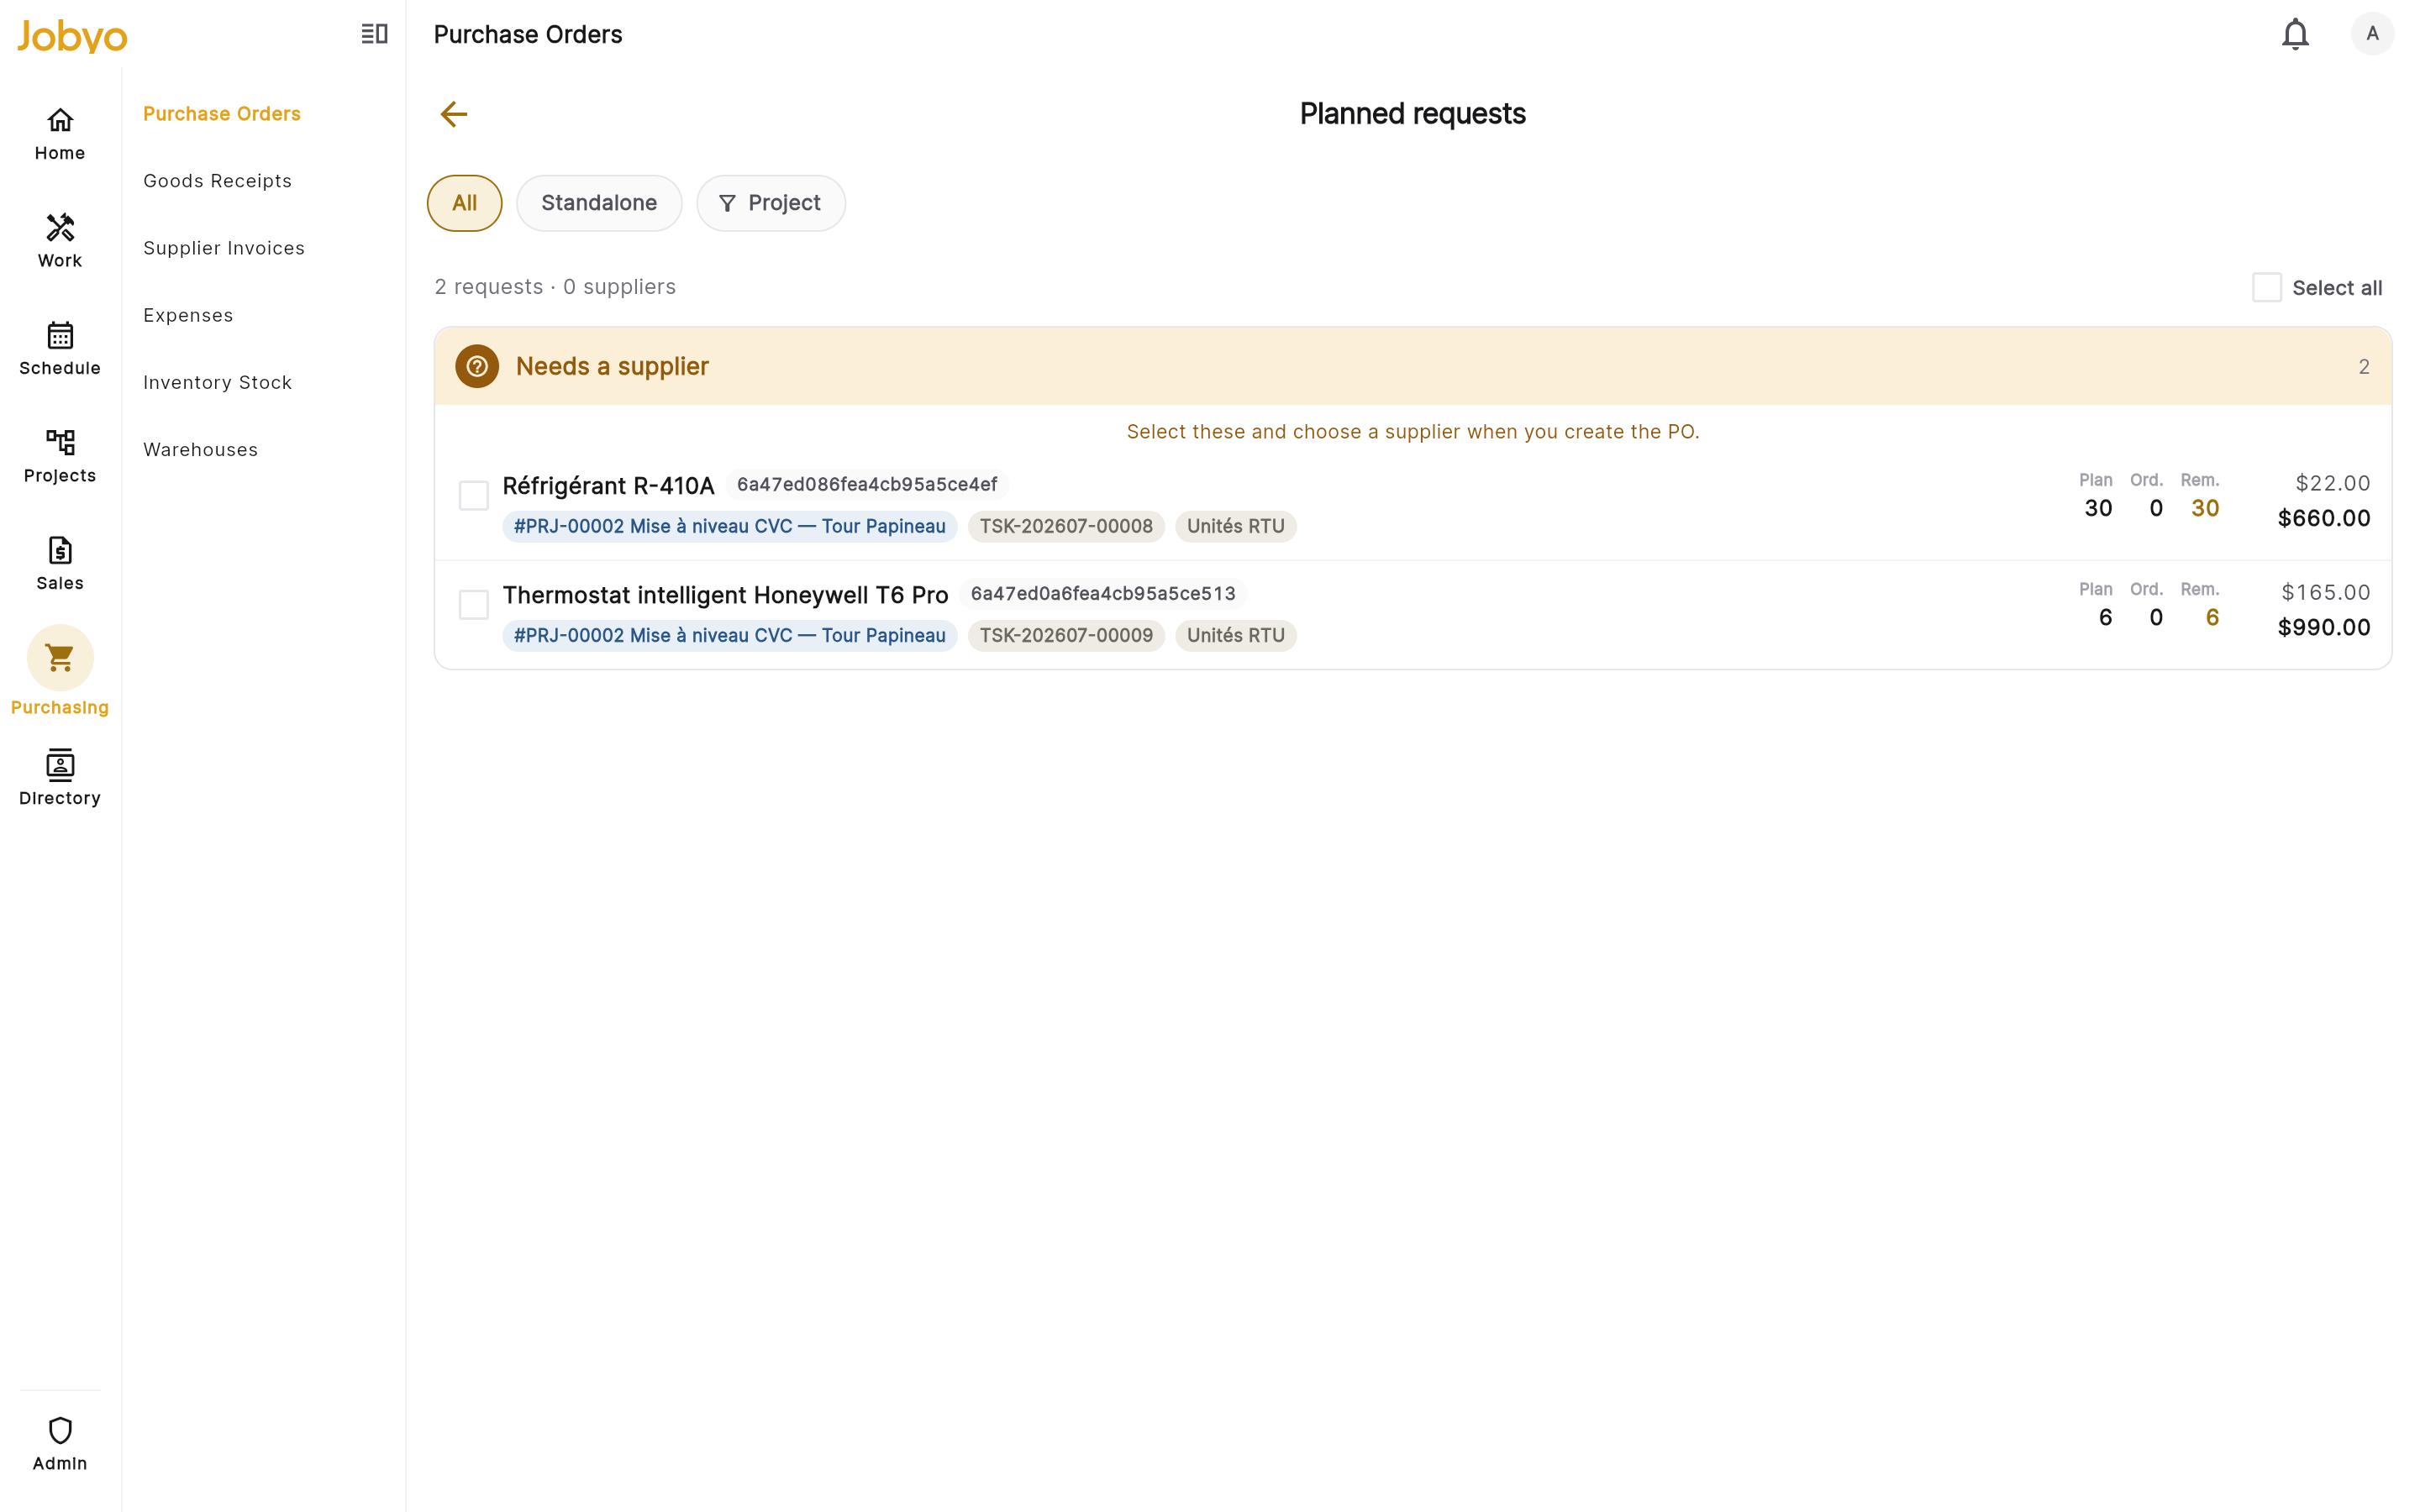
Planned-requests queue — supplier groups, per-line job context, ordered vs remaining Select the lines to order
Tick the material lines you want to buy — from one project, or across the mixed cross-scope queue. Adjust the quantity, and (if you have cost visibility) the price, per line before creating.
Create the draft POs
Confirm. Jobyo fans out one draft PO per supplier automatically — you don't create them one at a time. Each ordered line is stamped with a trace back to the planned material, so it nets out of the queue on the next pass and isn't bought twice.
Review and issue
The new POs are created as drafts. Review each one, then submit and issue it through the normal PO flow below.
If suggested prices show as blank, you don't have cost-visibility permission — you can still select lines and create orders; only the amounts are hidden. If a PO created from the queue is later cancelled, its lines reappear in the queue as still-needed.
Move a PO through its lifecycle
Submit for approval (Draft → Requested)
Open a Draft PO and select Submit for approval. The status changes to Requested and lines stay editable. Requested is a mandatory step — a PO can't jump straight from Draft to Issued.
Approve, reject, or send back a requested PO
A PO that requires approval can be approved, rejected, or sent back by a user who holds the Approve permission on Purchase Orders (within their role's approval ceiling). What you can do depends on where the PO stands:
- Not yet decided — Approve it, Reject it, or — when your organisation requires approval before issuing — Send back for edits: a softer alternative to rejecting that asks for a reason and returns the PO to Draft so the requester can revise and resubmit, rather than ending the approval outright.
- Already approved — the PO is locked for line and material edits. Return to not approved unlocks it again if you change your mind before it's issued.
- Rejected — a rejected PO can never be issued. The requester uses Resubmit for approval to send it back into the pending queue after making changes.
The approval decision — who approved, rejected, or sent it back, and when — is recorded on the PO, and the approval badge updates. To stop a requested PO instead of deciding on it, use Cancel PO.
If a PO was issued while its approval was still pending — for example, because your organisation turned on the approval requirement after the PO was already issued — it keeps an Approval pending badge and can still be approved in place from its detail screen. It is not stuck.
Issue to the supplier (Requested → Issued)
Open a Requested PO and select Issue. The PO moves to Issued, Jobyo mints the PO number at this moment (for example PO-00042), and records the issue date and who issued it. Line items lock once issued — you can no longer add, remove, or change lines.
If your organisation requires PO approval (the default), the PO must be approved before it can be issued; otherwise it can be issued directly. See Approve, reject, or send back a requested PO above.
Edit an issued PO (limited fields)
Once issued, most of the PO is locked, but you can still update notes, expected delivery date, ship-to, and delivery method / delivery note. Open the PO, select Edit, change one of those fields, and save. Line items stay read-only.
Record a goods receipt (Issued → Received)
When goods arrive, open the Issued PO and select Record receipt. A quick-entry dialog opens with one line per item on the PO — enter the quantity for each line you're receiving and choose Direct (cost goes straight to the job or expense) or Stock (goes into inventory; pick an inventory-tracked catalog item). Stock lines always land in your company's Main Warehouse from this screen — there's no condition code, notes field, or warehouse choice here. Select Post receipt.
What you'll see: the receipt posts immediately — there's no draft step on this path. Received quantities update on each PO line (shown as "X received of Y ordered"). When every line is fully received, the PO automatically becomes Received — you never set that status by hand.
For a condition code, line or header notes, a separate accepted-vs-received quantity, or a destination warehouse other than Main, create the receipt from the Goods receipts section instead — that path creates a draft that gets posted separately.
If a supplier ships more units than were ordered on a line, Jobyo records the actual quantity with a warning rather than blocking you.
Cancel a PO
Open a Requested or Issued PO and select Cancel PO, then confirm. The status changes to Cancelled — this is permanent and can't be reopened. To remove a Draft you no longer need, delete it instead.
You can't cancel (or delete) a PO once any line has goods received or an invoice matched against it. Cancel or delete before fulfillment begins.
Delete a draft PO
Open a Draft PO with no receipt or invoice activity and select Delete, then confirm. The PO is soft-deleted — it disappears from normal list views but the record is retained, with no in-app filter to bring it back.
Admin — permanently delete a cancelled PO
An administrator can permanently delete a Cancelled PO, removing it and its lines for good — directly from that PO's detail screen, no soft-delete step needed first. Filter the list by Status: Cancelled to find it, open it, select Delete permanently in the action bar, and confirm. The same fulfillment guard still applies — a permanent delete is blocked if any line has received or invoiced quantities, and that guard can't be overridden.
Permanent delete only works from a Cancelled PO's detail screen — it isn't how you remove a soft-deleted Draft. There's no in-app way to permanently remove a soft-deleted Draft PO. Permanent deletion can't be undone.
The purchase order lifecycle
A PO always follows this path — Draft → Requested → Issued → Received — with Cancelled as the exit:
| Status | What it means | What you can do |
|---|---|---|
| Draft | Being prepared; not yet submitted | Edit everything; submit; delete |
| Requested | Submitted; awaiting issue | Edit everything; approve; issue; cancel |
| Issued | Sent to supplier; PO number assigned | Edit notes / dates / ship-to only; record goods receipts; cancel (if no receipts) |
| Received | All ordered lines received | Read only — terminal |
| Cancelled | Cancelled before fulfillment | Read only — permanent |
Key points:
- The PO number is assigned only at Issue — before that it shows as a dash.
- Totals (subtotal, tax, total) are always calculated by the system; you never type them.
- Received and invoiced quantities update automatically as goods receipts and purchase invoices are processed — you never enter them directly.
- Received and Cancelled are permanent — there's no way to reopen a PO in either state.
Not yet in the app
These capabilities exist in Jobyo's backend but don't have buttons in the app yet:
- Short-close a PO — a partially-received PO can be closed without receiving every line (for example, when a supplier can no longer fulfil the rest). This transition is supported in the backend but has no button yet — contact your admin if you need a PO closed early.
- Duplicate a PO — the app shows a Duplicate button, but it's currently disabled.
Exact menu labels and filter names may differ slightly from what's written here depending on your build. If something is in a different place, look for the equivalent action in the same area.
If it doesn't work
- No "New PO" buttonYour role doesn't include creating purchase orders. An administrator can grant it under Users & roles.
- Feature lockedPurchase Orders isn't on your current plan (it needs Business or higher). Upgrade under Subscriptions & plans.
- "Edit" is unavailableThe PO is past Draft/Requested. Once issued, only notes, dates, ship-to, and delivery fields can change; Received/Cancelled POs are read-only.
- Approve button disabledYou don't hold the Approve permission on Purchase Orders. Ask an approver, or an admin to grant the permission.
- Cancel or Delete greyed outA line already has goods received or an invoice matched. Fulfillment activity blocks cancel and delete.
- "Record receipt" missingEither the PO isn't Issued, or your account lacks the goods-receipt permission (separate from purchase orders). Contact your admin.
- "You do not have permission" on Record receipt, even though you have the Goods Receipts permissionThree possible causes: the PO's project is Completed (restricted for members scoped to their own projects — ask an admin or have the project reopened); the PO isn't one of your projects (your access is limited to your own projects); or your role has Create on Goods Receipts but not Approve — recording a receipt here posts it right away, which needs Approve, not just Create (common for Project Manager roles by design). Ask an Ops Manager or admin to record it, or have Approve added to your role.
- Record receipt blocked — "Re-approval required" or an approval-pending indicatorThe purchase order still needs approval (or needs re-approval after a revision) before it can be received against. Ask an approver to approve it, then try again.
- Prices show as blankYou don't have cost-visibility permission. Quantities and structure are still shown; only money is hidden.