Users, teams & roles
Jobyo separates who people work with from what people are allowed to do. Teams group users for scheduling, reporting, and labour-cost defaults; security roles decide every person's permissions. This page covers both — managing teams and their members, and creating or tuning the roles that grant access.
Being on a team does not change which actions a person can perform — that's set entirely by their security role. What team membership can affect is which records they see: when a role grants Team-level access on a resource, the person's teams decide which work orders, tasks, and requests appear. For Company / Own / Assigned levels, team membership makes no difference. You manage the two in different places — teams below, roles further down this page.
Who uses this
Teams and roles are back-office, admin-oriented surfaces. Managing them needs administrator-class permissions — the exact actions each admin can take depend on their own role.
- Teams — administrators create, edit, and archive teams and manage members. Managers can browse teams and, if their role allows it, add or remove members on teams within their access scope.
- Security roles — creating and editing roles needs the security permission (Administrator or Company Owner). Everyone else only ever has a role; they don't manage the definitions.
What you'll need
- To manage teams: list / view to browse, create to add a team, modify to edit or manage members, and approve to archive or restore.
- To manage roles: the security permission at the matching action (list, view, create, modify).
- Neither area is gated by your subscription plan — roles and teams are platform foundations available on every plan.
Part 1 — Teams and their members
A team is a crew, dispatch group, or department (for example Service / Repair, Maintenance East, or HVAC Crew Alpha). Teams are used for scheduling, reporting, labour-cost defaults, and — when a role uses Team scope — for deciding which records a person sees.
Browse and find a team
Open Team Management
Select Team Management from the main menu. The list opens with all active teams, one tile each, showing name, short code, a description snippet, tags, and any System or Archived badge.
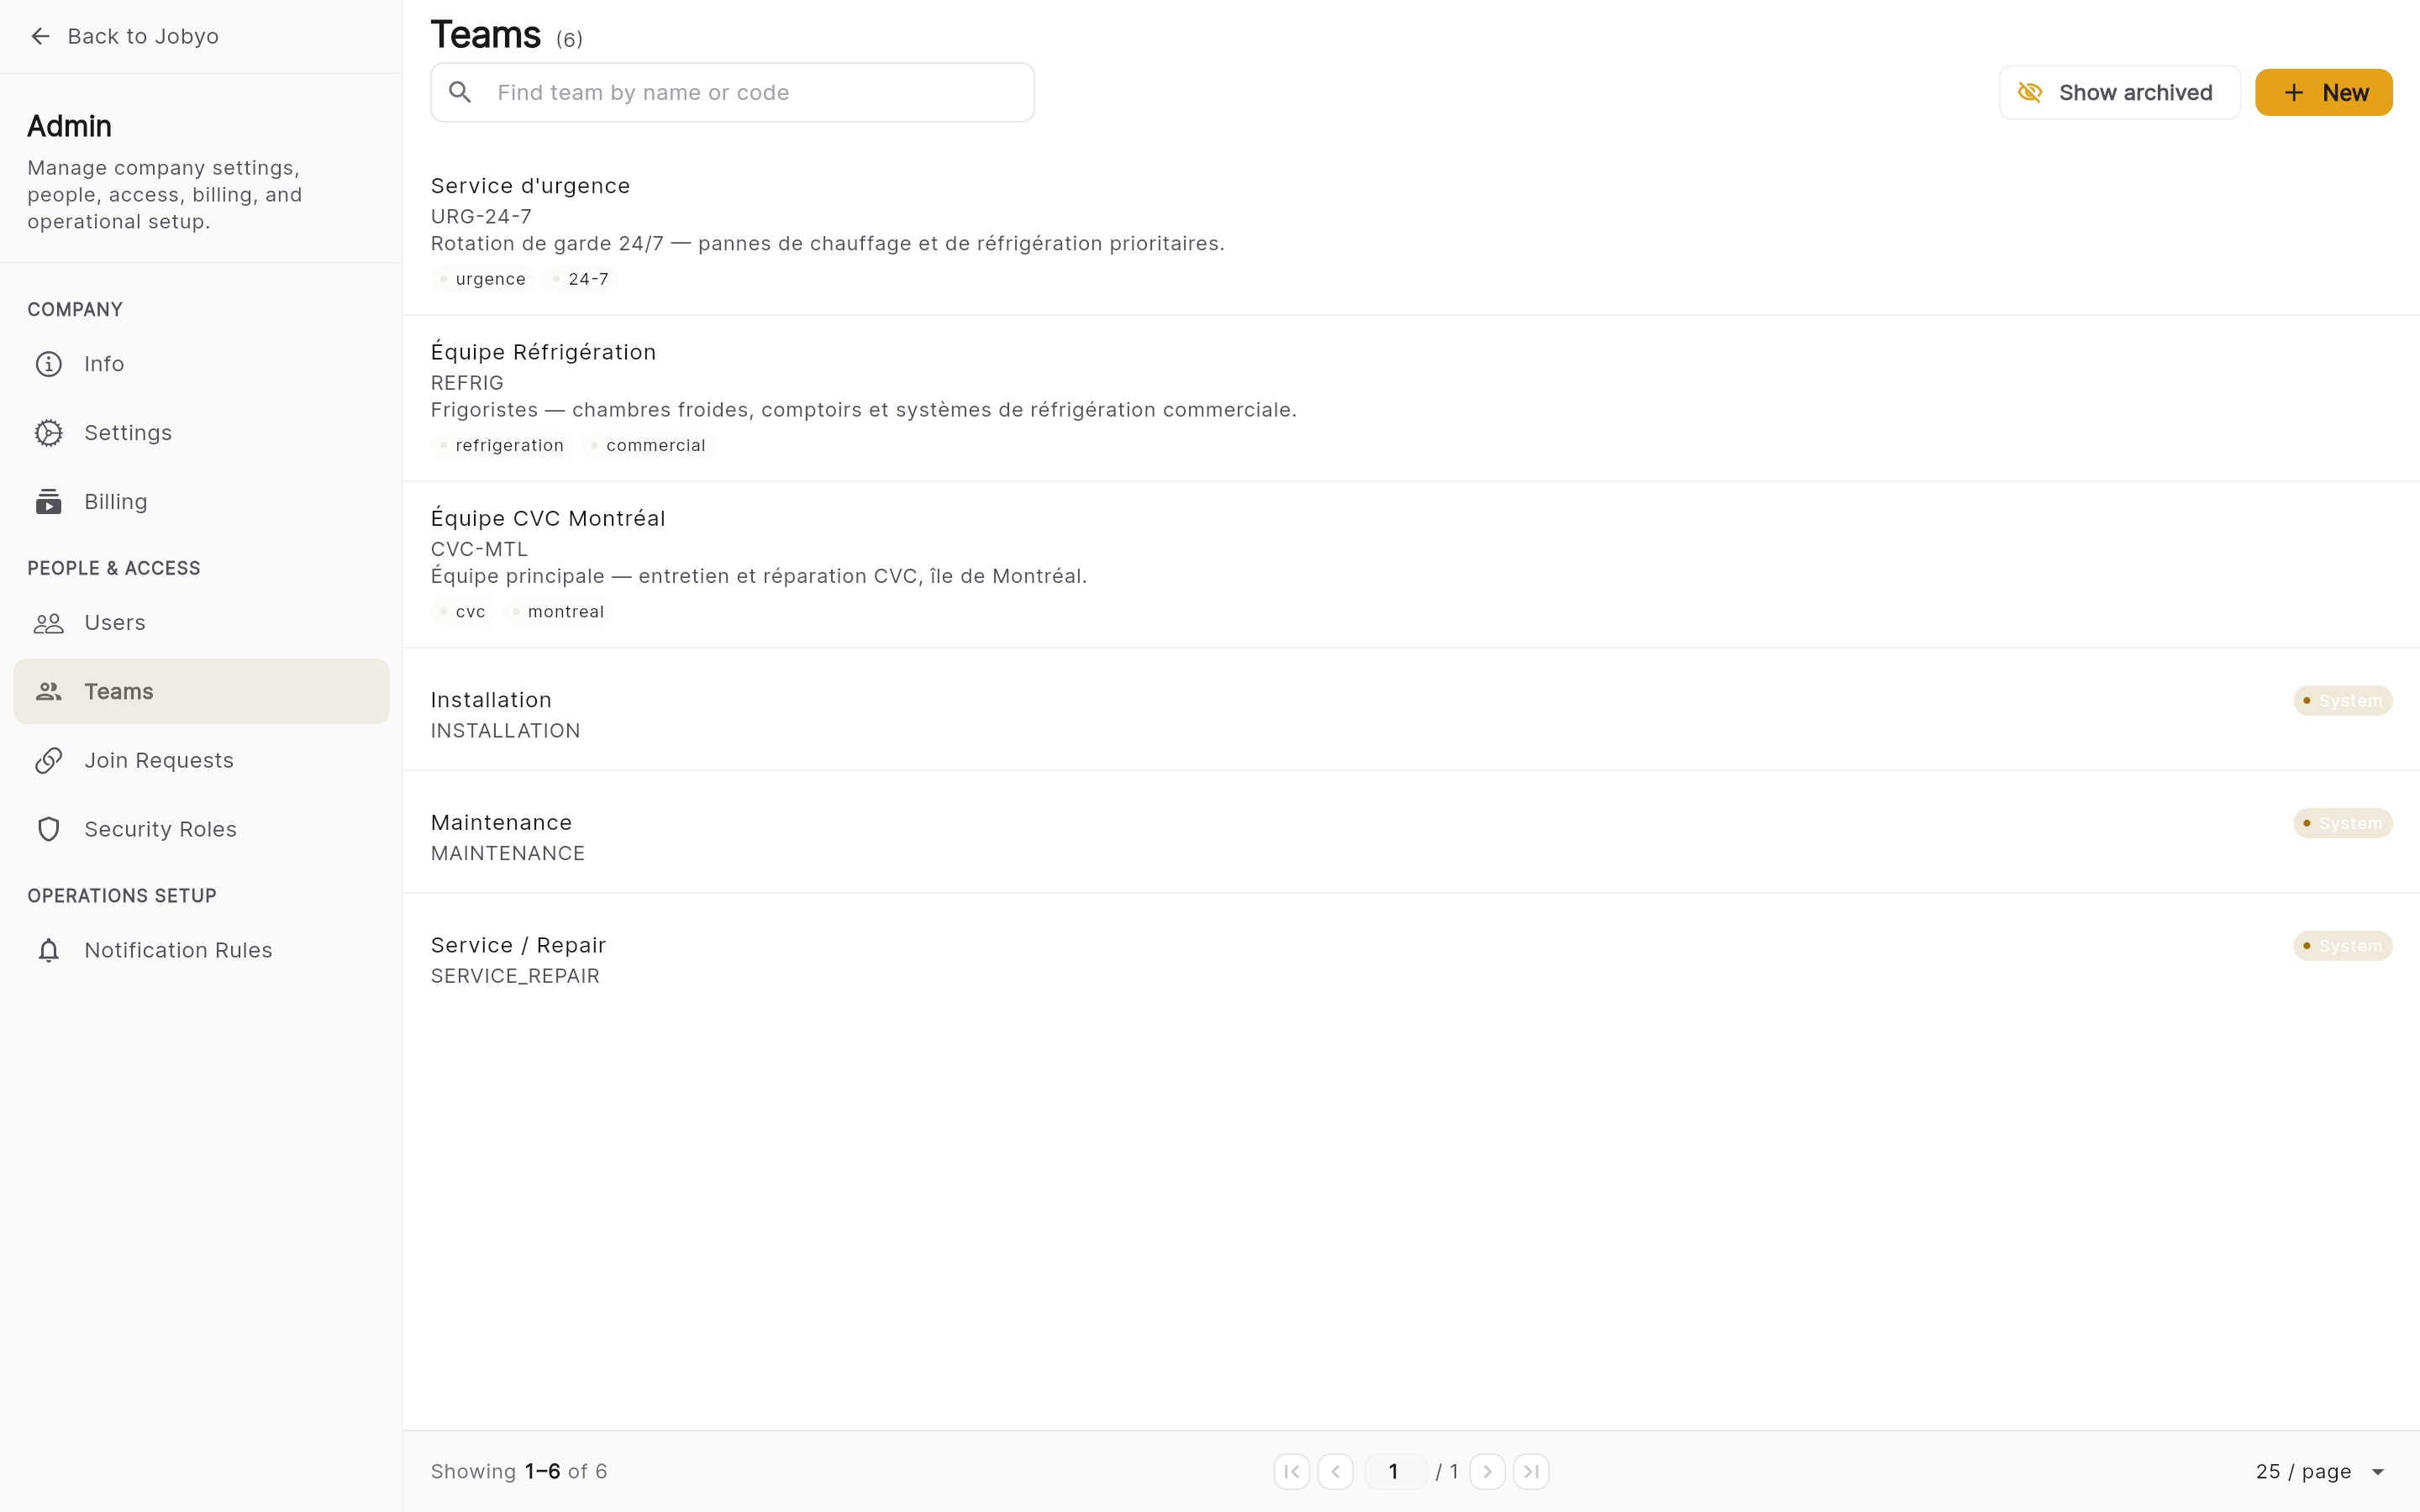
Team list — search box, Show archived toggle, team tiles Search or show archived
Type in the search box to match on name or code (results update as you type). Turn on Show archived to include archived teams. Page through results at the bottom if there are many.
Open a team
Tap a tile to open the team detail — name, code, description, tags, badges, and the Members section. If the team is archived, you'll also see who archived it, when, and the reason.
The list tiles deliberately don't show a member count yet — open a team to see its members. This is a known limitation, not a bug.
Create a team
Open the New team form
From the team list, select + New. If you don't see it, your role doesn't include create — ask an administrator.
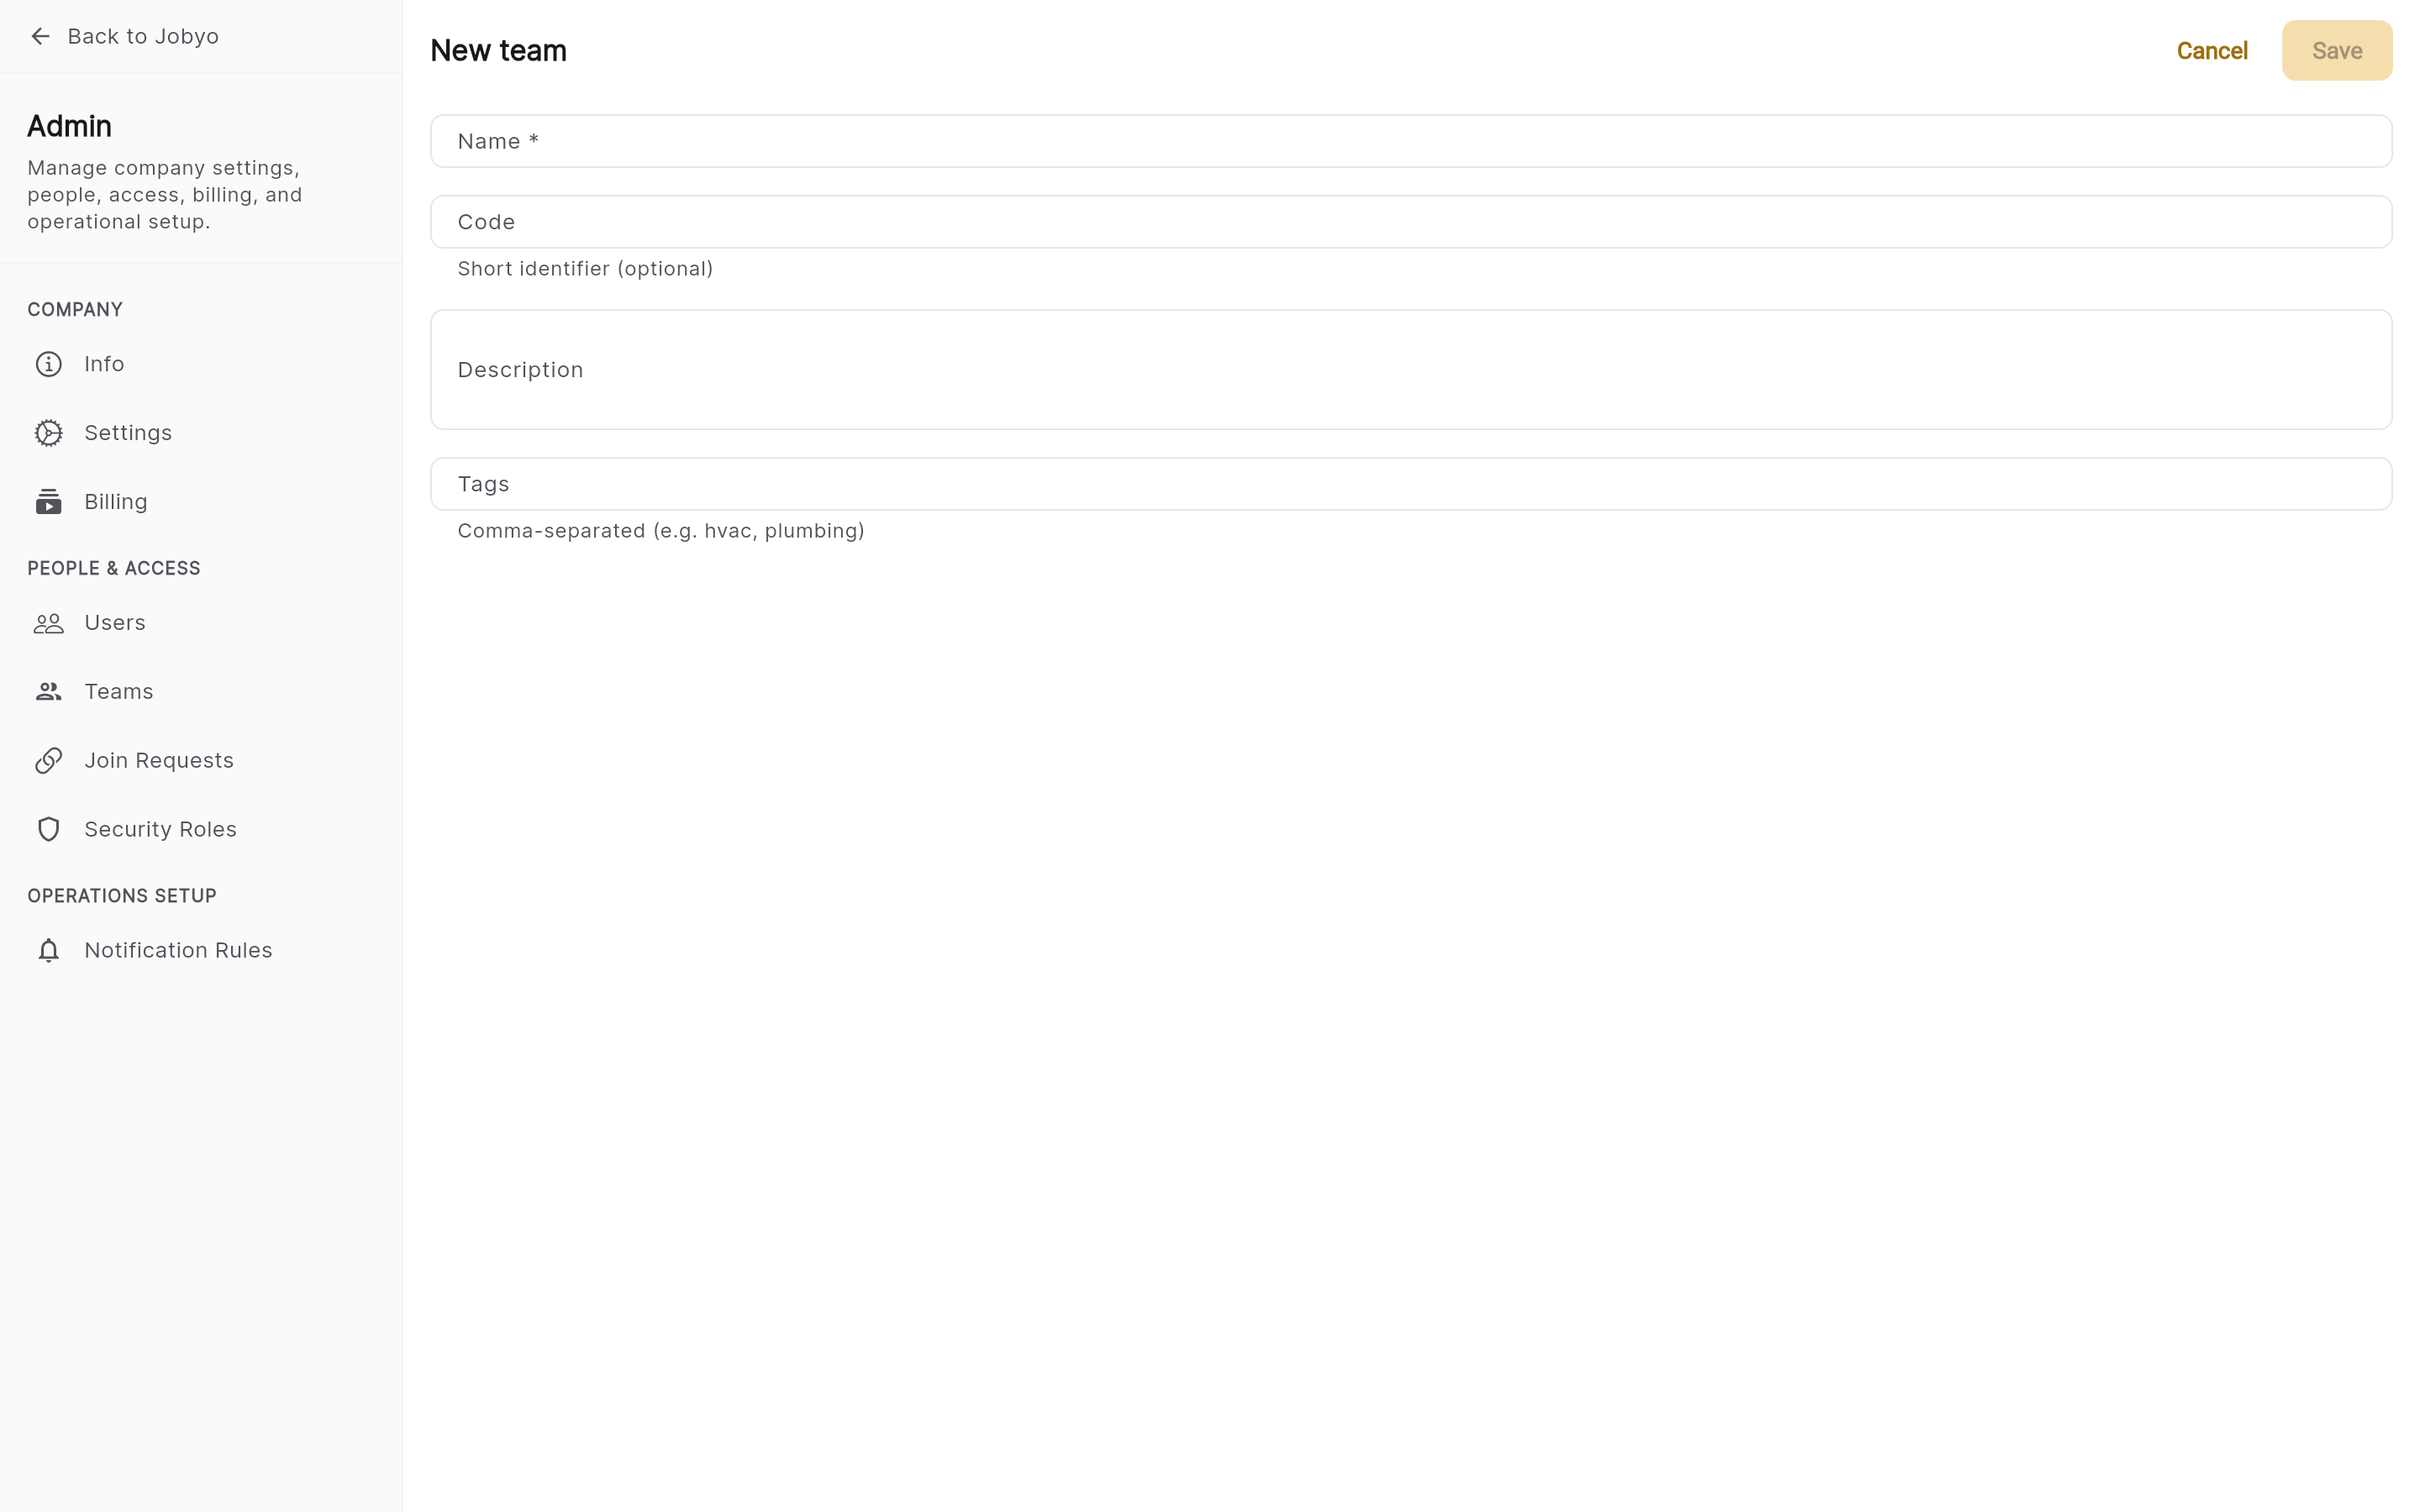
Create form — Name (required), Code, Description, Tags Fill in the details
Name is the only required field (for example HVAC Crew Alpha). Optionally add a code (a short identifier used in search and reporting), a description, and tags for grouping or filtering. Everything except the name is optional.
Save
Select Save. The team is created with Active status and is ready to have members added.
There's no automatic name for a team. If the Name field is empty the form won't save — fill it in and try again.
Edit a team
Open the team detail and select Edit. You can update the code, description, and tags, and the name for regular (non-system) teams.
- The team must be active — the Edit action isn't available on an archived team. Restore it first.
- Renaming a system team (see below) is rejected; its other fields stay editable.
Archive and restore a team
Archiving retires a team without deleting anything — work orders, tasks, and attendance records that reference it stay fully accessible, and you can restore the team at any time.
Archive
On the team detail, select Archive. You need the approve permission. Optionally enter a reason (recommended, so others know why). The team gains an Archived badge and drops out of the default list — turn on Show archived to see it again.
Restore
Open the archived team (with Show archived on) and select Restore. The Archived badge is cleared and the team returns to the active list. Also needs the approve permission.
Archiving only sets the team's status to archived — nothing is removed and history is preserved. There is no hard-delete for teams in the current version.
Add and remove members
Manage a team's people from the Members section on the team detail. Adding or removing members needs the modify permission on teams.
Add a member
In the Members section, select Add member, search for the person by name, pick them, and confirm. They appear in the Members list and are now included in scheduling and reporting filtered by this team.
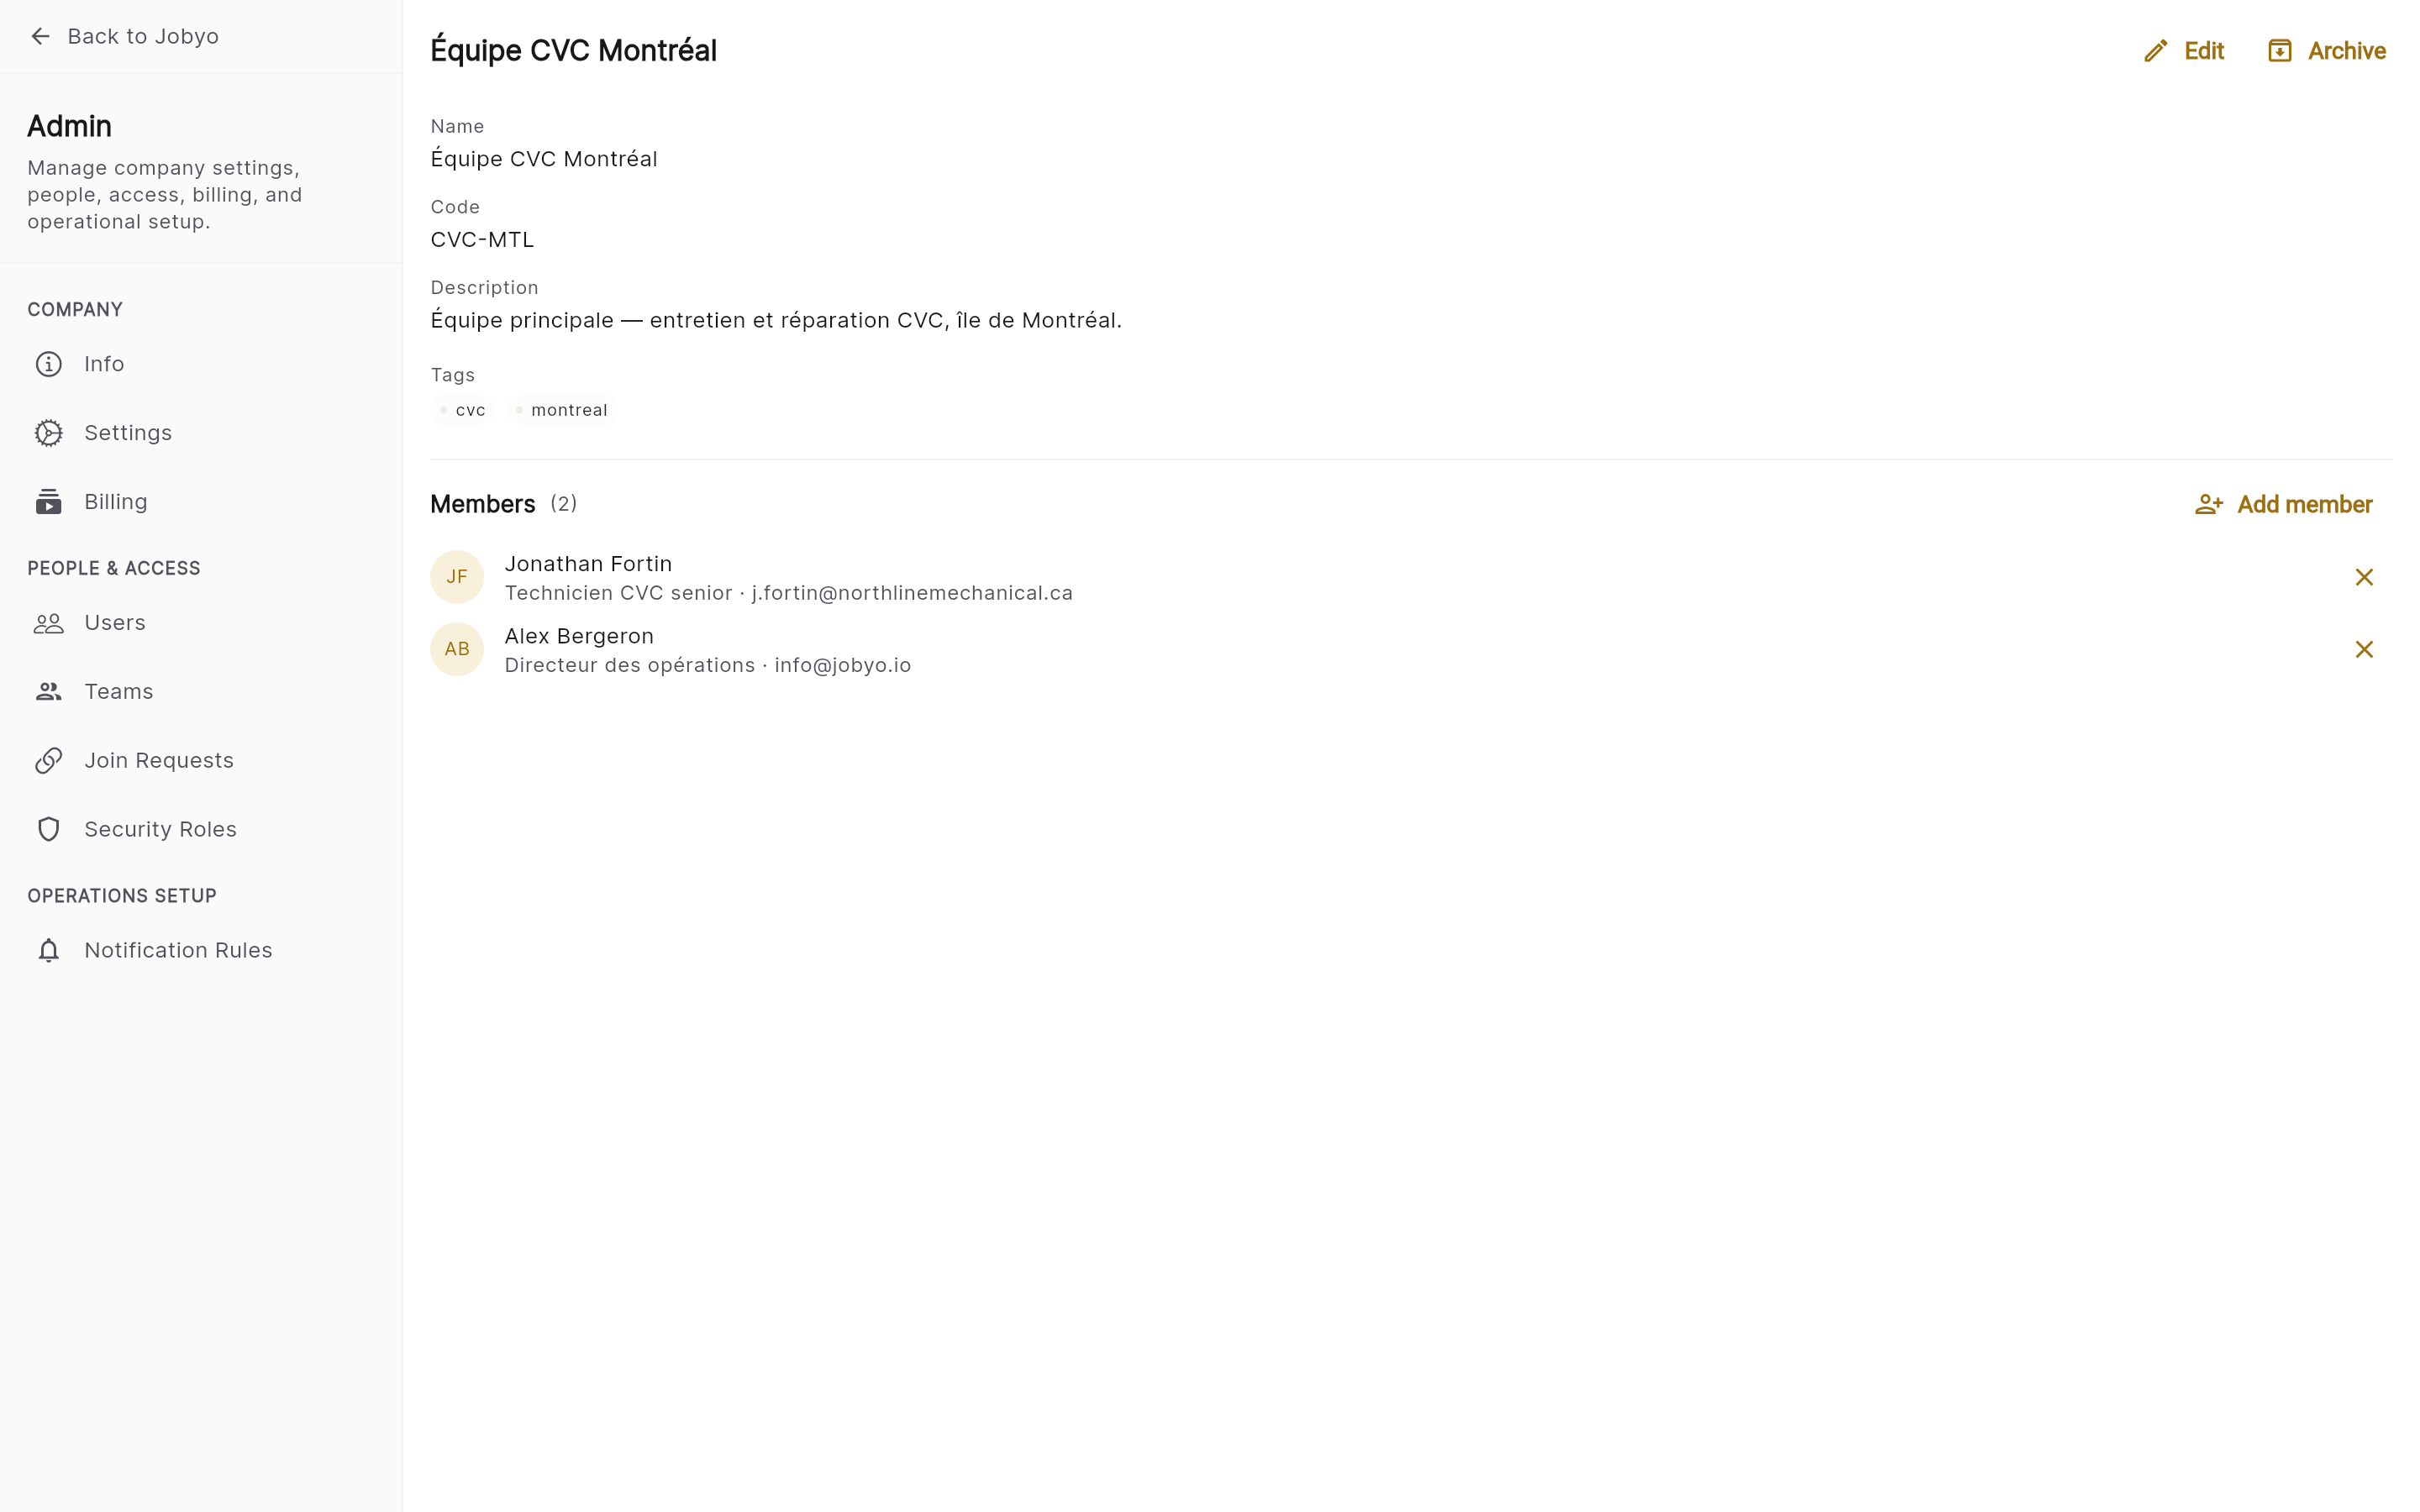
Members section — current members and Add member Remove a member
Find the person in the Members list and use the remove action next to their name, then confirm. If this was their primary team, that primary setting is cleared too.
Behind the scenes, team membership is stored on each user's profile, not only on the team. To the user it feels like "add member to team", but the authoritative record is the person's profile — so a member added here also shows on their profile.
Putting someone on a team never changes what they can do — that's governed by their security role (Part 2). If you also need to change what they can access, do it through their role.
System teams
Every company starts with three built-in system teams:
| Team | Purpose |
|---|---|
| Service / Repair | Default crew for service and repair work |
| Maintenance | Default crew for planned maintenance |
| Installation | Default crew for installation jobs |
You can edit their code, description, and tags and manage their members — but you cannot rename or archive them. They carry a System badge so they're easy to spot.
A team's data model also supports team leaders, a parent-team hierarchy (for reporting), and a default labour-cost profile — but there's no form for these yet. They're planned for a future release; for now they can't be set from the app.
Part 2 — Security roles and permissions
Every user is assigned exactly one security role. That role holds a permission matrix that maps each area of the app (resources) and each action to an access level. The backend enforces the role on every protected request — the app only uses it to show or hide buttons, so a user can never reach data their role forbids, no matter how they navigate.
This section covers creating and tuning role definitions. Assigning a role to a specific person happens on that person's profile, not here — see Roles & what you can see for how permissions shape each user's experience.
The 10 built-in roles
Jobyo ships with 10 predefined system roles, listed broadest to most restricted:
| Role | Intended for |
|---|---|
| Company Owner | The account owner — full access to everything, including billing. Only one person should hold this. |
| Administrator | Ops/IT admins — full access to all company data and settings, but not billing by default. |
| Operations Manager | Office operations — service requests, work orders, scheduling, customers, worksites, suppliers. No invoice creation by default. |
| Project Manager | Planning and delivery — projects, phases, tasks, planned costs, quotation drafts. Cannot send or approve invoices, and has no actual-cost visibility by default. |
| Finance Manager | Finance and billing — creates, edits, sends, and approves sale invoices; manages payments and purchase invoices; can see actual costs. |
| Lead Technician | Field supervisor — oversees team work and approves field submissions. No cost, margin, or invoice authority. |
| Field-Billing Technician | Field worker with limited invoicing — assigned field work plus create/modify/approve invoices on their own work only. No internal cost or margin visibility. |
| Technician | Standard field worker — sees and acts on assigned work, records attendance, uploads photos and evidence. No financial access. |
| Apprentice Technician | Restricted field support — view assigned work, upload notes/images, log own attendance. Cannot create work orders, approve, or touch financials. |
| Read-Only | View-only across configured areas. Cannot create, change, delete, or approve. Suitable for auditors. |
The 10 built-in roles are view-only. Use them as-is, or duplicate one to create an editable copy — that's the only way to customise a system role.
View and inspect roles
Open Security Roles
Go to the admin area and open Security Roles. The list shows all roles — the 10 system roles plus any custom roles — each with a name, description, and a System or active badge. Search by name or filter to active roles.
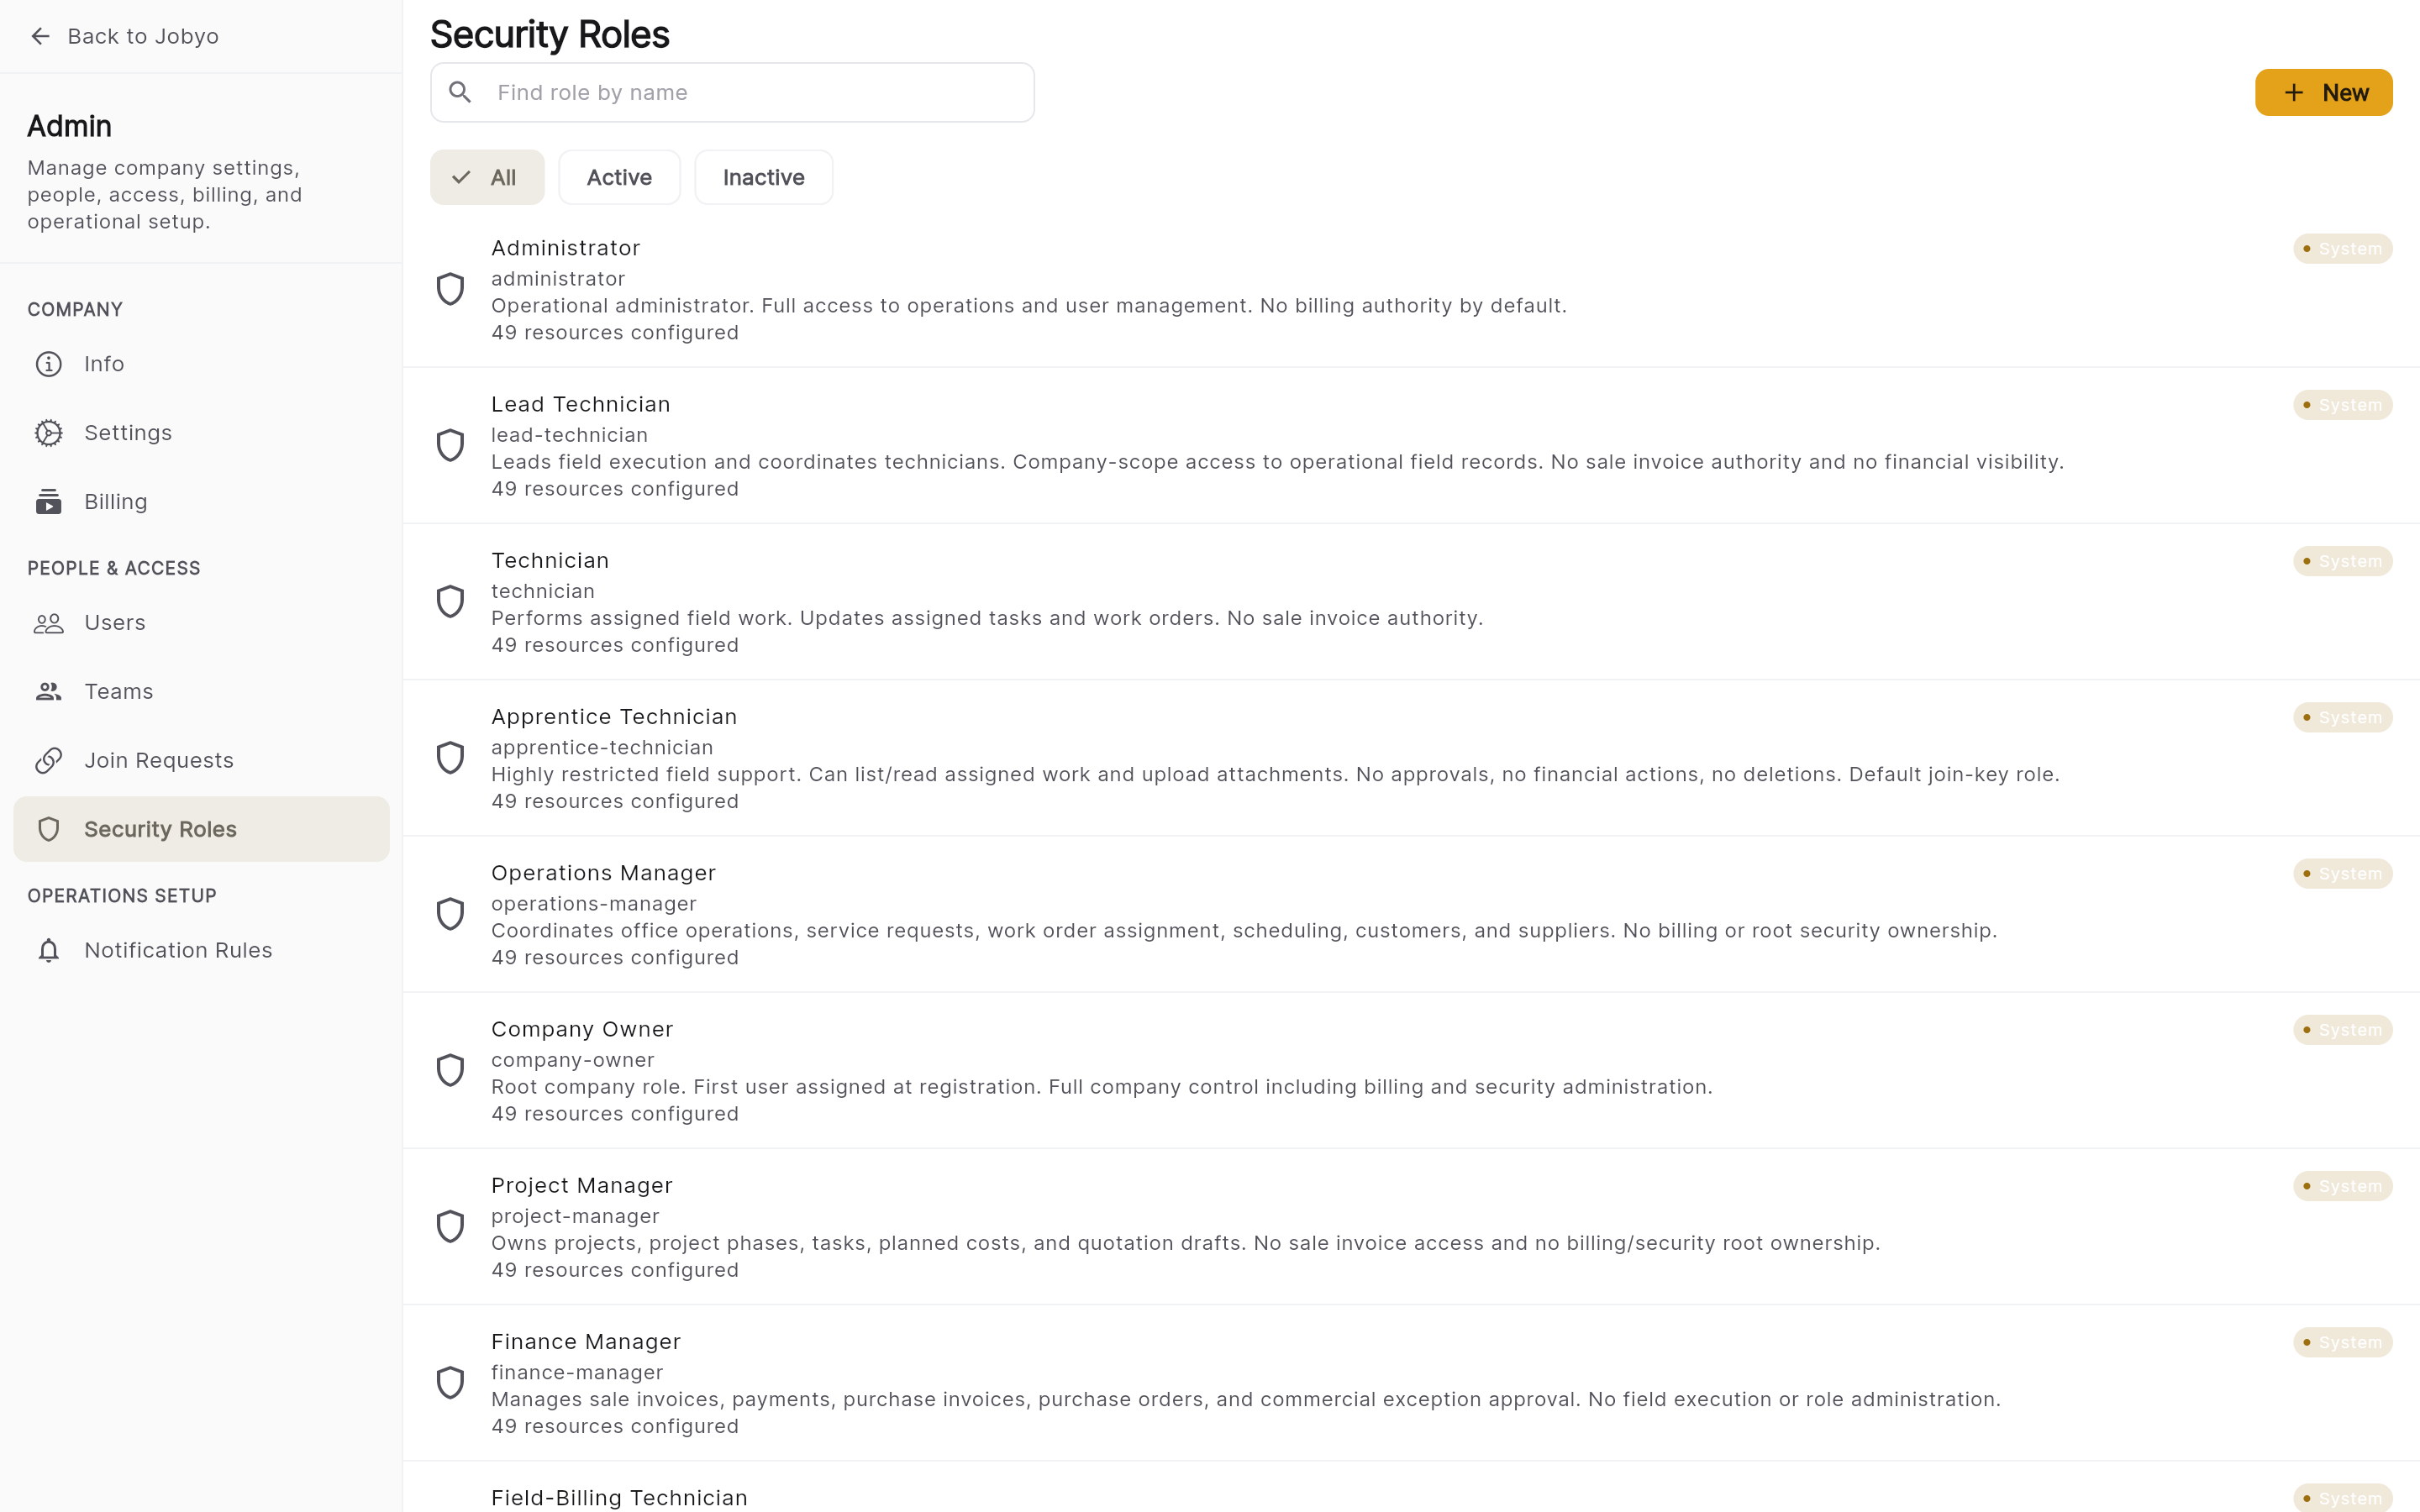
Security Roles list — System badges, Add button Open a role
Select a role to see its permission matrix: one row per resource area, one column per action, and the access level in each cell. System roles are entirely read-only here; custom roles have editable dropdowns.
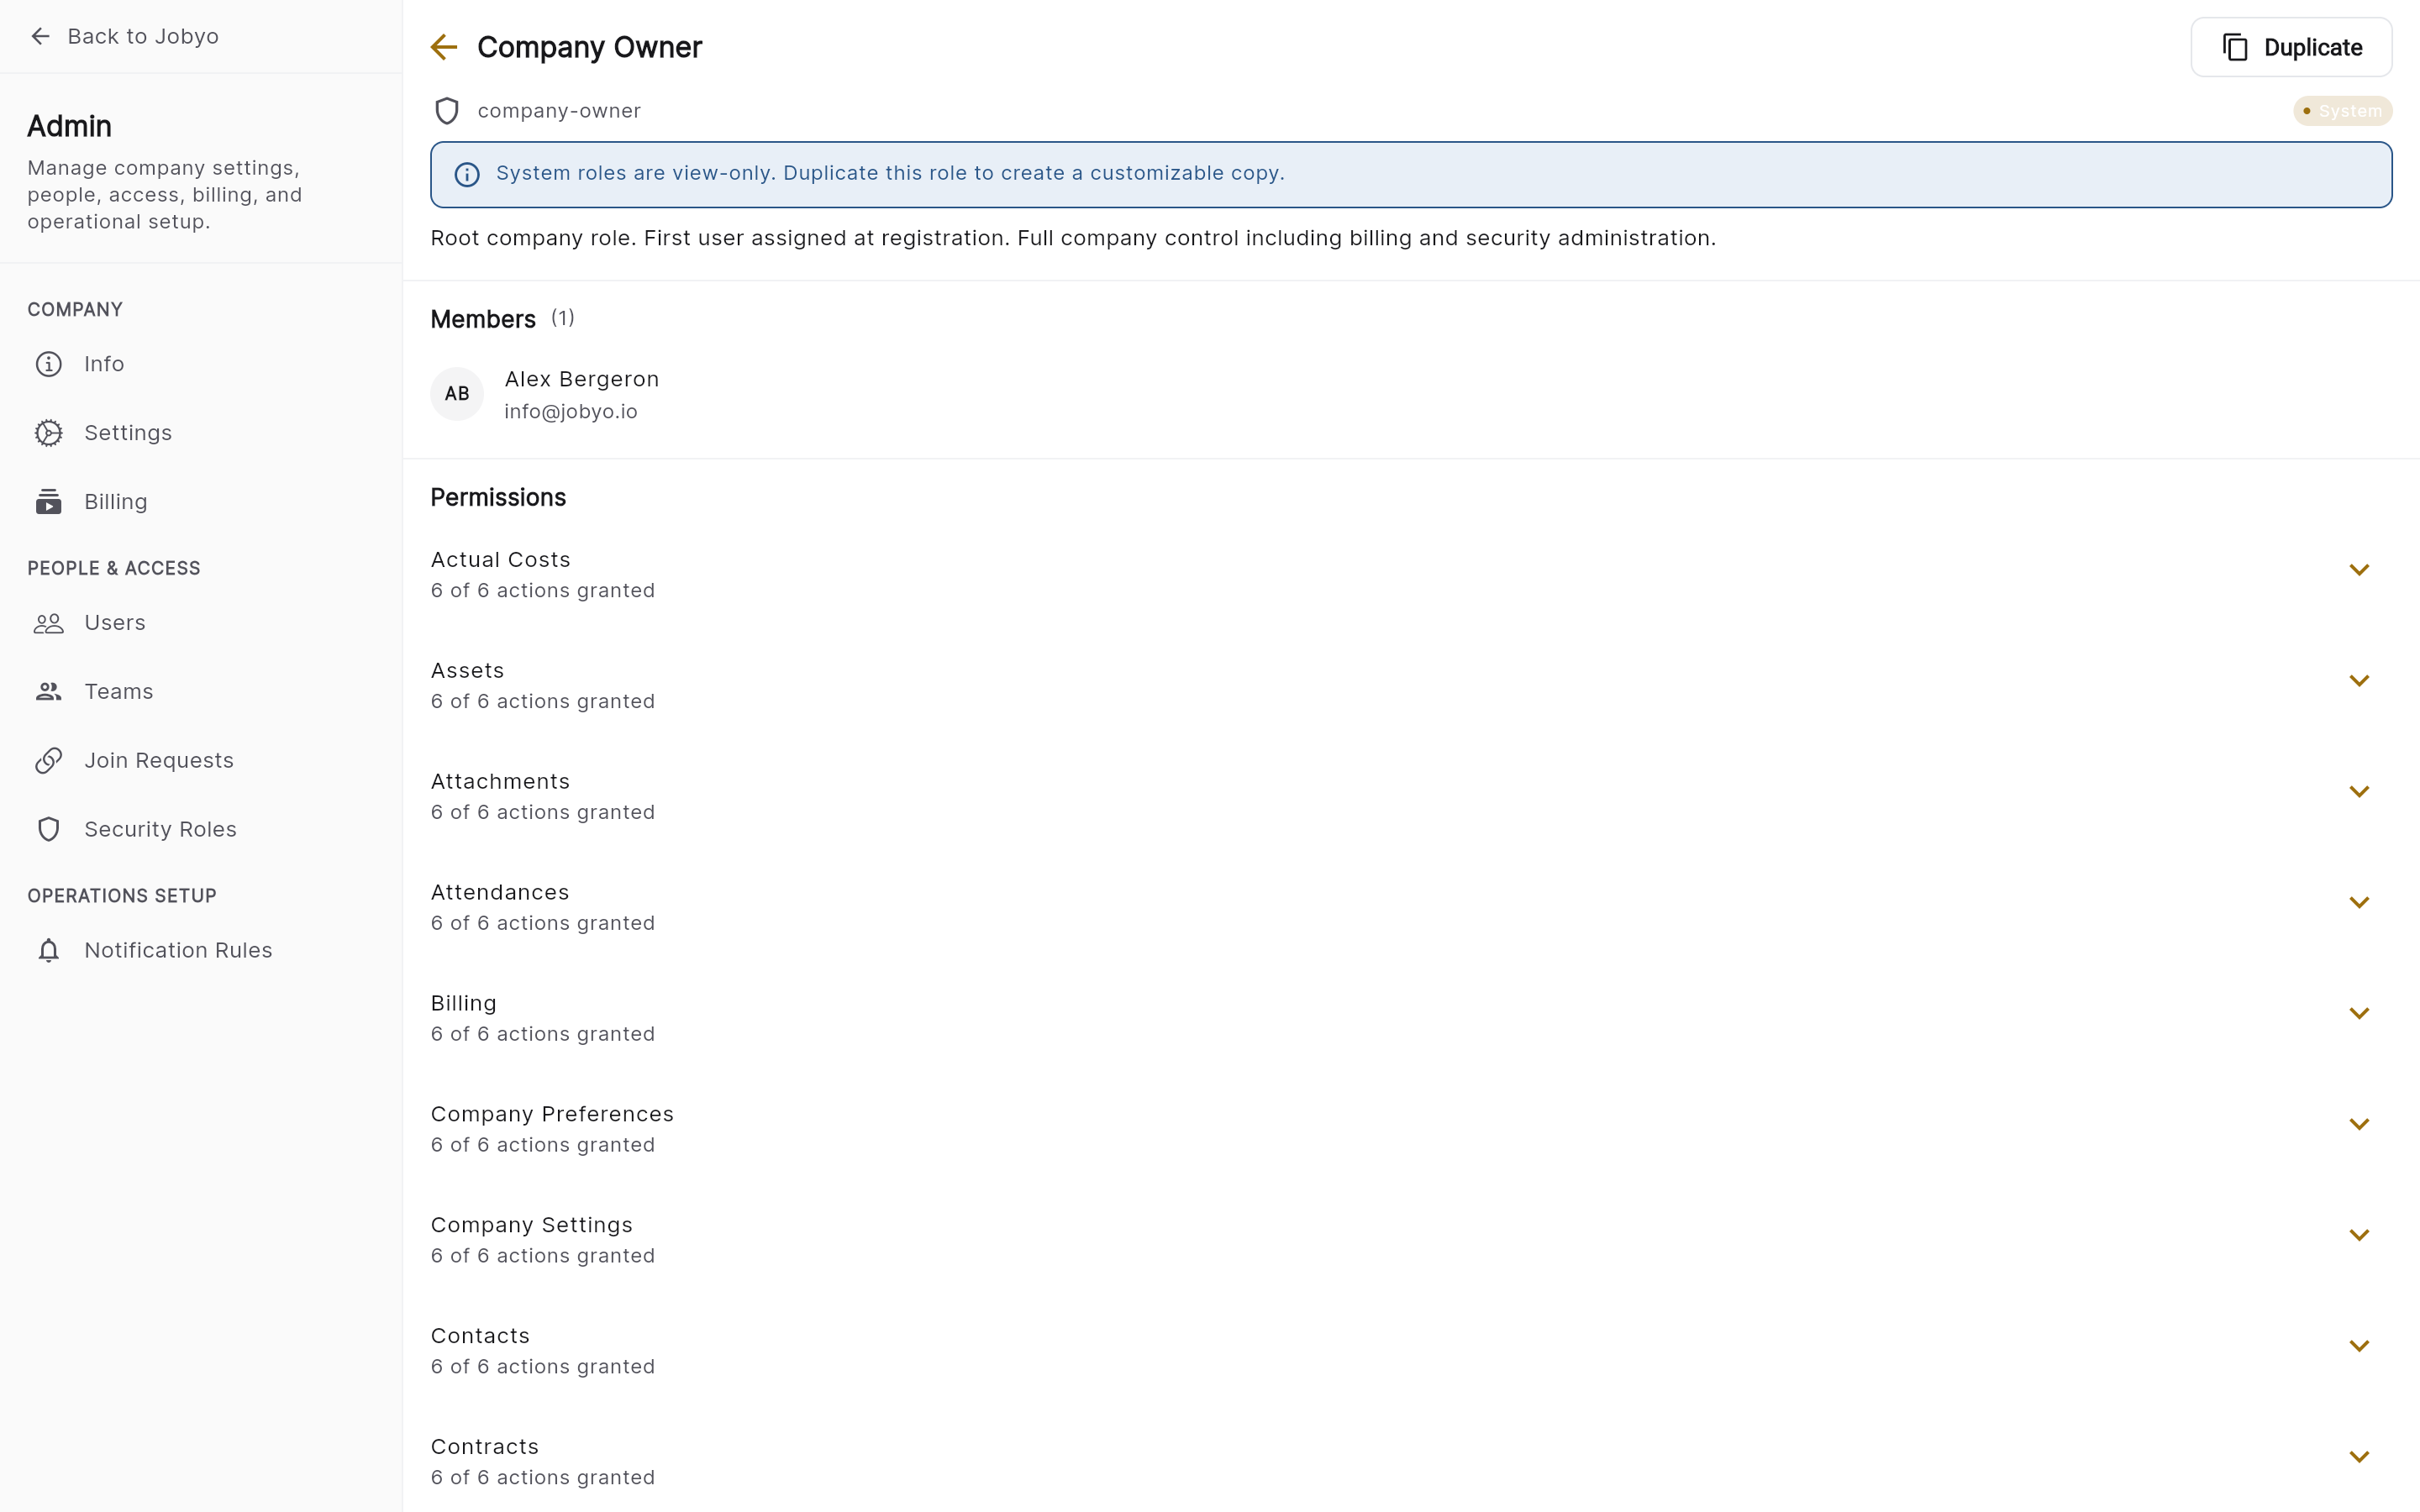
Role detail — permission matrix (resource rows, action columns)
Create a custom role
Add a role
From the Security Roles list, select Add. You need the create permission (Administrator or Company Owner).
Name and describe it
Enter a role name (required, and unique within your company) and an optional description. If the name is already in use, the form won't save.
Set the permissions
Save, and you land on the role's matrix with every cell at None. Set the access level for each resource area and action you want to grant.
If a new role is close to an existing one, duplicate it and adjust a few cells rather than building from scratch — a blank role starts with all permissions at None, so you'd otherwise set every cell by hand.
Duplicate a system role to customise it
Because system roles can't be edited, duplicating is how you base a custom role on one of them.
Open the system role and duplicate
Open the system role you want to copy (for example Technician) and select Duplicate.
Rename and save
The create form opens pre-filled with the original name and description. Give it a unique name (for example Technician — with Scheduling Access) and save. You get a new custom role with the same permissions, ready to edit. The original system role is untouched.
Edit a custom role's permissions
Open a custom role (system roles are view-only) and work in the permission matrix:
Find the cell
Locate the resource area (row) — for example Work Orders or Sale Invoices — and the action column you want to set.
Choose an access level
Tap the dropdown and pick the level: None, Company, Team, Own, or Assigned (explained below). Each change is saved on its own — there's no separate "save all" step for the matrix.
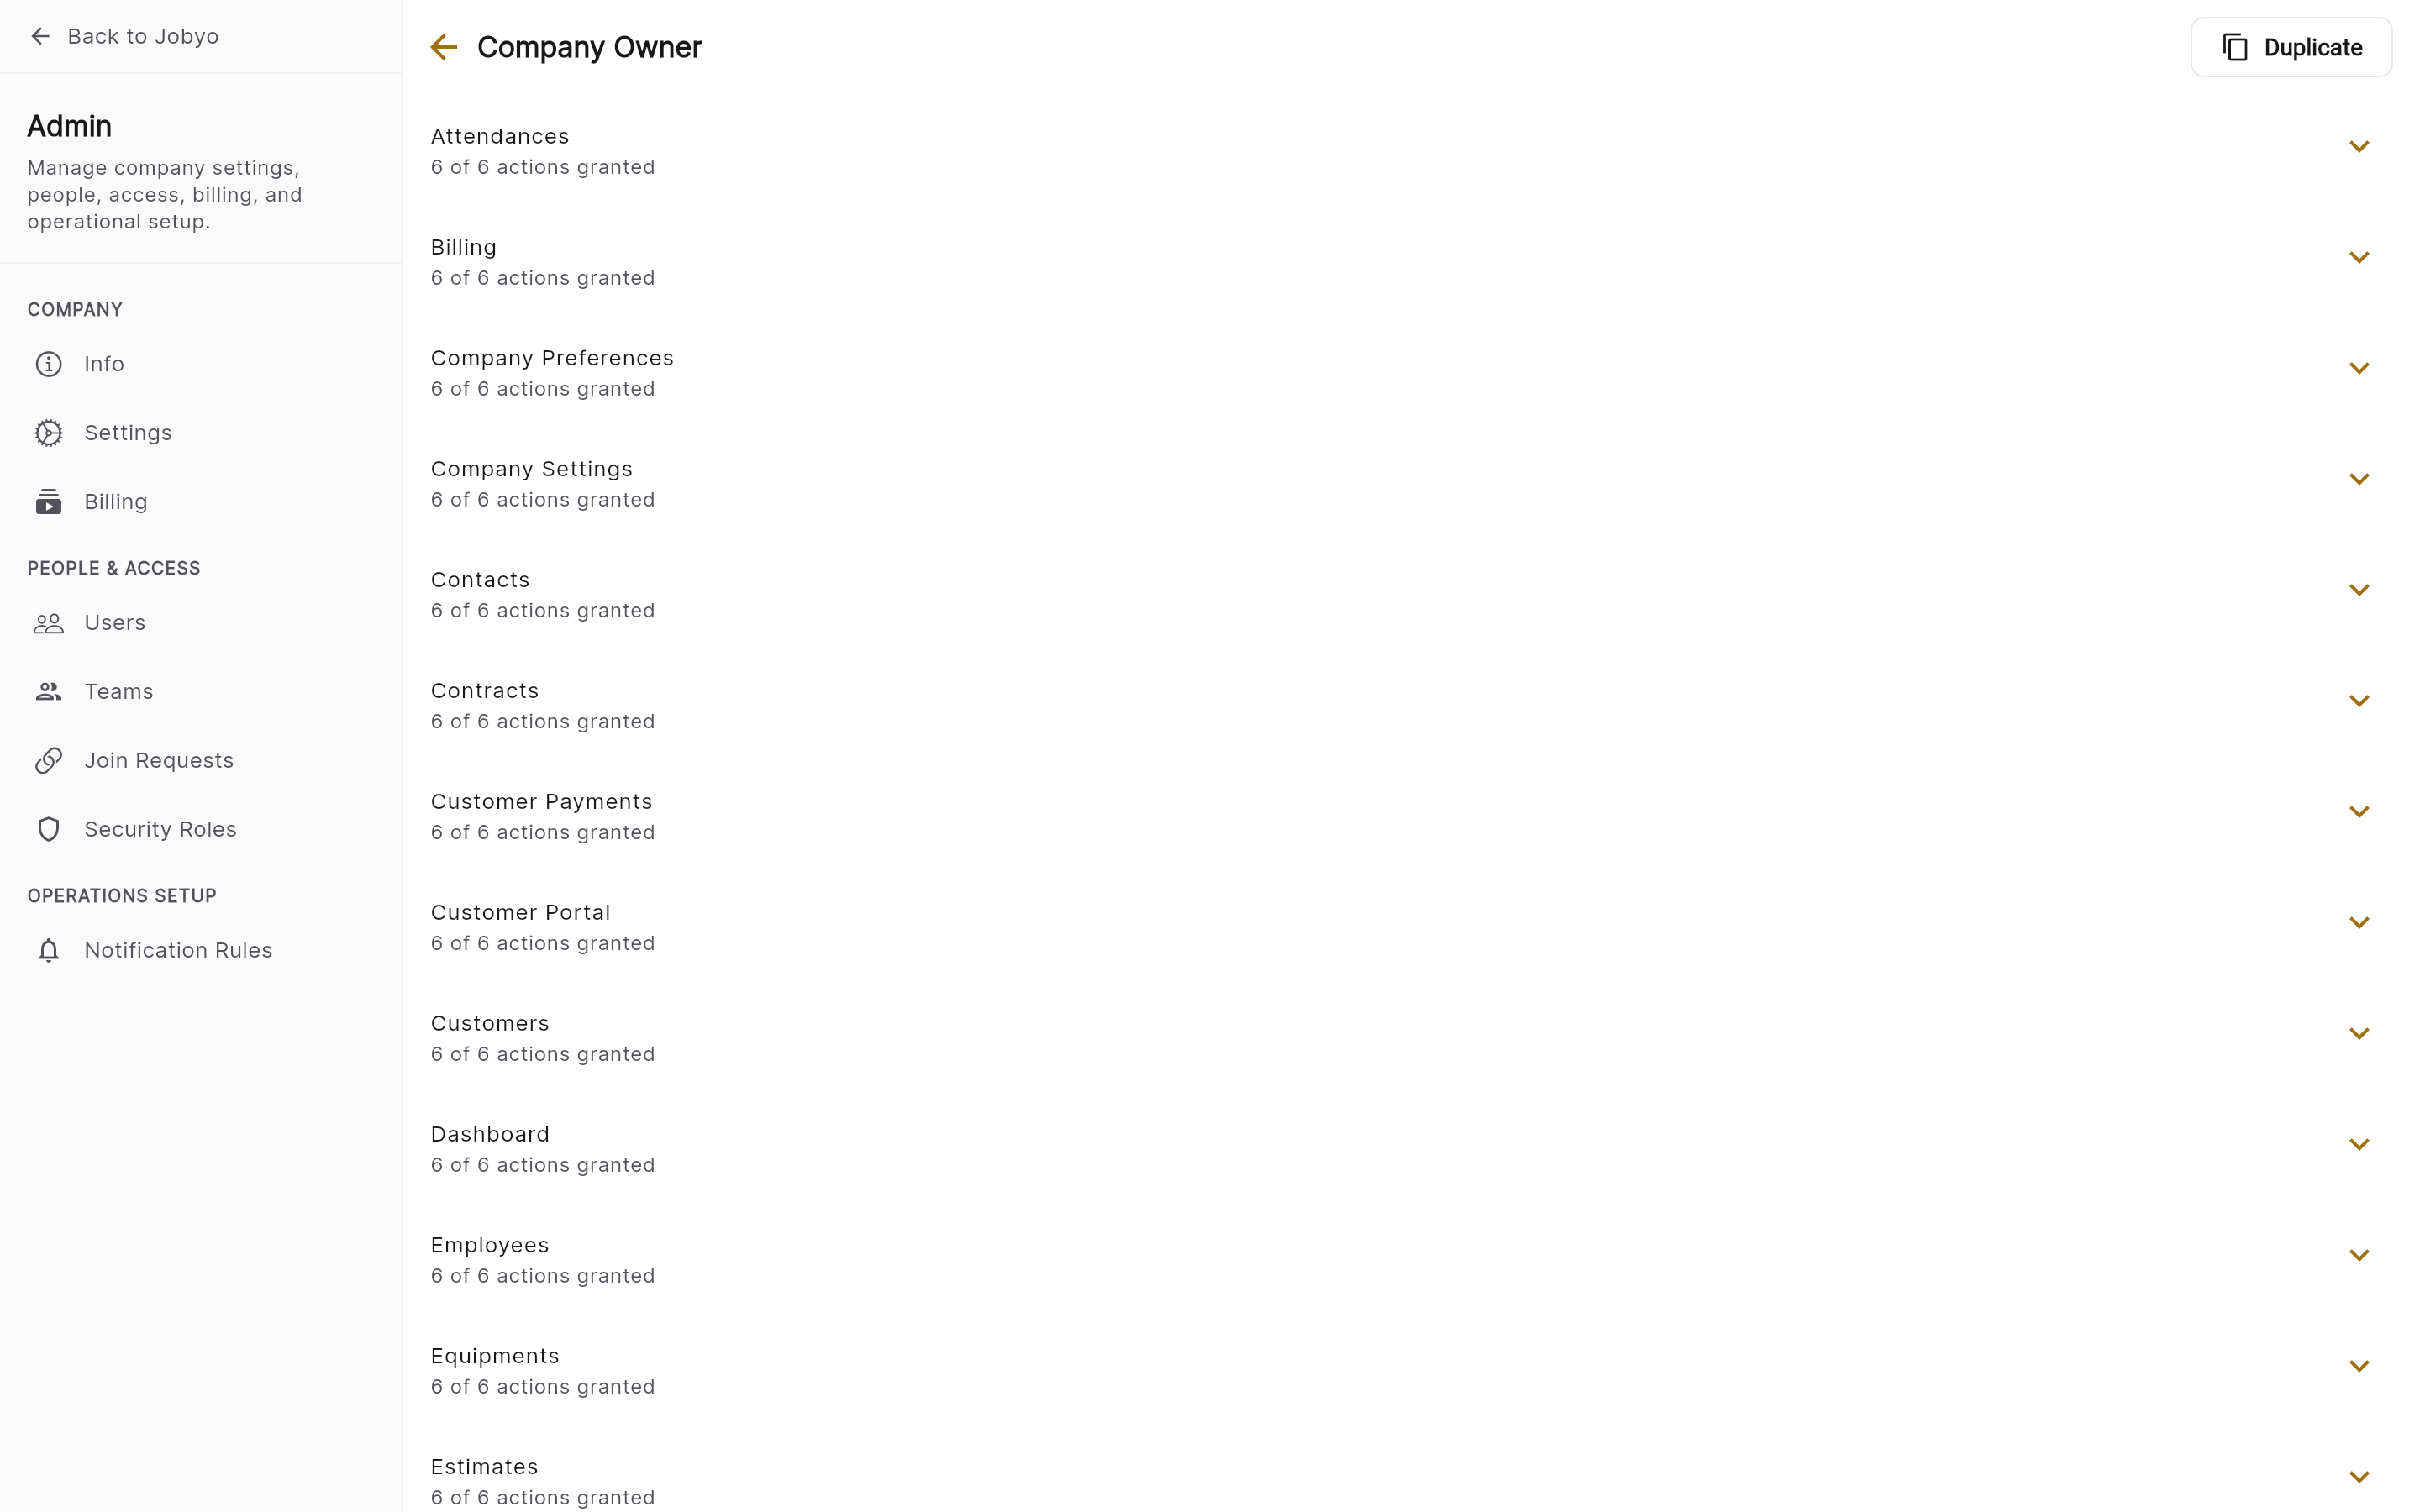
Permission matrix editor — scope-level dropdown open
To rename or re-describe a custom role, use Edit on the role detail. You cannot rename a system role — its name is permanent; duplicate it instead if you need a differently-named version.
Understanding access levels
Every cell in the matrix holds one of five access levels. Note that a higher level is not always "better" — the right level depends on the job.
| Level | What it means |
|---|---|
| None | The user can't perform this action at all, and won't see the button or option. |
| Company | The user can act on any record in the company — the broadest access. |
| Team | The user can act on records belonging to their team(s). Records from other teams are hidden. A team-scoped role with no team membership sees nothing for that area. |
| Own | The user can only act on records they created or are directly assigned to. |
| Assigned | The user can act on records where they appear as a participant — for example, a work order they're listed on, even if someone else created it. A more targeted form of Own. |
A Technician usually needs Assigned or Own on work orders so they see only their jobs; a Finance Manager usually needs Company on sale invoices to process all billing. Too wide exposes data a person doesn't need; too narrow hides records they must manage.
Understanding the actions
The matrix editor exposes six actions per resource area:
| Action | What it controls |
|---|---|
| List | Whether the user sees a list or search results. Set to None, the whole section is hidden. |
| View | Whether the user can open and read a specific record. |
| Create | Whether the user can create new records here. |
| Modify | Ordinary updates — editing fields, changing status, reassigning. |
| Remove | Deleting or cancelling records. |
| Approve | Privileged actions — approving a work order, sending an invoice, finalising a purchase order. |
There's a seventh internal action, Lookup, used for autocomplete/search behind the scenes (so, for example, a technician can pick a customer without seeing the full customer list). It's set automatically on the built-in roles and doesn't appear in the matrix editor — you can't set it on a custom role through the app.
Current limits
A few role actions aren't available in the app yet:
- No delete or archive for roles. Once created, a custom role can't be removed through the app. If it's no longer needed, reassign its users to another role and leave it unused.
- No per-user overrides. You can't yet narrow one individual below their role's ceiling. For now, assign a different role that matches what that person needs.
- Role assignment isn't on this screen. The Security Roles area manages role definitions; to give a specific person a role, edit their profile.
If it doesn't work
- No "+ New" on Team ManagementYour role doesn't include creating teams. An administrator can grant the create permission on teams.
- Can't rename or archive a teamIt's one of the three system teams (Service / Repair, Maintenance, Installation). Their names are protected and they can't be archived — edit code, description, tags, or members instead.
- Edit is unavailable on a teamThe team is archived. Restore it first, then edit.
- A user is missing from the Add member searchThey may not have an active Jobyo account yet, or their profile isn't set up. Check their account status.
- Can't see the Security Roles sectionYour role doesn't have the security permission. Ask your company owner.
- Role dropdowns are greyed outYou're viewing a system role — it's read-only. Duplicate it to get an editable copy.
- "A role with that name already exists"Role names are unique within the company. Choose a different name.