Plan a project
The Plan tab is where a project takes shape — you break it into phases, see the whole schedule on a Gantt timeline, and freeze an agreed plan as a baseline you can measure progress against later. Here's how the planning surface works.
When you'd do this
Plan a project once it exists and you're ready to structure the work: split it into stages, lay tasks out on a timeline, and — when scope and schedule are agreed — publish a baseline as a fixed reference point. You return to the Plan tab whenever the shape of the work changes.
For creating the project itself, see Projects overview. For the money side — budget, spend, and variance — see Project budget and Project costs.
What you'll need
- Permission to view projects to open the Plan tab and read the timeline, baseline history, and changelog.
- Permission to modify projects to publish a baseline (baseline publish uses the project-edit permission).
- Permission to create / modify project phases to add, edit, or reorder phases. Deleting a phase needs administrator permission.
The Plan tab
Open a project and select the Plan tab. It shows the schedule as a Gantt timeline built from the project's phases and the tasks planned under them.
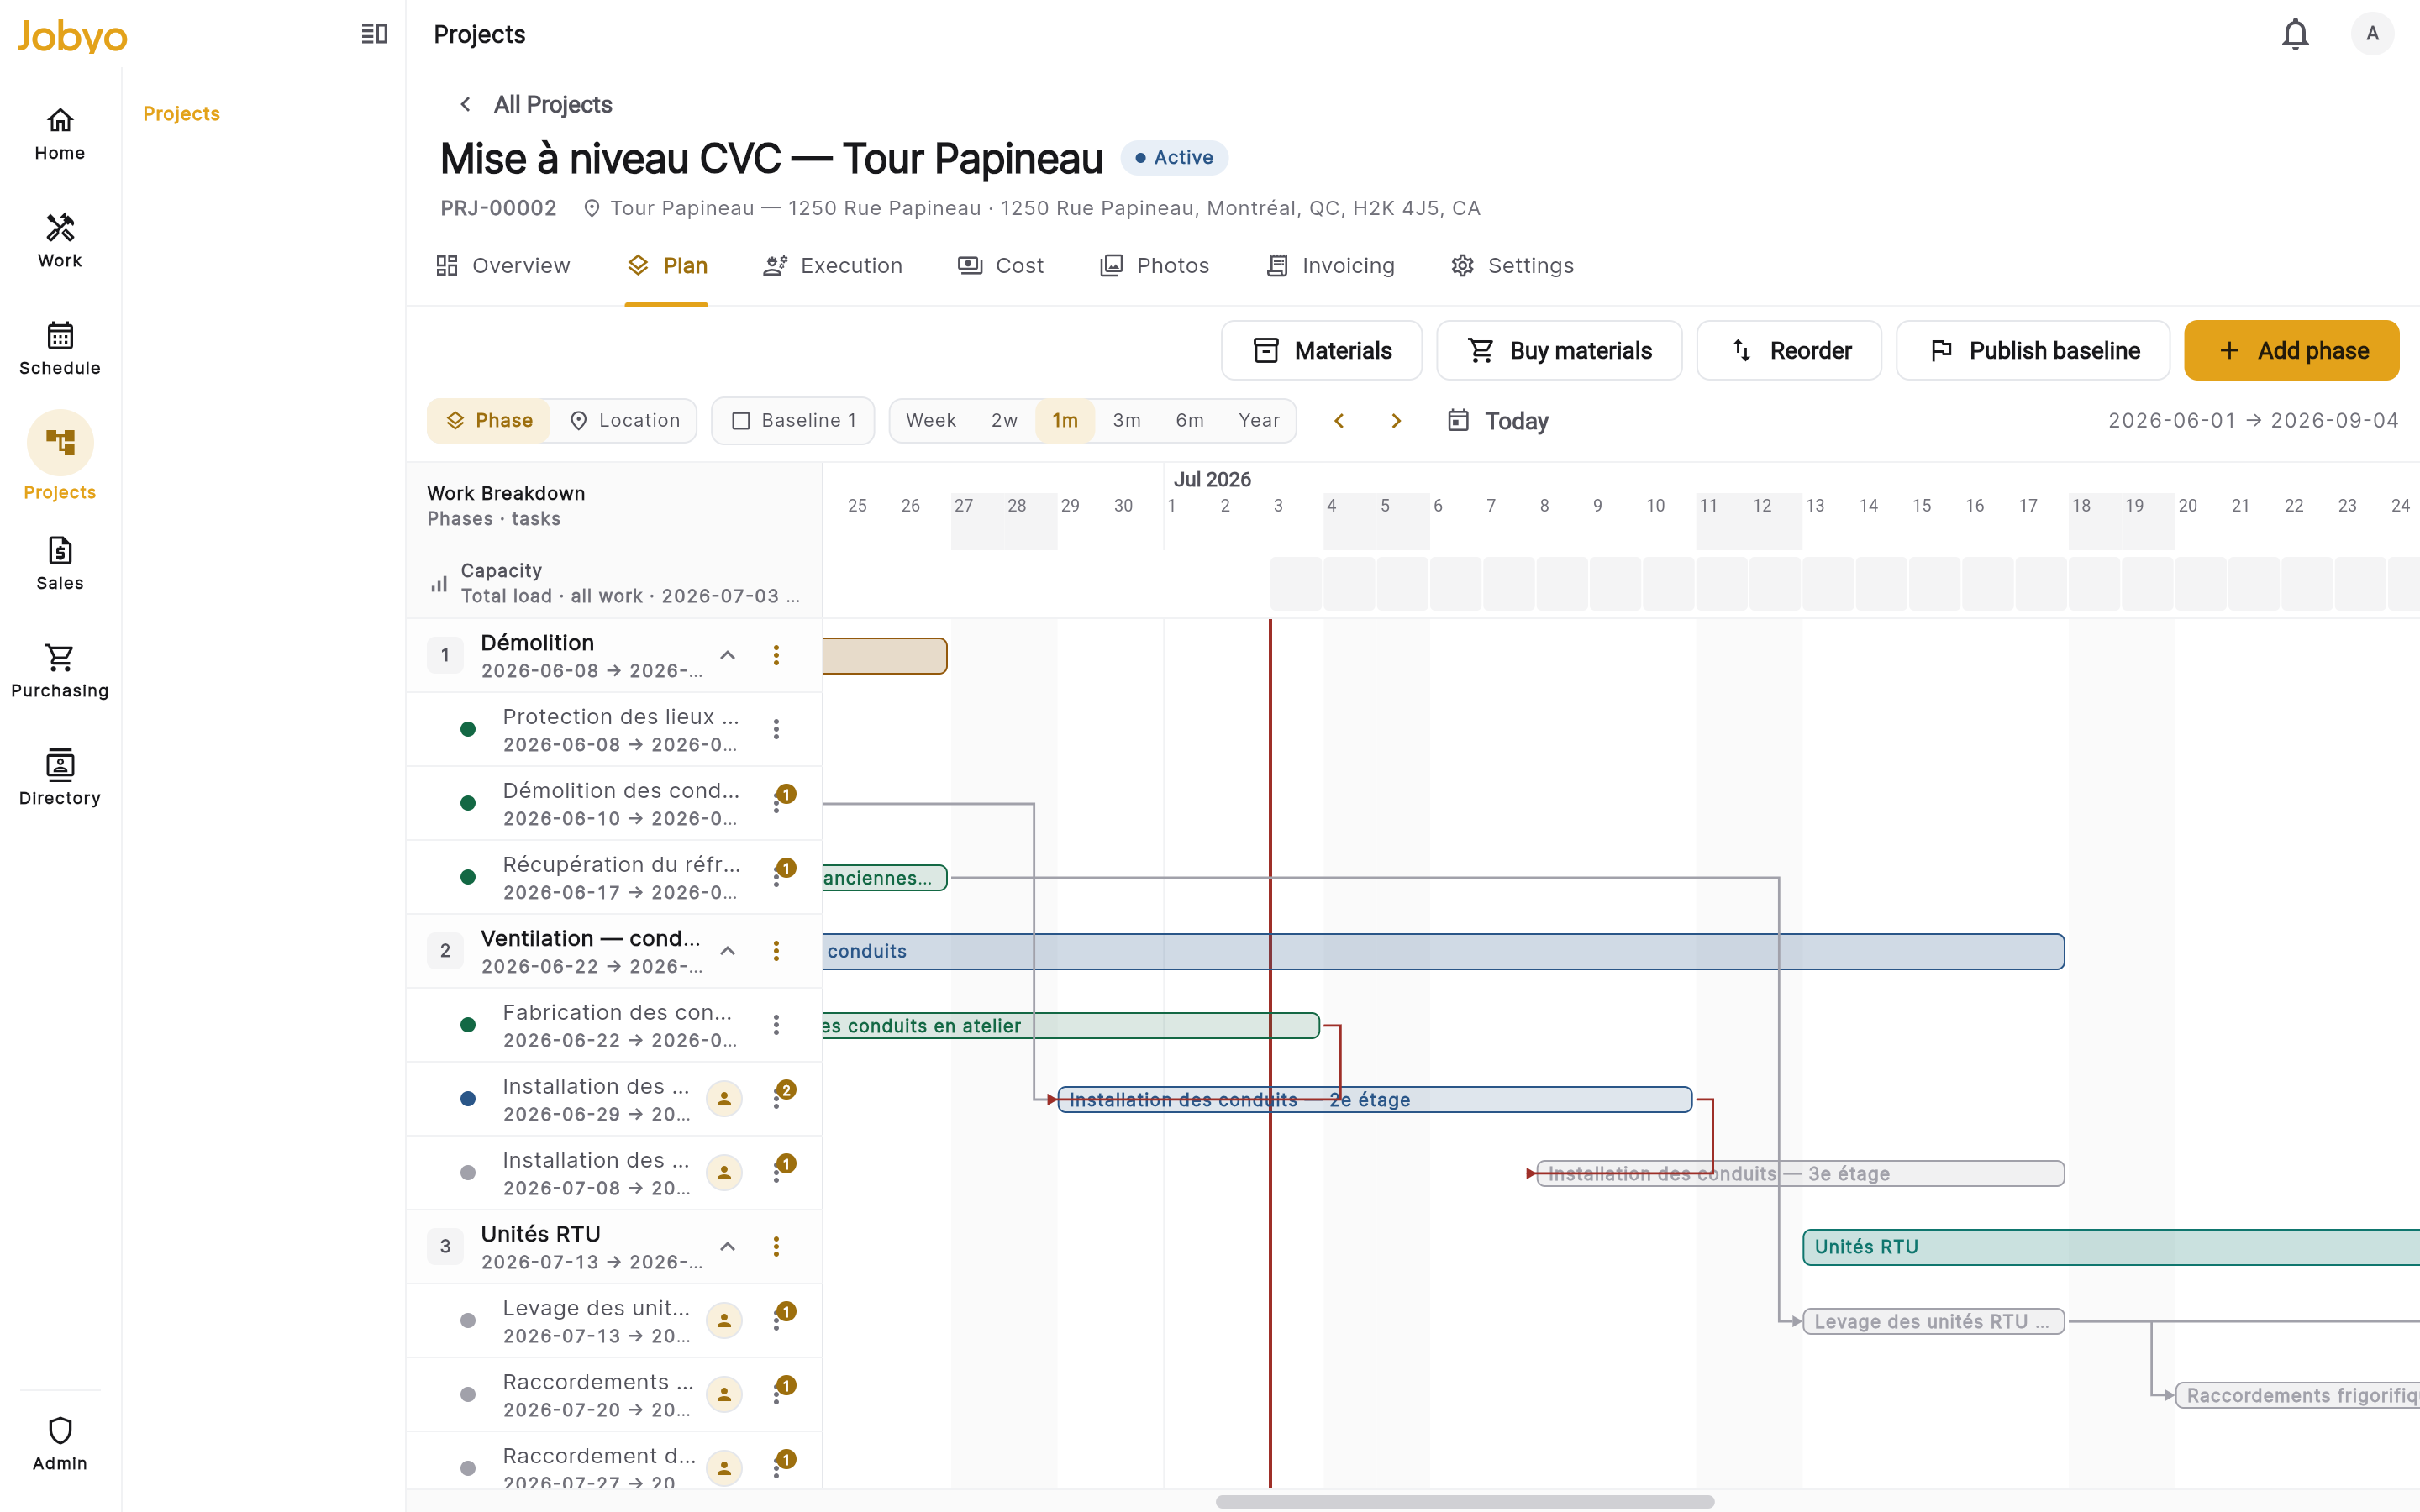
On the timeline you'll see:
- Phase rows — each phase as a band across the timeline, ordered by its display position.
- Task bars — the tasks planned under the project, drawn against their scheduled dates.
- Dependency arrows — finish-to-start links between tasks, showing what has to happen before what.
- A capacity lane — an at-a-glance view of scheduling load across the timeline.
The Plan tab isn't read-only: use the + on a phase to add a task straight into it (the task opens in a side panel with the phase already set), tap a task bar to edit it, use a task's menu to assign it, add a subtask, or set dependencies, and drag a bar to reschedule. Tasks open the full task form to edit their fields — see Tasks.
Add a phase
Phases split a project into stages — for example Phase 1: Foundation, Phase 2: Framing, Phase 3: Fit-out. Tasks can then be assigned to a phase so the timeline groups them.
Open the Plan tab and add a phase
From the project workspace, open the Plan tab and select Add phase (the add control in the phases section). If you don't see it, your role doesn't include creating phases — ask an administrator.
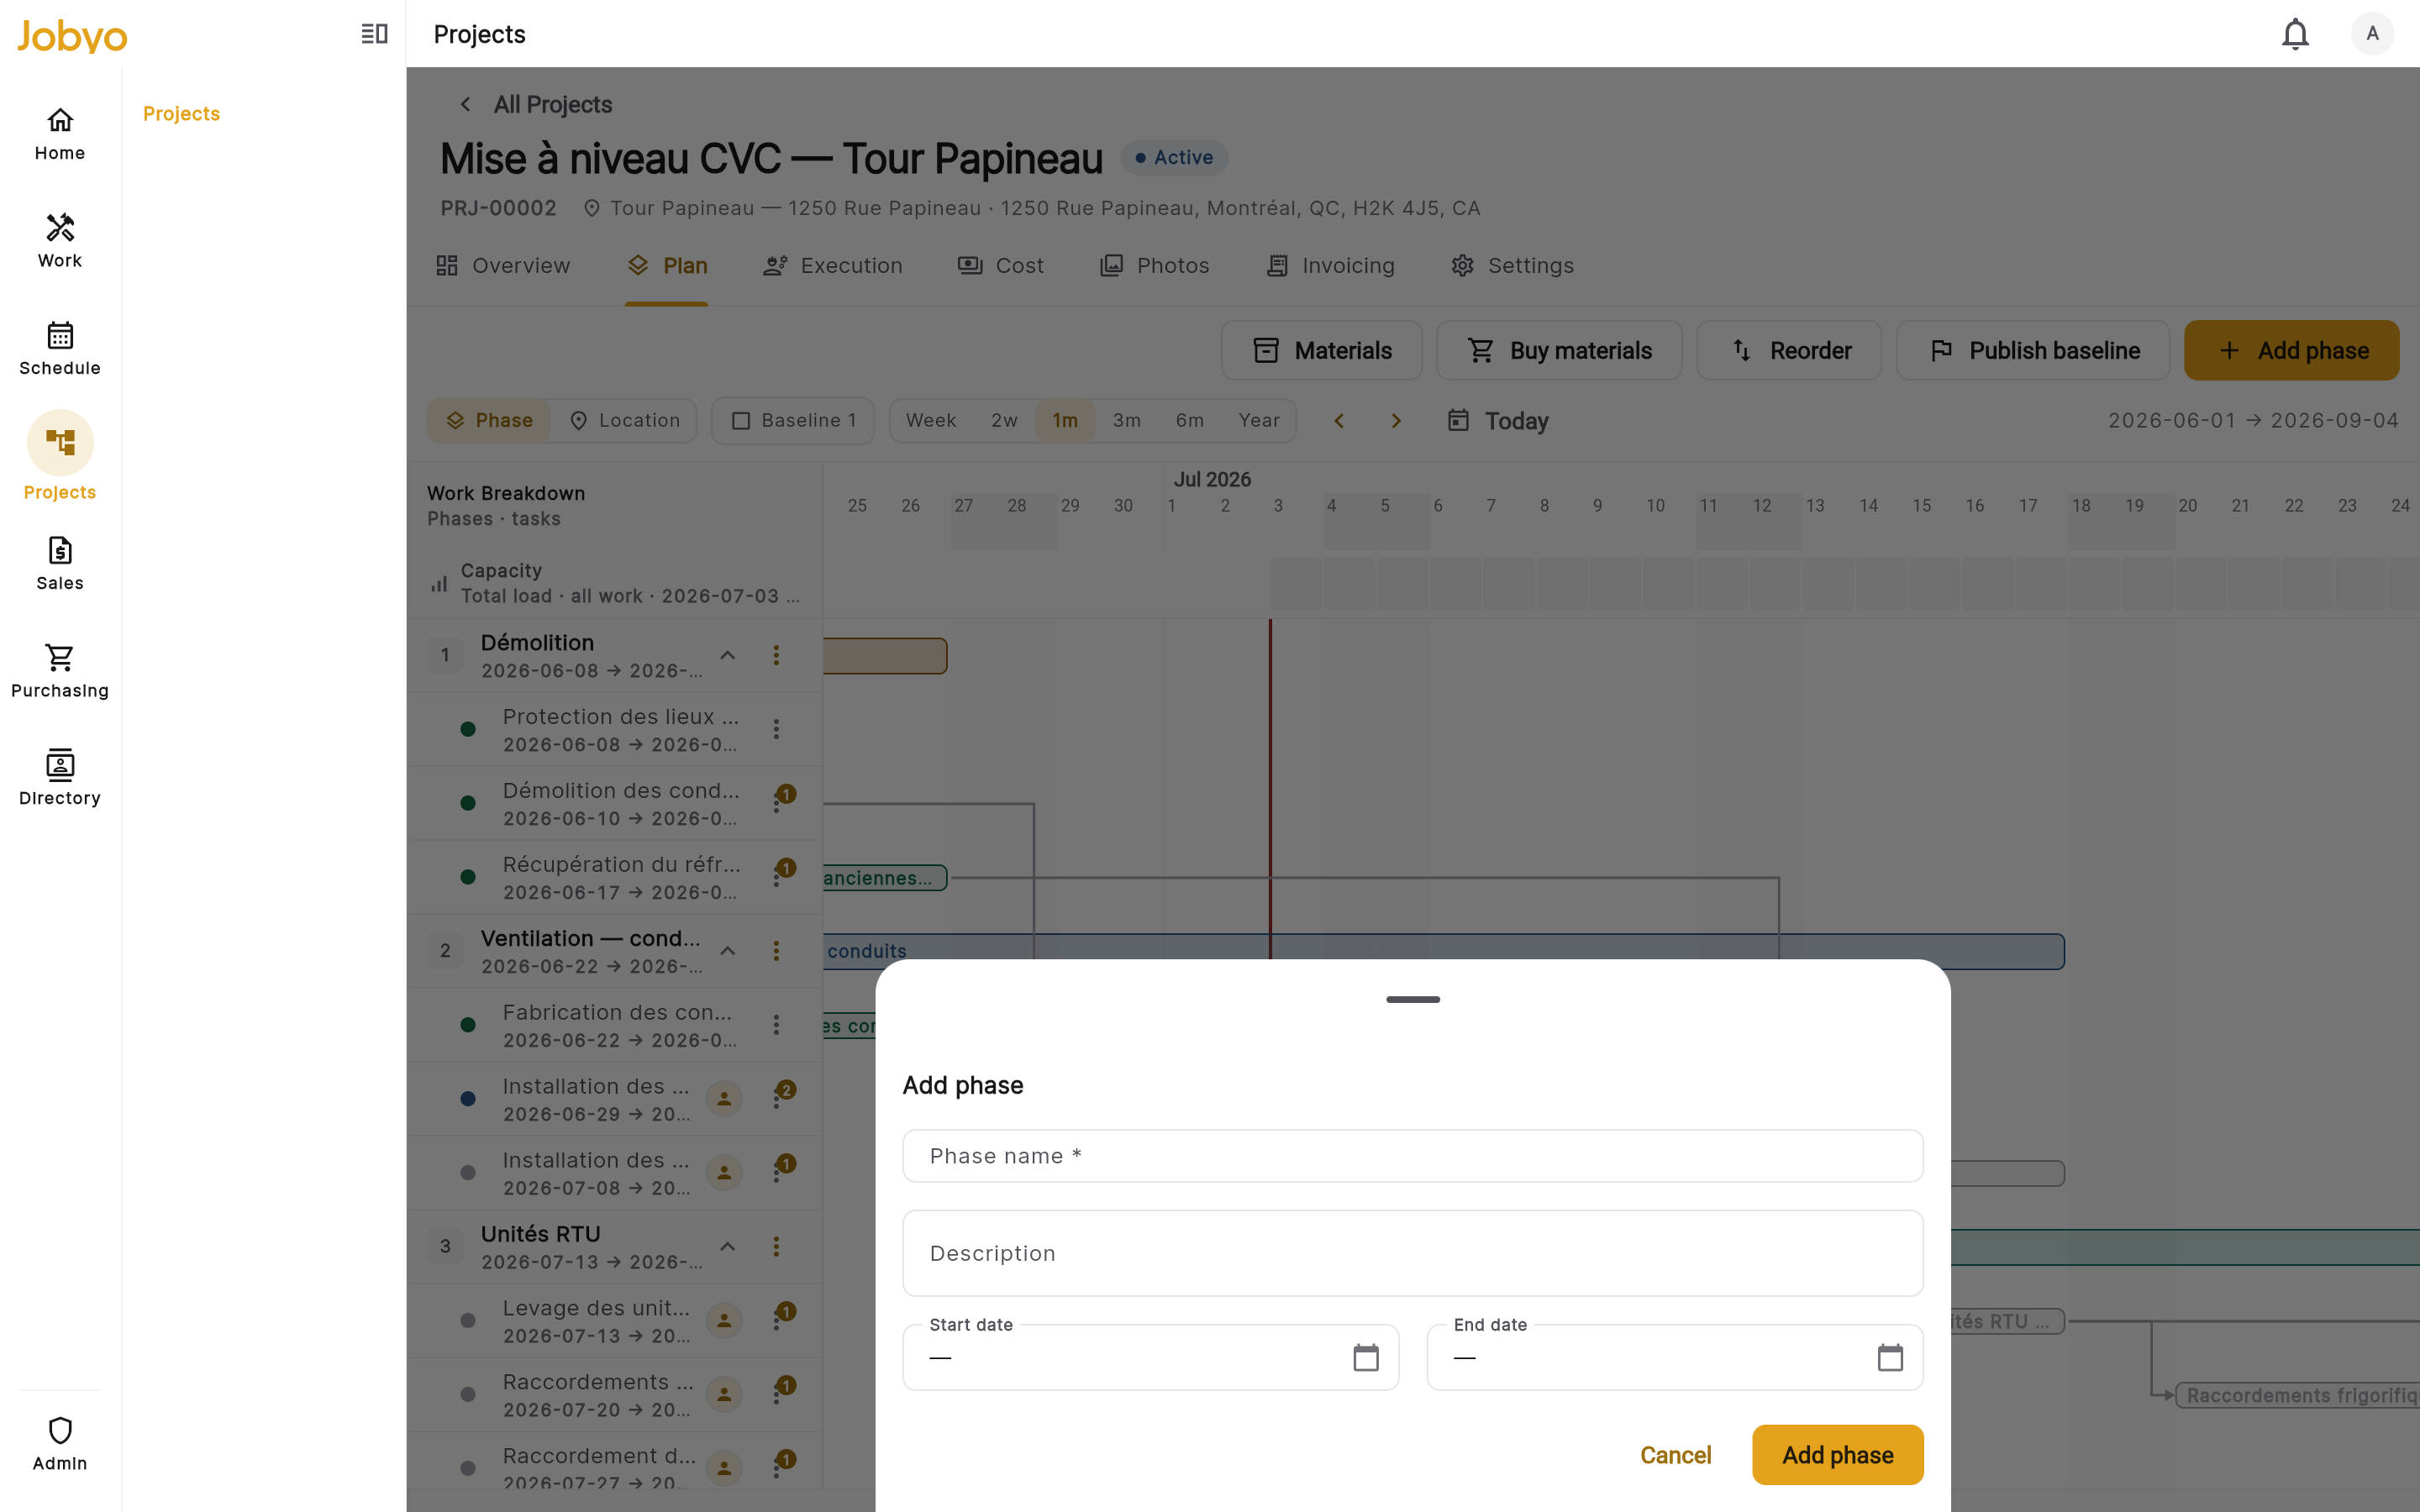
Plan tab — Add phase form Fill in the phase
Only the phase name is required. Optionally add a description, a start and end date, and a location — a location node within the worksite, if relevant.
Save
Save the phase. It appears on the Plan tab, and tasks can now be assigned to it.
Jobyo validates that phase dates are real dates but does not enforce that the start falls before the end — so a reversed range won't be blocked. Double-check start and end yourself.
Edit and reorder phases
- Edit — select a phase on the Plan tab and choose Edit to change its name, description, dates, or location.
- Reorder — press and hold a phase and drag it up or down. Each position change saves automatically, and the new order shows for everyone viewing the project.
Both actions need the modify project phases permission.
Delete a phase
Project managers can add, edit, and reorder phases but cannot delete them — that needs administrator permission.
Open the Plan tab, select the phase, choose Delete, and confirm. Deletion is blocked while the phase still has open work orders or posted cost records — resolve those first.
Publish a baseline
A baseline is a permanent, immutable snapshot of the plan at a moment in time. It's the fixed reference the Cost tab's variance report compares actual spend against. Once published, a baseline can't be edited or deleted — if the plan changes, you publish a new version with a different name, and the history keeps every version.
Open the Plan tab and start a baseline
From the Plan tab, choose Publish baseline. This needs the modify projects permission.
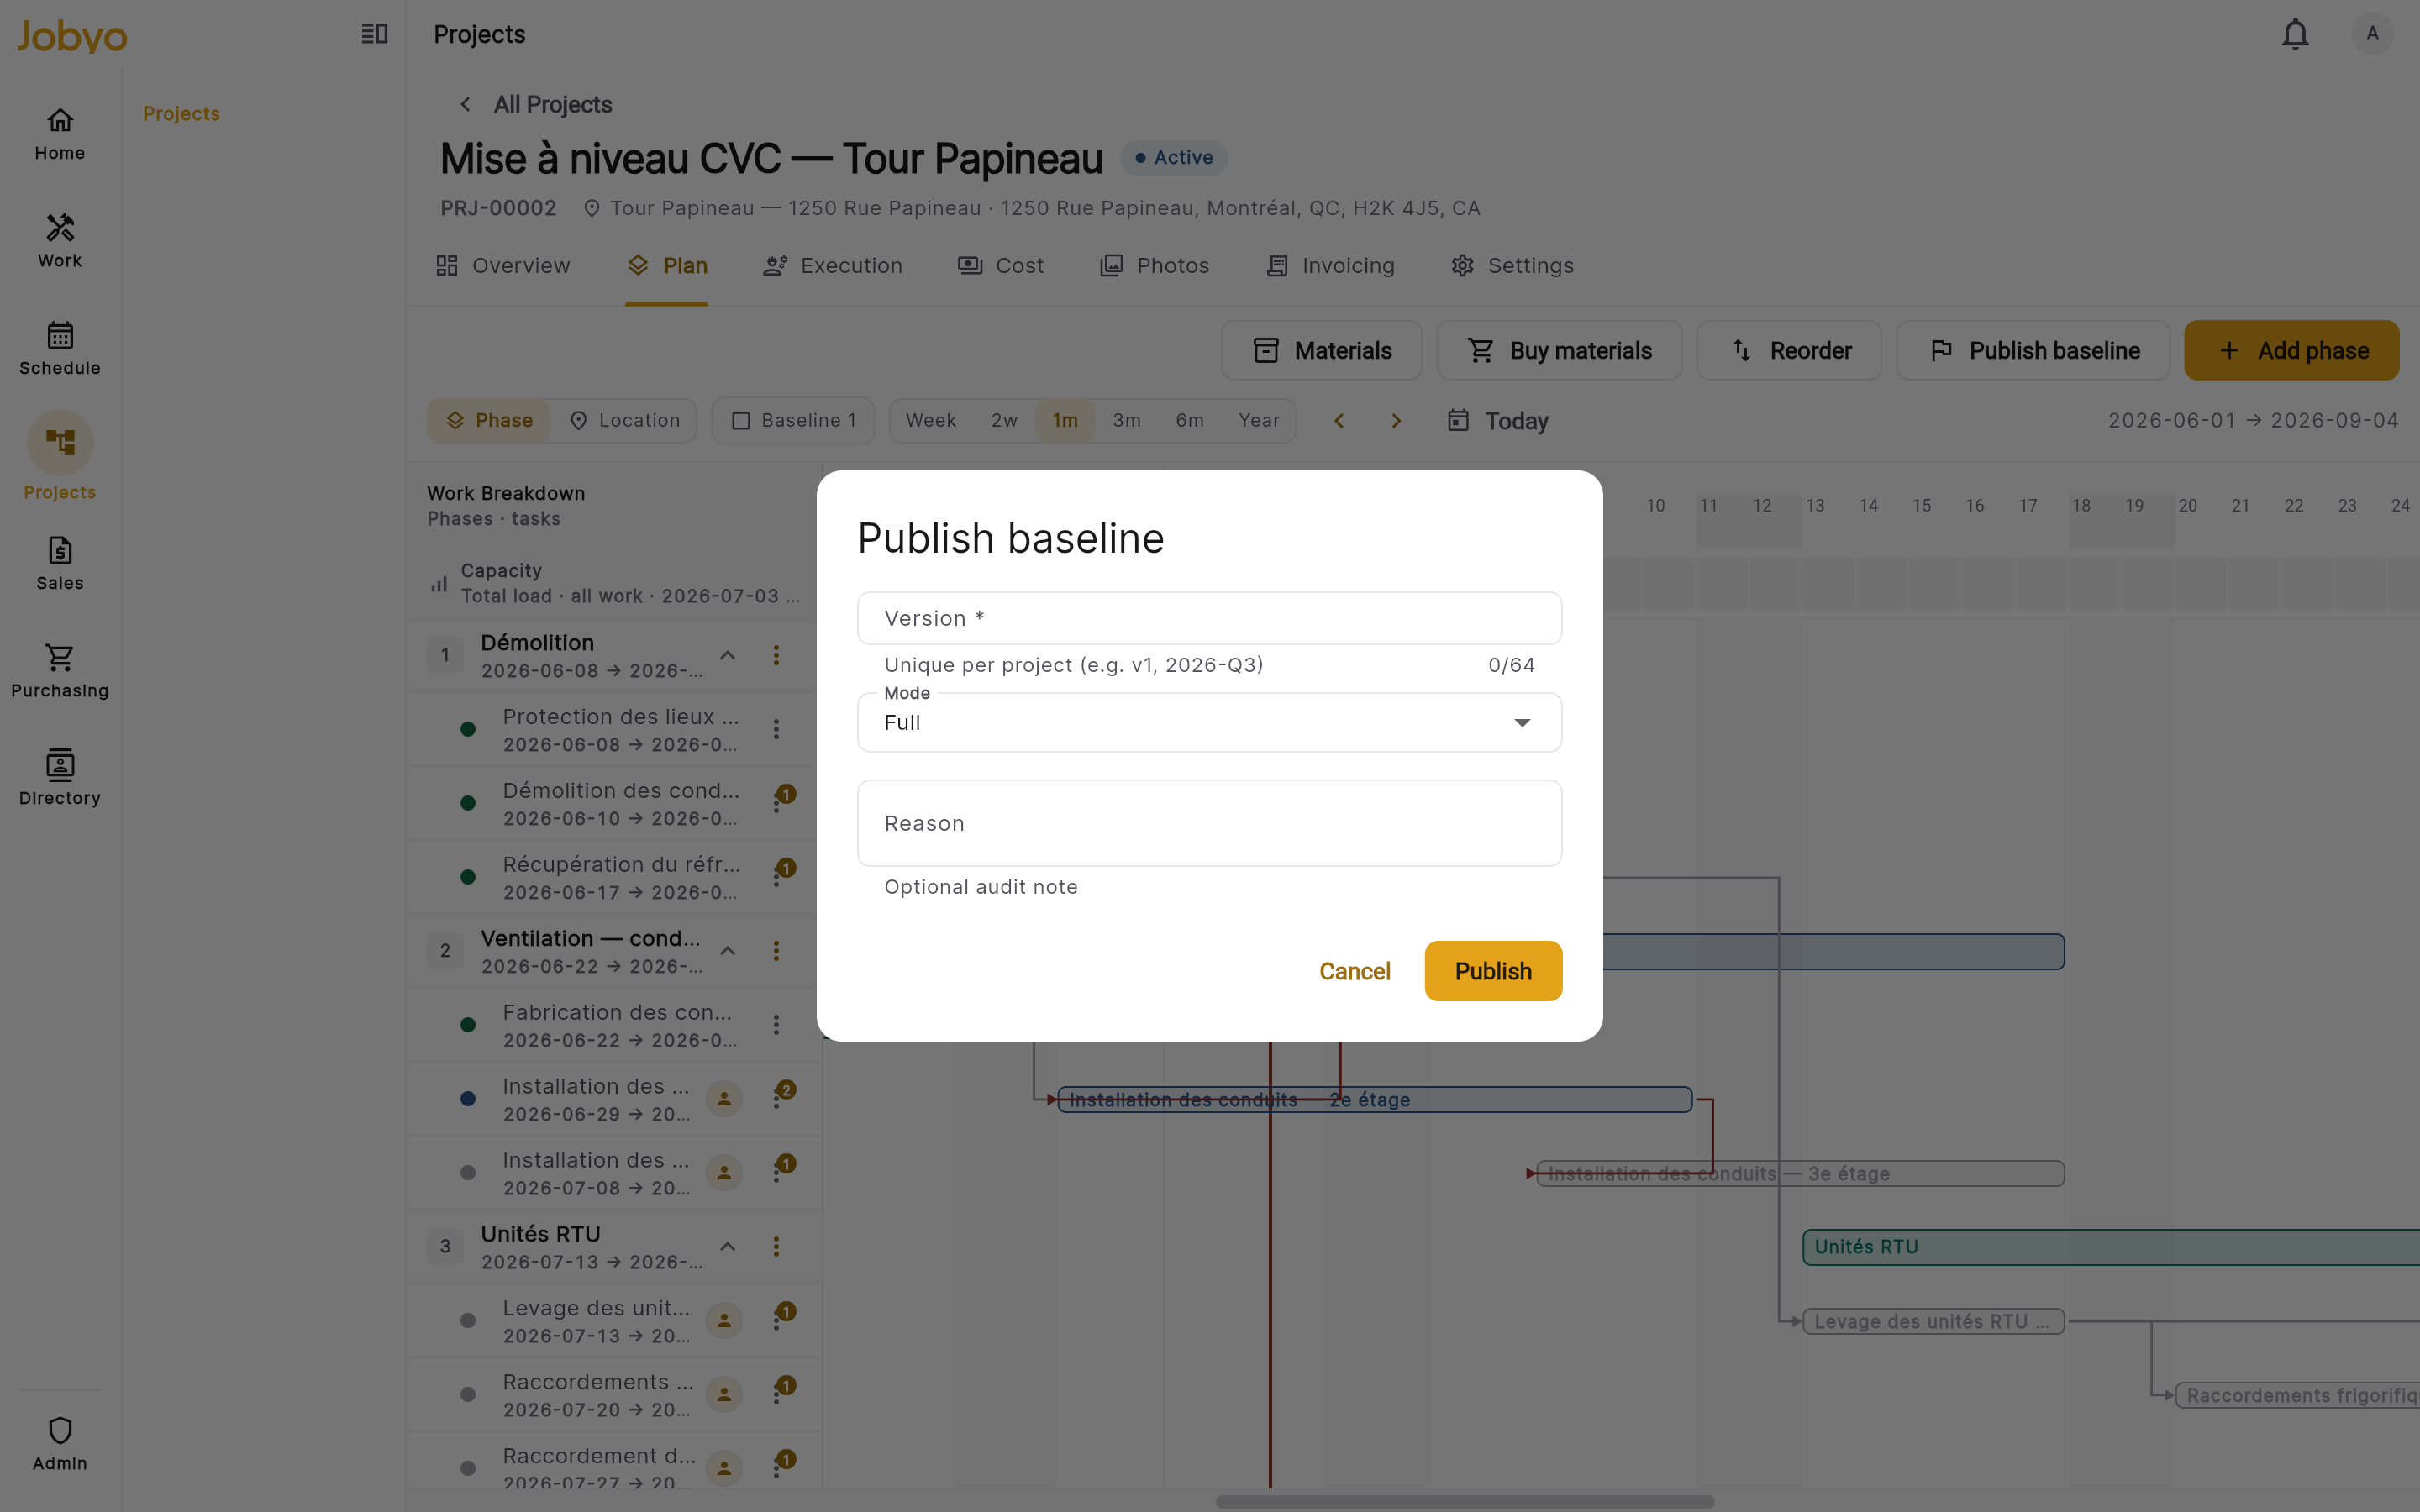
Publish baseline dialog — version, snapshot mode, reason Name the version
Enter a version name — a short, unique label such as
v1,Approved-2026-06, orPost-change-order-2. It's required, must be 64 characters or fewer, and must be unique on this project (you can't reuse a version name).Choose a snapshot mode (optional)
Pick what the baseline captures: Full (the default — both schedule and cost), Cost only, or Dates only.
Add a reason (optional) and publish
Optionally add a reason — an audit note explaining why you're publishing. Then publish. Jobyo writes the baseline, adds a changelog entry, and freezes the planned-cost figures for that version, all in one atomic step.
Once published, a baseline is locked for good — there's no edit and no delete. To correct a mistake, publish a new version with a different name.
Baseline history and the changelog
- Baseline history — the Plan tab lists every published baseline, newest first, each showing its version name, snapshot mode, publish date, and optional reason. Select an entry to see its snapshot.
- Changelog — the project's Activity tab shows the append-only baseline changelog. Nothing is ever edited or removed from it.
Publishing a baseline is what makes the Planned vs actual variance report available on the Cost tab. Without at least one baseline, there's nothing to compare actual spend against. See Project costs.
From a quotation? Plan it manually for now
Jobyo's back end can build a draft project straight from an accepted quotation — seeding the budget and planned-cost lines from the quote — but there's no button for it in the current release. The Quotation field on the project form is a reference label only; it doesn't pull scope or cost across. For now, create the project manually, enter the quotation number for the link, and plan the phases and baseline yourself. See Quotations.
If it doesn't work
- No "Add phase" buttonYour role doesn't include creating phases. An administrator can grant it under Users & roles.
- Can't delete a phaseDeleting phases is administrator-only. Project managers can add, edit, and reorder but not delete.
- "This phase has open work orders"Close or cancel the work orders under the phase first, then delete it.
- "This phase has posted cost records"Cost has been posted against the phase. Resolve the posted costs before removing it.
- "This version name already exists"Baseline version names are unique per project. Choose a different name.
- "Baseline is invalid"Check the version name is not empty and is 64 characters or fewer.
- No "Publish baseline" buttonYour role doesn't include editing projects, which baseline publish requires. Ask an administrator.