Manage worksites
A worksite is a service address — the physical place where your team carries out work. Work orders, tasks, contracts, and invoices all reference a worksite to say where the job is. Inside each site you can build a location tree (building → floor → area → room → zone) and see the equipment installed there. Here's how to create and run them.
Who uses this
Worksites is mostly a back-office surface. Operations and coordinators create and maintain sites and build their location trees; administrators handle the lifecycle — approving drafts, deactivating, and archiving. Technicians don't manage the directory, but they do meet worksites in two ways: scanning a QR/barcode to open the right site, and quick-adding a site from a job when the address isn't in the system yet.
What you'll need
- Permission to list and view worksites to browse the directory, and create or modify to add or change sites. Archiving needs the remove permission, and approving/rejecting drafts needs approve — these are separate from edit.
- A site name for every worksite. This is the only required field.
- A customer to make a site live. A site can be created without one (it stays a draft), but it can't be activated until a customer is attached.
Location nodes have their own permission set (list · view · create · modify · remove · approve), and viewing equipment details uses the separate equipment permission.
Browse and search
Open the worksite list
Select Worksites from the main menu. Each site shows its name, customer, city, and a status badge.
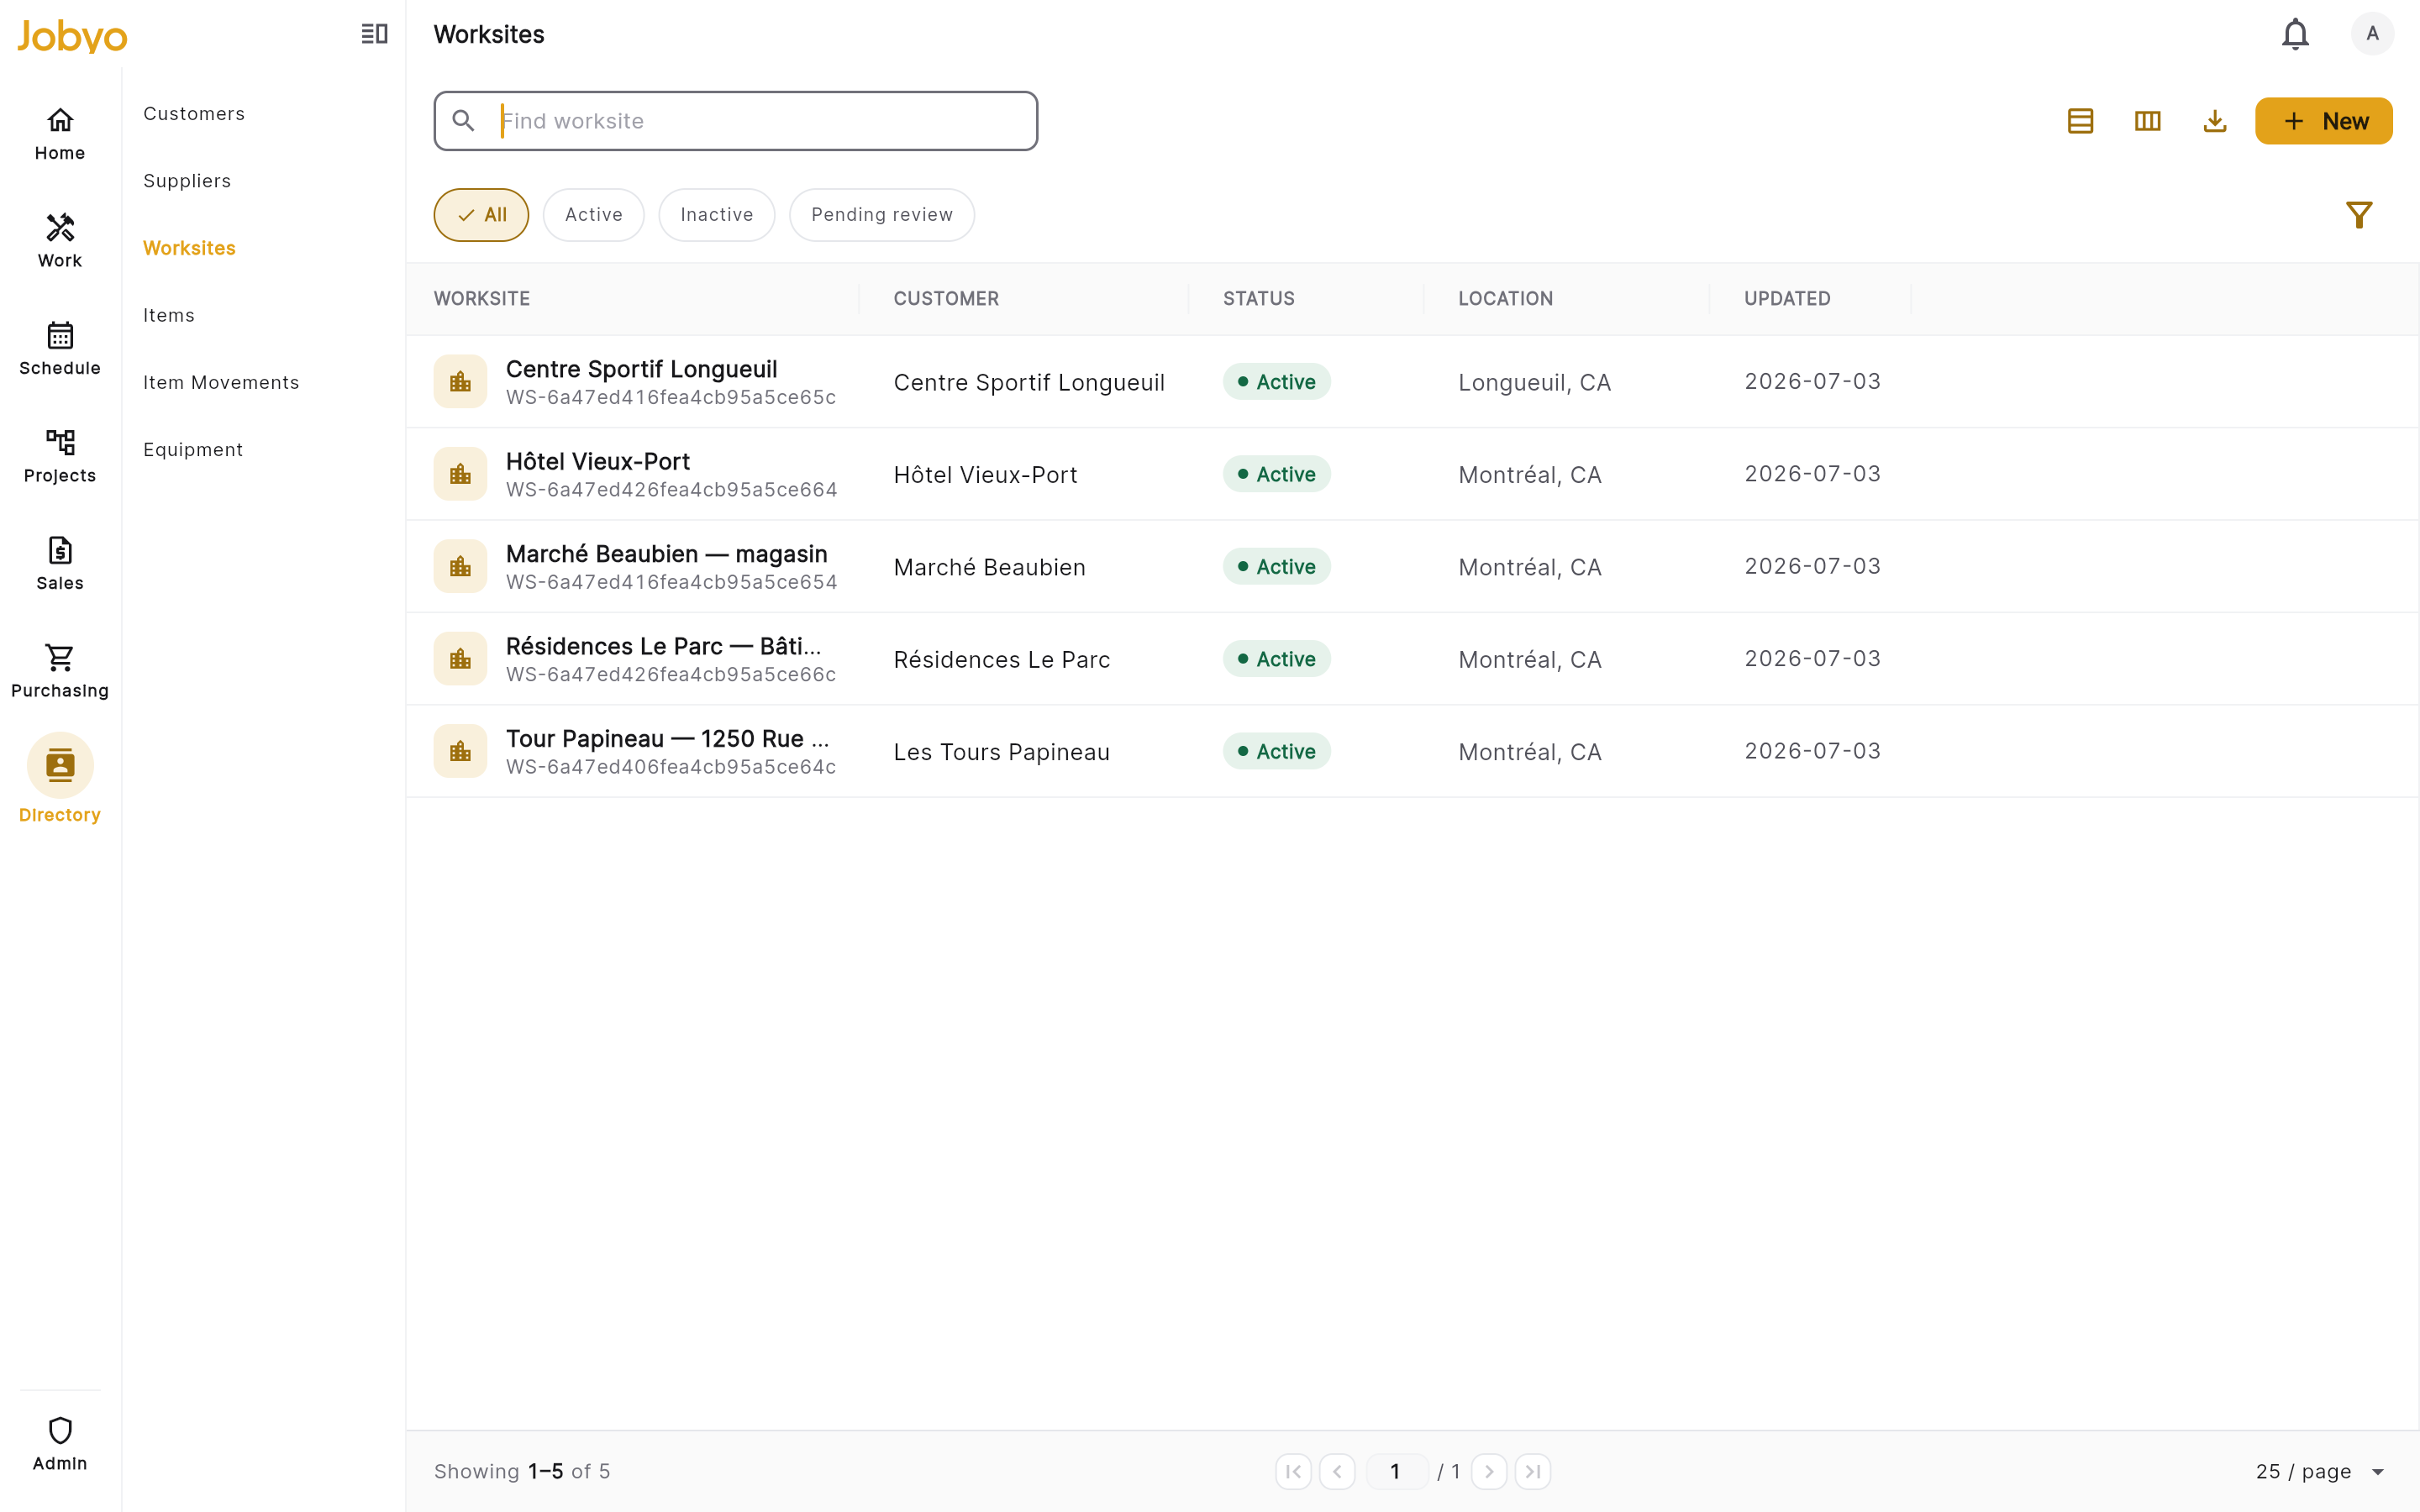
Worksite list — search box, filter row, status badges Search and filter
Search by name or address. Narrow the list by customer, status (Active · Inactive · Pending Review), or geography (city, region, country). The list updates as you adjust filters.
Open a site
Select any row to open the worksite detail — its Details, Locations, and Equipment tabs.
Open a worksite and see its details
The detail screen has three tabs:
- Details — site name, customer, service address, primary and secondary contacts, and access/safety instructions. A side rail shows the status badge and lifecycle, the scan code (with a QR dialog), and audit history.
- Locations — the hierarchical location tree. See Build the location tree.
- Equipment — the equipment installed at this site, grouped by location. See Equipment installed at a site.
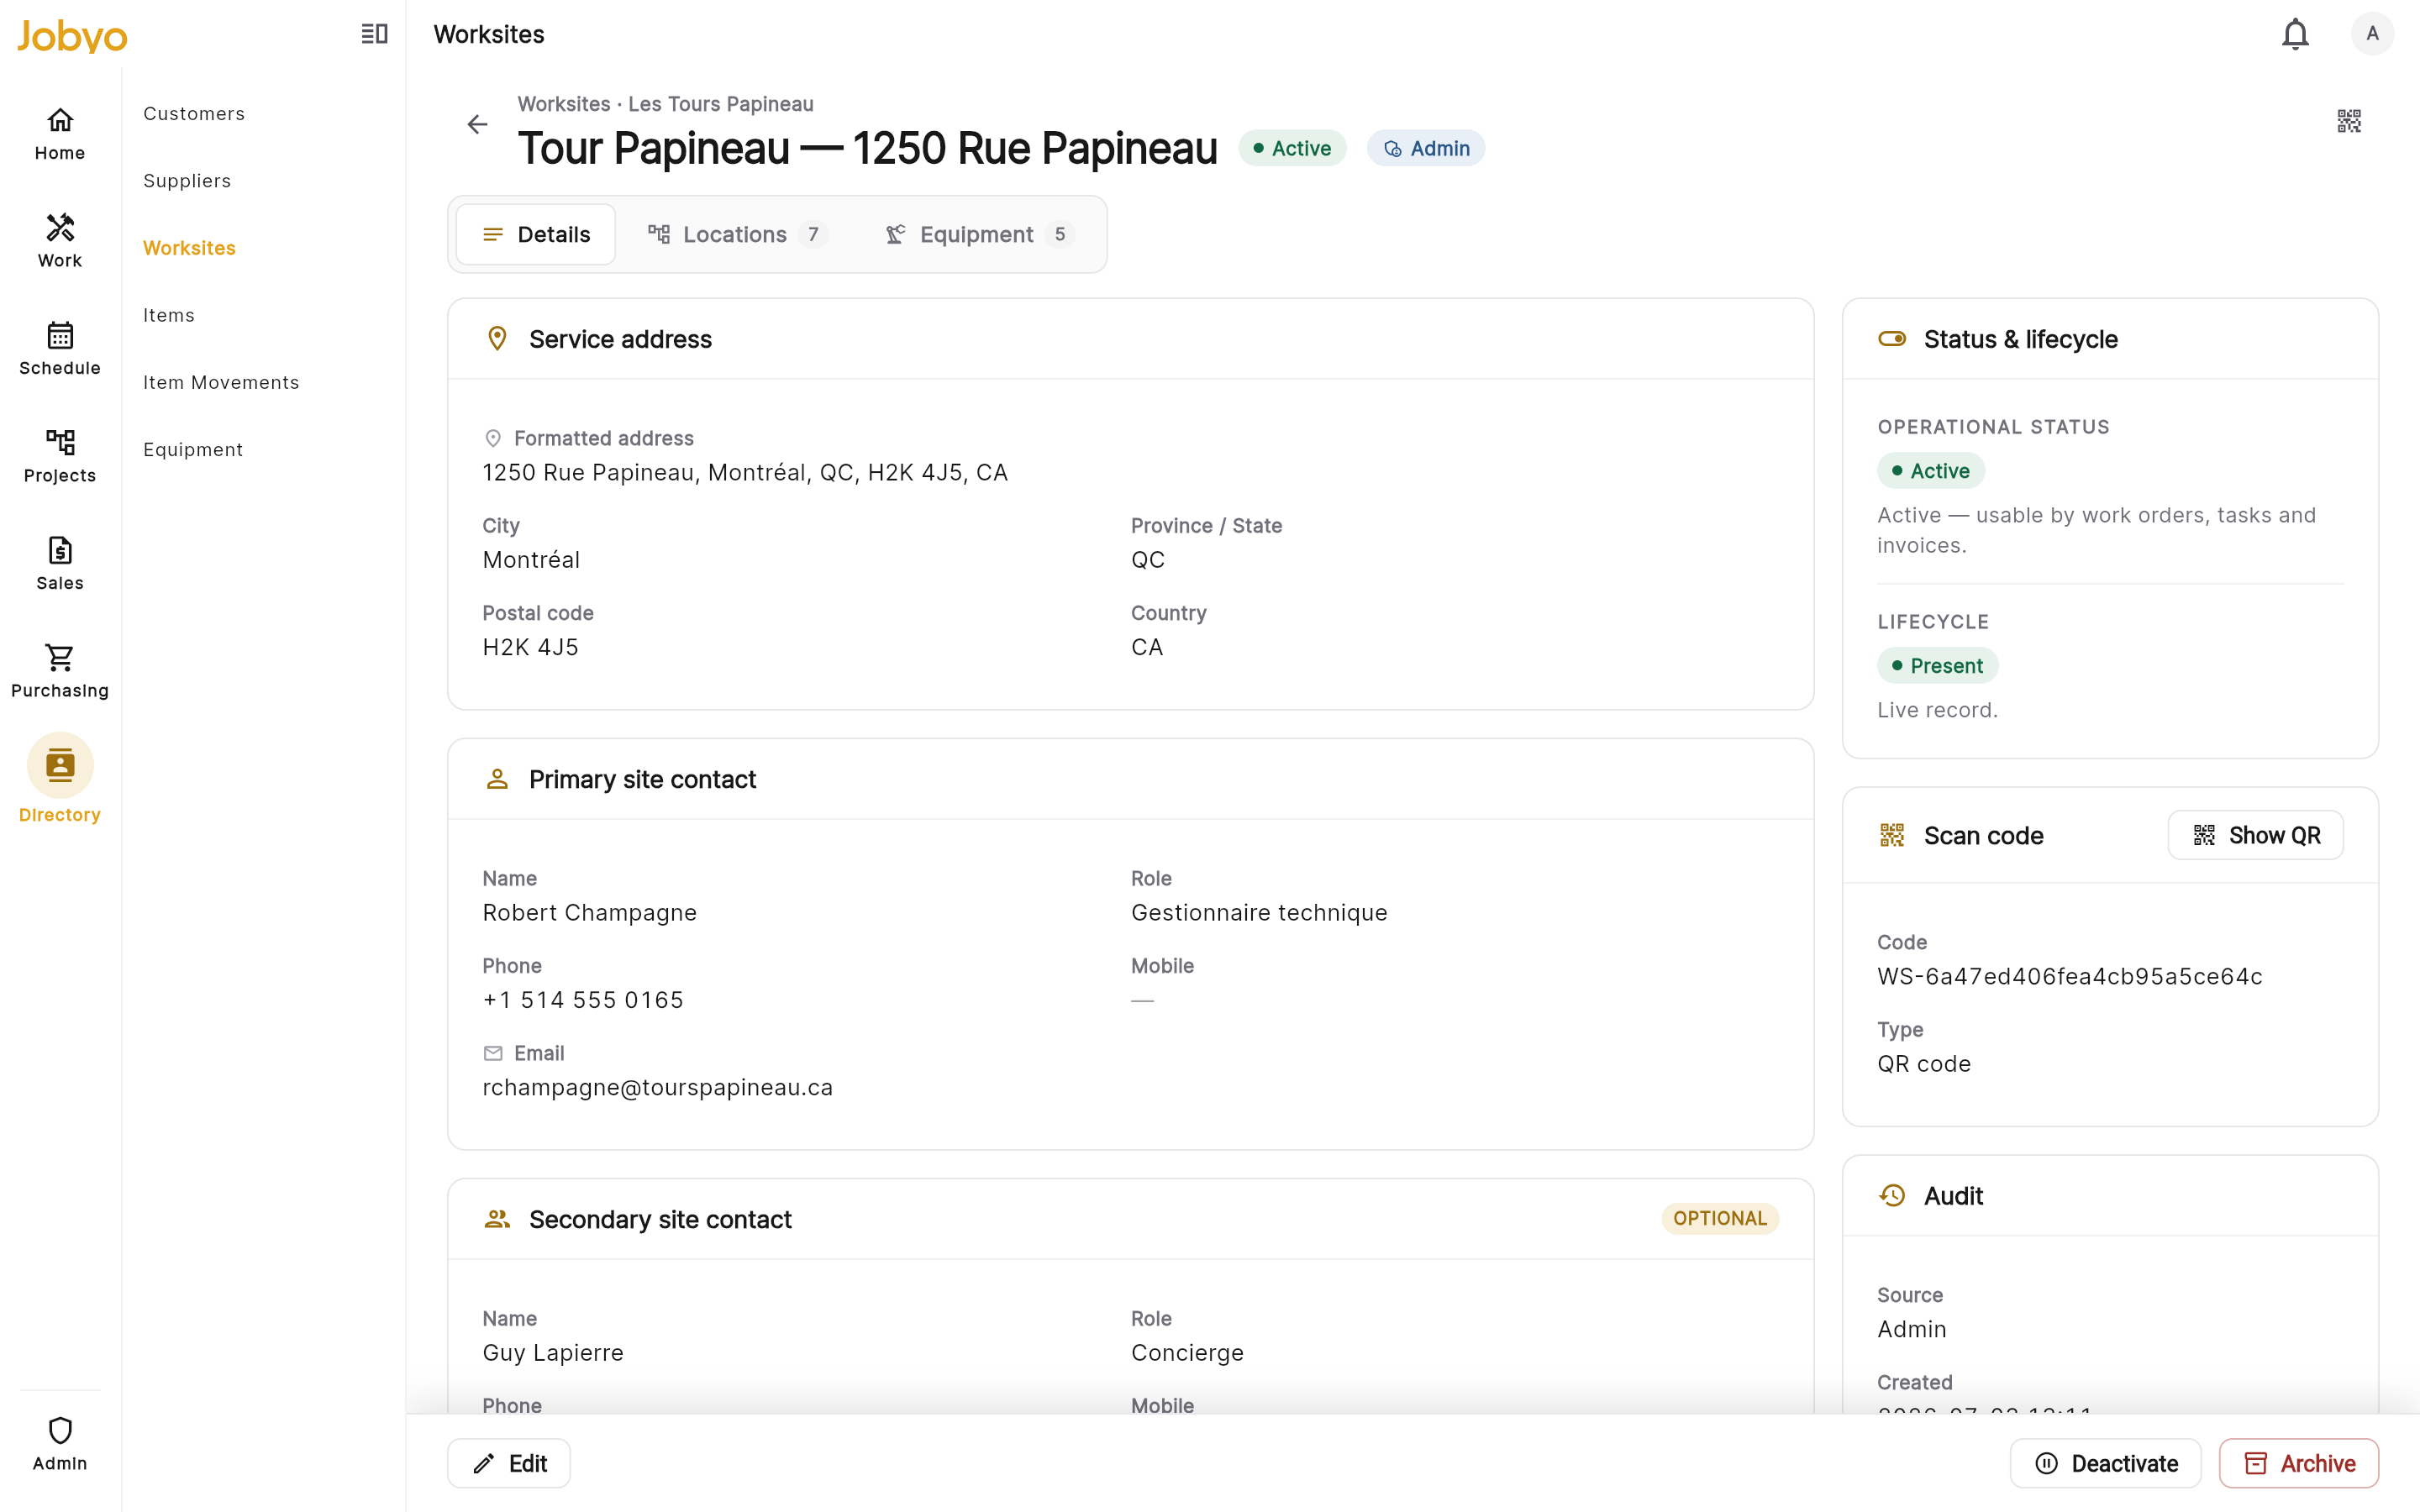
The action bar shows only the lifecycle actions your role and the site's current status allow — Edit, Approve/Reject, Deactivate/Reactivate, or Archive.
Create a worksite (back office)
Open the New worksite form
From the worksite list, select New worksite. If you don't see the button, your role doesn't include create — ask an administrator.
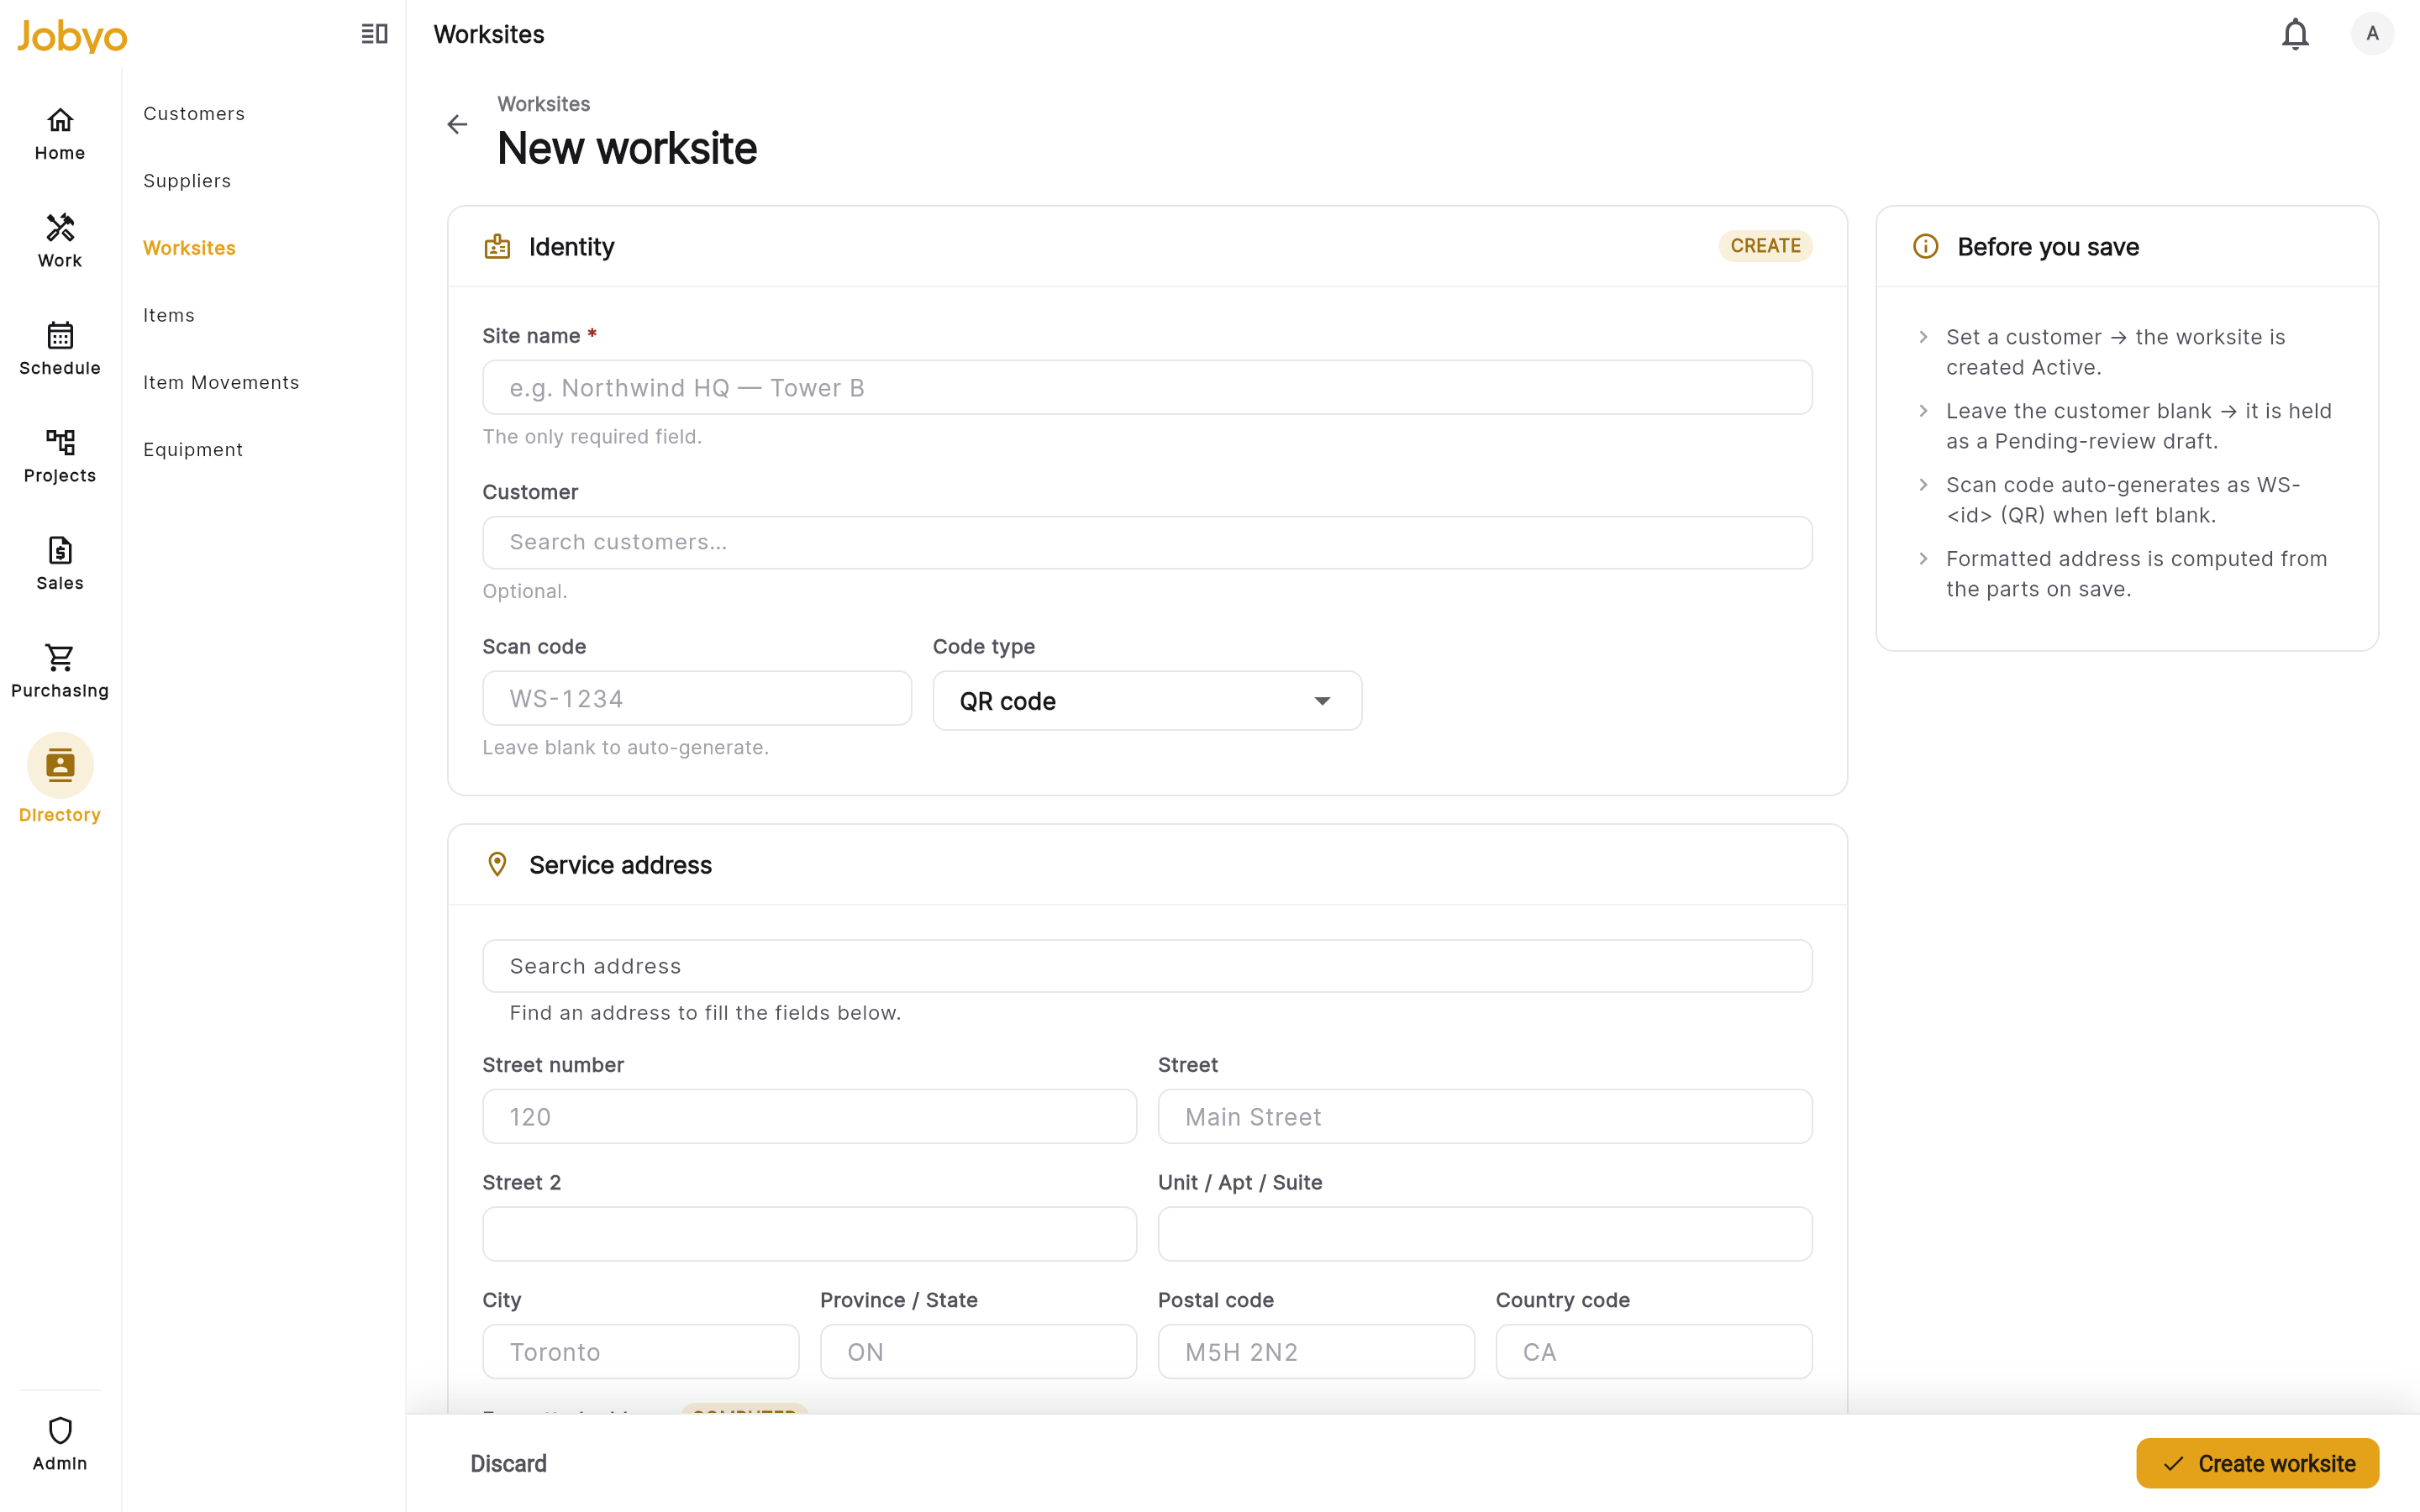
Create form — Site name required, customer and address sections Name the site and choose a customer
Site name is the only required field (for example, "Elm Street Office — North Tower"). Choose the customer who owns the site. You can leave the customer blank for now, but the site will be held as a draft until one is attached.
Customer is attach-onceOnce you save a customer to a site, it can't be changed — not even by an admin. If the wrong customer is attached, the site has to be archived and recreated. Double-check before saving.
Add the address, contacts, and access details
Fill in the service address (street, unit, city, province, postal code, country), the primary and secondary site contacts (name, role, phone, mobile, email), and the access and safety block — gate/buzzer/lockbox codes, parking and loading notes, site hours, on-site contacts, hazards and required PPE, and Wi-Fi credentials. All of this is optional and can be added later.
Set the scan code (optional)
Leave the code blank to have Jobyo generate a QR code automatically, or enter your own code and choose QR or barcode. A code you supply must be unique within the customer.
Save
Select Save. If you attached a customer, the site is created Active and is ready for work orders and tasks. If you left the customer blank, it's created Pending Review and must be approved before it can be used on new work.
Jobyo builds the single-line formatted address from the parts you enter. Fill in the street, city, province, postal code, and country, and the formatted version is generated for you.
Quick-create from another form
When you're filling in a work order, task, or contract and the site doesn't exist yet, start typing in the worksite picker; if there's no match, choose Create new worksite. A side panel opens over your current form — enter the name and address, save, and the new site is selected on the form immediately. You don't lose any work on the original form.
Edit a worksite
Open the detail and select Edit. The address and contact blocks update piece-by-piece: change one field and the rest of that group is kept — you only fill in what's changing, and leaving a field blank doesn't clear it.
Changing a site's address or GPS coordinates does not update work orders, attendance records, or cost entries that already referenced the old address — those keep a snapshot of the address as it was when they were created. Only future records use the new address.
Show a site's QR code
On the Details tab, find the Scan code section in the side rail and open the QR dialog. The code (for example, WS-64e3f0…) is shown large enough to print, display, or share so technicians can scan it on arrival. If the site uses a barcode instead of a QR code, that's shown instead.
Build the location tree
Inside a worksite you can map its internal layout so work and costs can be pinpointed to a specific area.
Open the Locations tab
On the worksite detail, go to Locations.
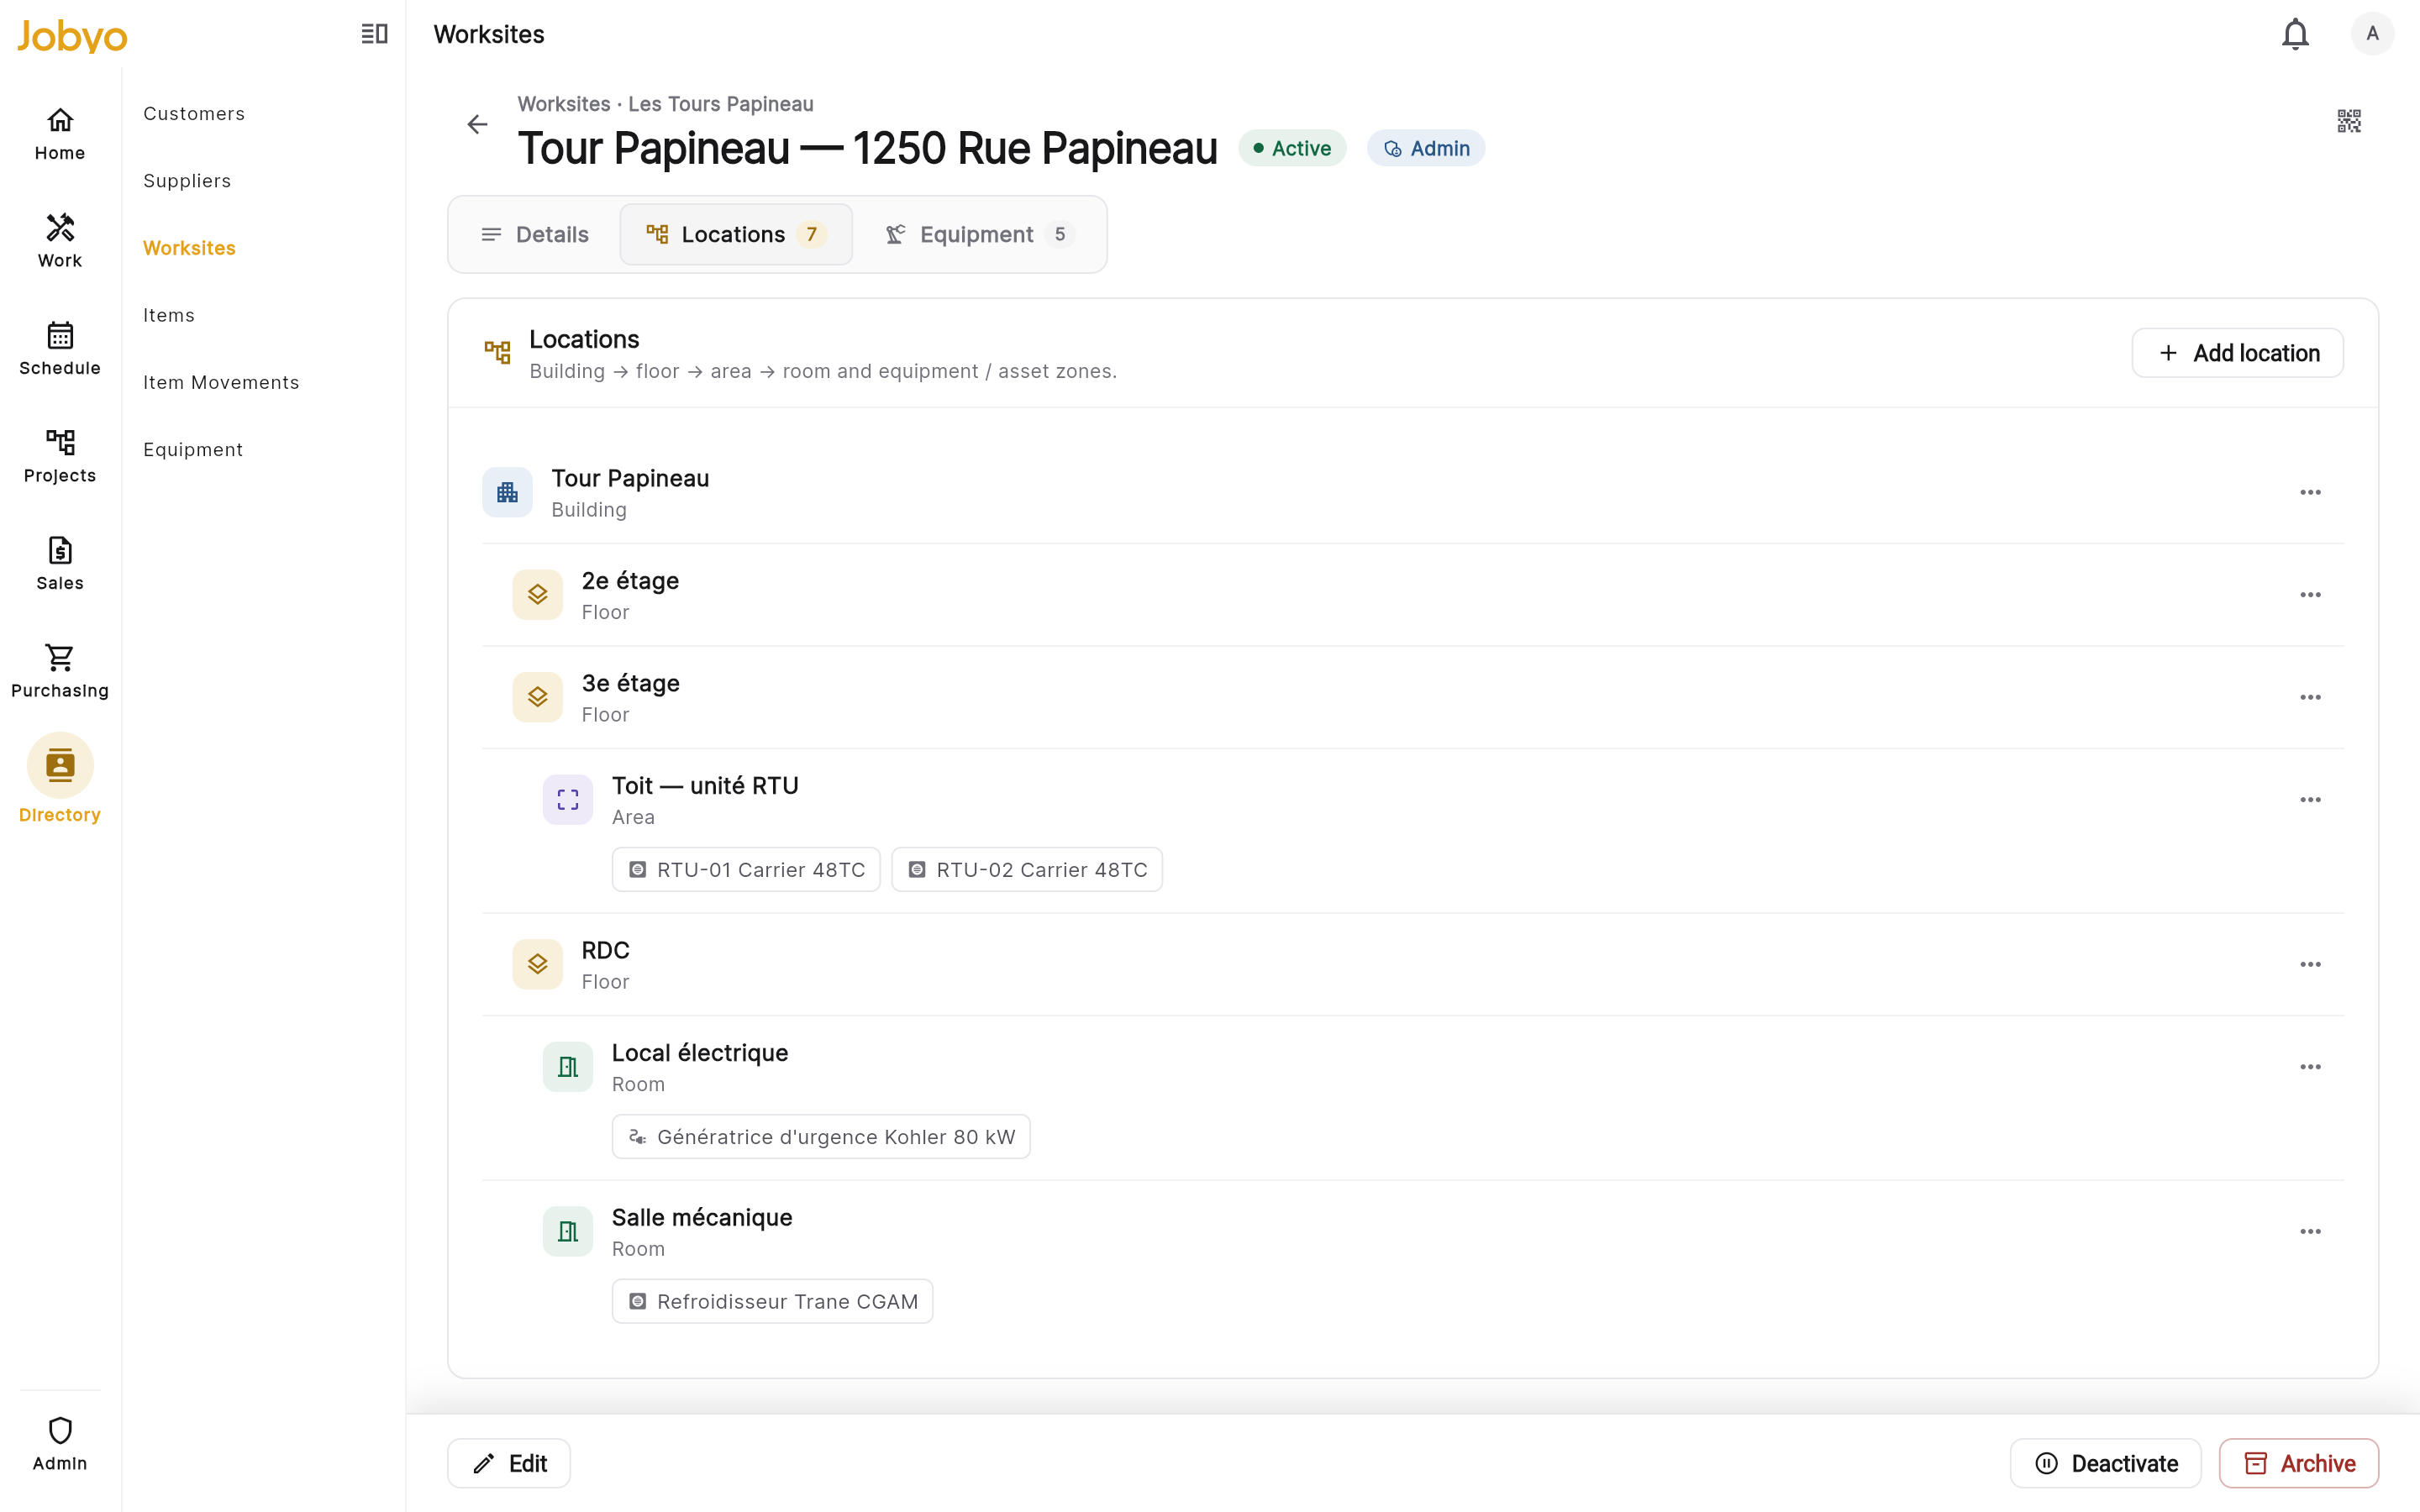
Locations tab — building → floor → room tree Add a node
Use Add location for a top-level node (like a building), or the + next to an existing node to add a child (like a floor under a building).
Fill in the node
Give it a name (required — e.g. "Building A", "Level 3", "Server Room") and a type: Building, Floor, Area, Room, Equipment zone, Asset zone, Zone, or Other. Optionally add a short code and access instructions with an access mode:
- Inherit — use the site-level access instructions as-is (default).
- Append — show the site-level instructions plus these extra ones.
- Override — replace the site-level instructions with these for this location.
Save
The node appears under its parent. Its full path (for example, "Building A > Level 3 > Server Room") is shown when you open it.
A node's worksite is set at creation and can't be moved to another site later. A node's parent must belong to the same worksite, and you can't create a circular path (making a room the parent of its own building) — the app blocks it.
To edit a node, open it from the tree and select Edit. To delete one, open it and choose Delete. Deletion is blocked while open work orders reference the node, and child nodes aren't removed automatically — clear the children first. Deleting a node is permanent in this release; there's no restore.
Bulk-add a repeating structure
For a site with a repeating layout — a residential tower where every floor has the same apartments, a hotel with identical floor plans — describe the structure once instead of adding each room by hand.
Open Bulk add
On the Locations tab, select Bulk add next to Add location.

Bulk add — level and room-kind rows with the Structure preview panel Start from a template (optional)
Tap a starting template — Residential tower, Office building, Hotel, or Warehouse — to pre-fill a typical structure, then edit it to match your site.
Define your levels
Build the vertical chain (for example Building → Floor → Apartment). Each level has a name pattern and a count, and the count is per parent instance — 3 floors under 1 building, then 4 apartments under each floor, makes 12 apartments total.
Define your room kinds
Add the leaf locations at the bottom of each branch (Room, WC, Kitchen), each with its own name pattern and a count per parent.
Use name-pattern tokens for unique names
A pattern like
Floor {n}numbers floors 1, 2, 3…;Apt {#floor}{n:02}combines the floor number with a zero-padded apartment number (Apt 101, 102, 201, 202…). Curly braces are reserved for these tokens.Check the preview and create
The Structure preview panel shows the full tree with sample names before you commit. When it looks right, select Create (or Apply when adding to an existing worksite).
- Create is disabledEvery level and room kind needs a name pattern and a count of at least 1.
- "Structure too large"Reduce your counts — there's an upper limit per transaction. Split a very large structure across two bulk-add runs.
- A name pattern is highlighted in redA literal "{" was used outside a token. Curly braces are reserved for name-pattern tokens.
Add equipment while bulk-adding
On any room-kind row inside the bulk-add form, select Add equipment to specify that every instance of that room kind should contain certain equipment (every apartment gets a fan coil unit and a thermostat, for example). Fill in a name, a discipline type (HVAC, Electrical, Plumbing, …), and a count per room. Jobyo creates one equipment record per room per equipment row — 12 apartments × 2 equipment rows creates 24 equipment records.
To link a row to a standard type instead of typing freeform, select the catalog picker on that row. The catalog opens grouped by category, combining the shared library with your company's own custom types — search or browse, then select a type. The equipment name and discipline fill in from the catalog entry, and discipline becomes read-only (select the catalog picker again and choose None to unlink and edit freely).
Both actions need the worksite-edit and location-node-create permissions together. Field-scope users don't get them.
Duplicate a location and everything inside it
Once one location is built out exactly right — a floor with all its rooms and equipment — replicate it instead of rebuilding it. On the Locations tab, open the row menu (⋯) on that location and select Duplicate. Give the copies a new name (defaults to the original name plus "(copy)") and a number of copies (1–100), then confirm.
The copies land as siblings of the original, each with the full subtree — every child location and every piece of equipment — cloned and independent of the original and of each other. A catalog-linked equipment item keeps its catalog link in the copies.
- Duplicate is missing from the row menuYou need both the worksite-edit and location-node-create permissions.
- "Structure too large"The subtree size times your copy count exceeds the per-transaction limit. Try fewer copies at a time.
Equipment installed at a site
The Equipment tab is a scoped view of the separate Equipment module — equipment records themselves are created and managed there, not on the worksite.
- See what's installed — open the Equipment tab. Equipment is grouped by location node; expand a node to see what's placed there, and select a card to open the full record in a side panel. An empty tab means no equipment has been registered for this site yet.
- Place equipment at a node — on the Locations tab, use the + affordance next to a node to open the equipment form in a side panel and link a piece of equipment to that exact location. This uses equipment permission.
For technicians: scan and quick-add
Scan a QR code or barcode
In the worksite picker (inside a work order, task, or the Worksites list), tap the Scan icon and point your camera at the code on the site or location sign. Jobyo resolves it automatically to either a worksite (the full site opens) or a location zone (the specific zone opens, with its parent site filled in alongside). Only active sites and locations resolve — draft sites that haven't been approved can't be scanned open.
Quick-add a site from a job
If the address you need isn't in the picker, tap Add new worksite and enter the name and address. The site is saved as a draft (Pending Review) and your work order or task is linked to it right away, so your job isn't interrupted. An admin approves the site before it can be used on future work.
Leave the customer blankA field quick-add doesn't need a customer — an admin attaches one when they approve the draft. You must be inside an open work order or task to quick-add; the form won't submit without that context.
For admins: lifecycle, approvals, and archiving
A worksite moves through a lifecycle. Approvals and archiving are admin-gated.
- Approve a draft — open a Pending Review site (filter the list by status to find them), make sure a customer is attached (edit to add one if not), then select Approve. The site becomes Active. Approving without a customer is blocked.
- Reject a draft — select Reject on a Pending Review site to move it to Inactive. The work order or task it was created from keeps its reference.
- Approve or reject a location node — on the Locations tab, use Approve / Reject next to a node that a technician added from the field.
- Deactivate — select Deactivate on an active site to move it to Inactive when it's temporarily out of service. It stops appearing as an option on new work, but all history is kept.
- Reactivate — select Reactivate on an inactive site to return it to Active. The site must have a customer attached.
- Archive — select Archive to remove a site from the active directory. History still references it for reporting.
There's no restore for an archived worksite or a deleted location node in the current version. If you might need the site again, Deactivate instead — that's reversible. Archiving is also blocked while open work orders reference the site: close or cancel those first.
Worksite states at a glance
| Situation | Status | How it gets there |
|---|---|---|
| Created by admin with a customer | Active | Live immediately |
| Created without a customer, or by a field tech | Pending Review | Draft — needs a customer + approval |
| Draft approved | Active | Approve (customer required) |
| Draft rejected | Inactive | Reject |
| Active site paused | Inactive | Deactivate |
| Inactive site resumed | Active | Reactivate (customer required) |
| Retired | Archived | Archive — terminal, no restore |
How worksites connect to the rest of Jobyo
- Work orders and tasks reference a worksite (and optionally a location node inside it) to say where the job is.
- Attendance records whether a check-in is within the expected radius of the site's GPS coordinates; past check-ins keep the location policy in effect at the time.
- Sale invoices and standard work orders need an active site — a Pending Review draft can't be billed against.
- Contracts / SLAs reference worksites through the same directory.
- Equipment lives in the Equipment module; the worksite Equipment tab is a scoped view of it.
If it doesn't work
- "Site name is required"The Site name field is blank. Enter a name and save again.
- Site saved as Pending Review, not ActiveThe customer field was left blank. A site without a customer is always held as a draft — attach a customer, then approve it.
- "A customer is required" on approve or reactivateThe site has no customer attached. Edit the site, select a customer, save, then approve or reactivate.
- Can't change the customerCustomer is attach-once. If the wrong one is set, archive the site and create a new one.
- "This site has open work orders" on archiveClose or cancel every open work order linked to the site, then archive.
- Location delete is blockedThe node has open work orders or child nodes. Close the work orders and remove the children first, then delete.
- Field quick-add won't submitYou must be inside an open work order or task. This form only works in that context.
- Scan finds "no match"The code isn't in the system, is damaged, or points to a draft site that hasn't been approved. Only active sites and locations resolve by scan.